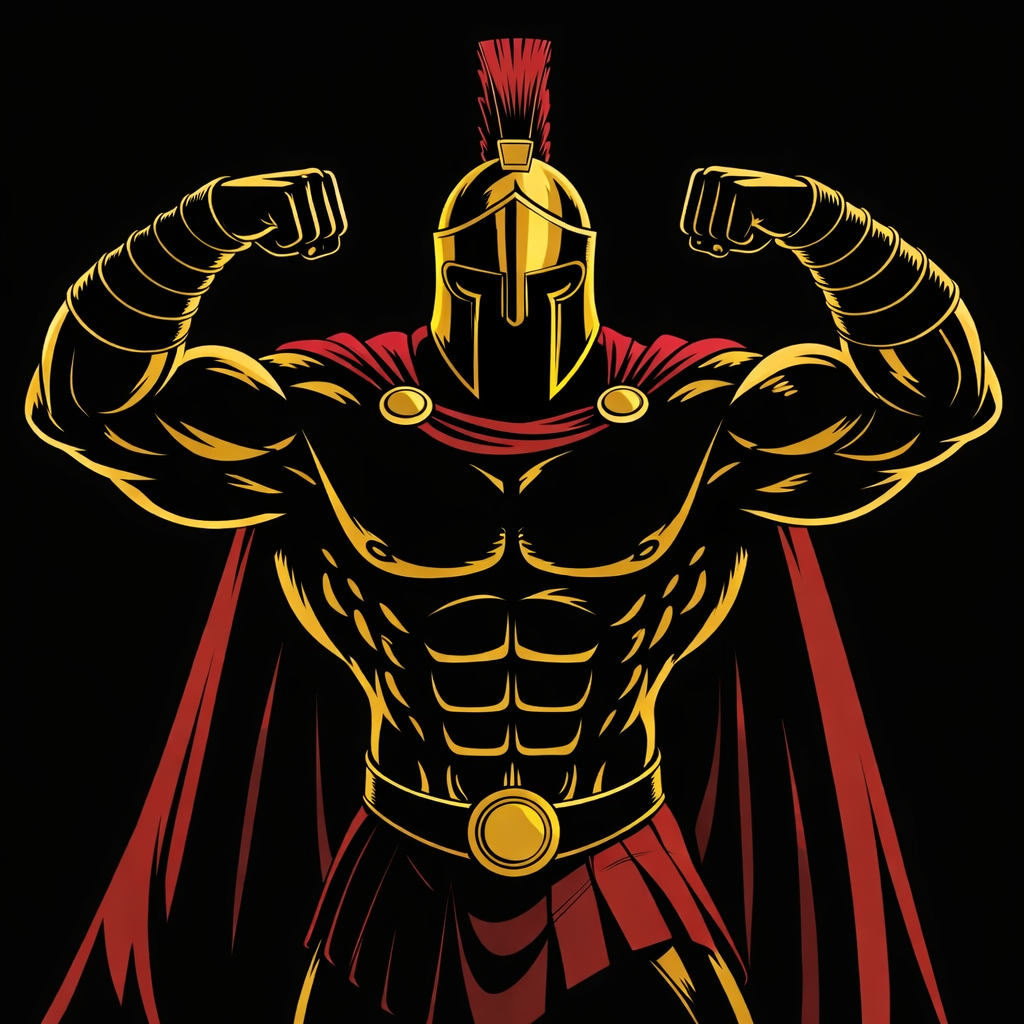
How to Do a Human Flag Correctly: Step-by-Step Guide for Beginners

Learn how to do a human flag with perfect form, avoid common mistakes, and discover the best progressions to build elite upper-body strength and body control.

The human flag is one of the most impressive calisthenics skills, requiring tremendous shoulder strength, core stability, grip power, and full-body tension. Whether you are training for calisthenics, gymnastics, or advanced athletic performance, mastering the human flag is a major achievement.


What Is a Human Flag?

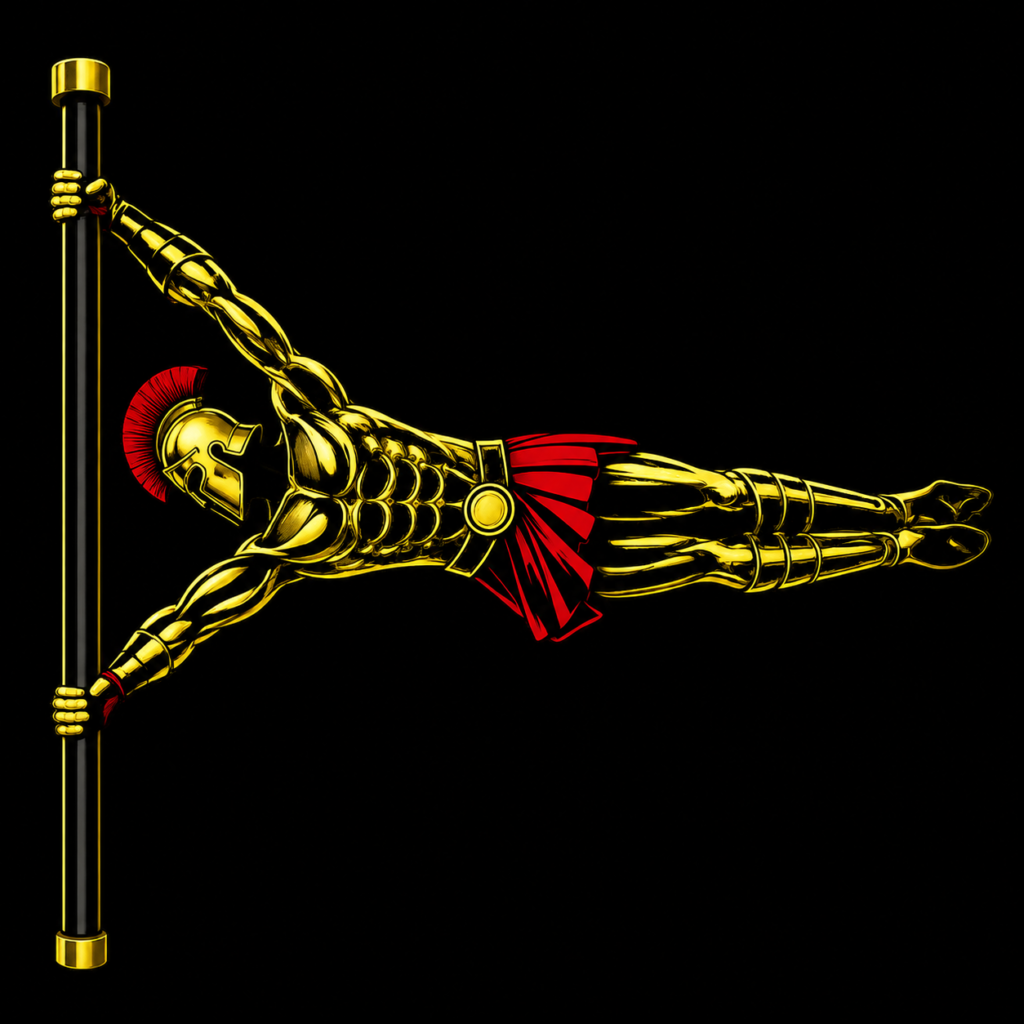
A human flag is an advanced bodyweight exercise where you hold your body horizontally while gripping a vertical pole or stable structure.

This movement demands extreme lateral core strength, shoulder stability, and total-body control.

The human flag is commonly used in:

  • Advanced calisthenics training
  • Gymnastics conditioning
  • Static hold skill development
  • Bodyweight performance training

Unlike traditional gym exercises, the human flag develops elite relative strength and balance.

Benefits of Human Flag Training

Human flag training is one of the best methods for building advanced bodyweight strength.

Benefits include:

  • Builds elite core strength
  • Develops powerful shoulders and grip
  • Improves body control and balance
  • Enhances straight-arm stability
  • Strengthens obliques and lateral core muscles
  • Unlocks advanced calisthenics performance

Few exercises demonstrate total-body control as effectively as the human flag.

Muscles Worked in Human Flag

The human flag activates multiple upper-body and core muscles simultaneously.

Primary Muscles
  • Obliques
  • Shoulders (Deltoids)
  • Latissimus Dorsi (Lats)
Secondary Muscles
  • Core Muscles
  • Trapezius
  • Forearms and Grip Muscles
  • Chest (Pectorals)
  • Glutes and Hip Muscles

This makes the human flag one of the most demanding static holds in calisthenics.


How to Do a Human Flag (Step-by-Step)

Step 1: Grip the Pole Properly

Grab a sturdy vertical pole with both hands.

  • The top hand pulls inward
  • Bottom hand pushes away
  • Arms shoulder-width apart or wider

Tip: Use a stable pole with good grip support.

Step 2: Engage Your Upper Body

Activate your shoulders, lats, and arms before lifting.

  • Lock elbows firmly
  • Keep shoulders stable
  • Tighten your grip

Step 3: Lift Your Legs Off the Ground

Kick or raise your legs upward carefully.

  • Keep your body tight
  • Engage your core fully

Step 4: Straighten Your Body

Extend your legs and align your body horizontally.

  • Squeeze glutes
  • Point toes
  • Maintain straight body positioning
Warrior showcasing How to do a Human Flag with proper form

Step 5: Hold the Position

Maintain the human flag:

  • Push hard with the top arm
  • Pull strongly with the bottom arm
  • Keep core fully engaged

Lower yourself slowly with control.


Human Flag Form Checklist

Use this checklist to ensure proper form:

  • Keep arms locked
  • Engage your entire core
  • Maintain straight body alignment
  • Push and pull actively with both arms
  • Keep full-body tension throughout

Perfect form builds strength safely and efficiently.


Common Human Flag Mistakes

Bent Arms

Problem: Reduces stability and strength transfer.

Fix: Keep elbows locked throughout the hold.

Sagging Hips

Problem: Breaks body alignment.

Fix: Tighten your core and glutes fully.

Weak Shoulder Engagement

Problem: Causes instability.

Fix: Actively push and pull through the shoulders.

Using Excessive Momentum

Problem: Reduces control and skill development.

Fix: Focus on controlled entries and holds.

Poor Grip Positioning

Problem: Makes balancing difficult.

Fix: Use a strong push-pull hand setup.


Human Flag Progressions and Variations

The full human flag is extremely advanced. These progressions help build strength safely.

Vertical Flag Hold

The best beginner progression.

How to Do Vertical Flag Hold

  • Keep your body angled upward
  • Maintain strong arm positioning
  • Hold with control

Tucked Human Flag

Reduces leverage difficulty.

How to Do Tucked Human Flag

  • Pull knees toward your chest
  • Keep arms locked
  • Hold the position steadily

Straddle Human Flag

Improves balance while reducing resistance.

How to Do Straddle Human Flag

  • Spread legs apart
  • Maintain body alignment
  • Engage your core fully

Human Flag Negatives

Builds strength through controlled lowering.

How to Do Human Flag Negatives

  • Start near the top position
  • Lower slowly with control
  • Maintain tension throughout

Full Human Flag

The ultimate progression.

How to Do Full Human Flag

  • Keep legs fully straight together
  • Hold the body parallel to the ground
  • Maintain complete body tension

Final Thoughts

The human flag is one of the most elite calisthenics skills you can master.

It builds:

  • Elite core strength
  • Shoulder and grip power
  • Straight-arm stability
  • Body control and coordination
  • Mental discipline

Progress may take months or even years, depending on your consistency and strength level. However, every progression builds tremendous athletic ability and total-body control. Learn more about Calisthenics Skills here.

Focus on patience, tension, and clean progressions.

A warrior holds himself against gravity through discipline — not shortcuts.


Human Flag FAQ

Q1: Is the human flag difficult to learn?
Yes, the human flag is an advanced calisthenics skill requiring exceptional core and shoulder strength.

Q2: Should beginners start with the full human flag?
No, beginners should start with vertical holds, tucked progressions, and negatives.

Q3: How often should I train human flag progressions?
You can train human flag progressions 2–5 times per week, depending on recovery and shoulder health.
    How to Do Front Lever and Back Lever Correctly: Step-by-Step Guide for Beginners

    Learn how to do front lever and back lever with perfect form, avoid common mistakes, and discover the best progressions to build elite bodyweight strength and control.

    The front lever and back lever are two of the most advanced calisthenics static holds, requiring tremendous pulling strength, core stability, shoulder control, and total-body tension. Whether you are training for calisthenics, gymnastics, or elite athletic performance, mastering these skills is a major achievement.


    What Are Front Levers and Back Levers?

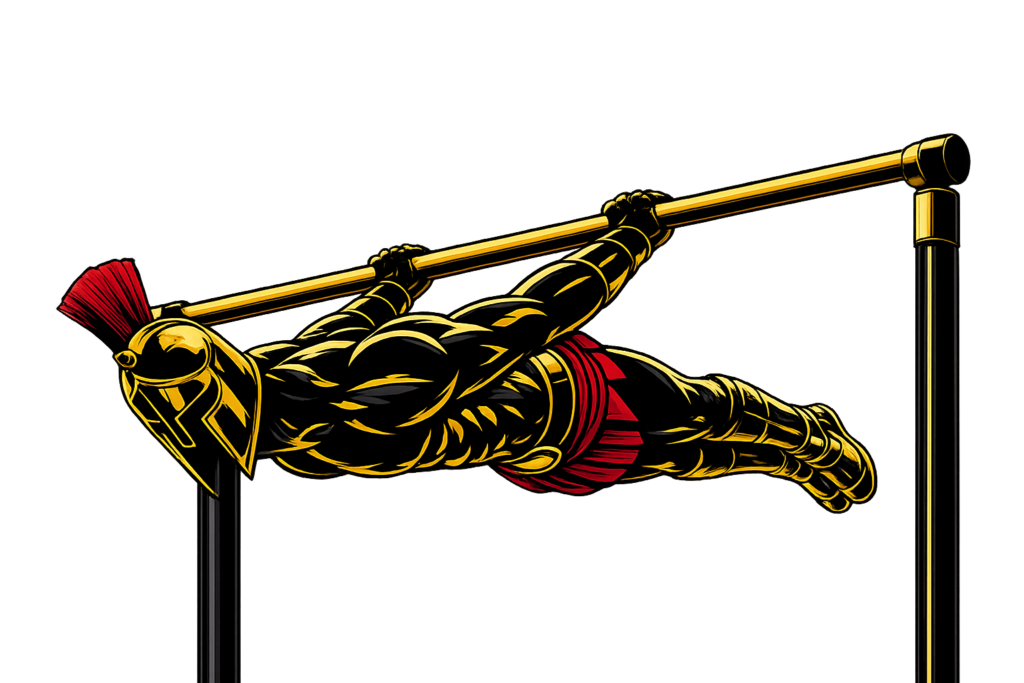
    A front lever is a static hold where your body remains parallel to the ground while hanging underneath a bar.

    A back lever is a similar static hold performed while your body faces downward with the bar positioned behind you.

    Both exercises demand full-body control and advanced straight-arm strength.

    Levers are commonly used in:

    • Advanced calisthenics training
    • Gymnastics strength programs
    • Static hold skill development
    • Bodyweight performance training

    Unlike traditional gym exercises, levers develop elite relative strength and body control.

    Benefits of Front and Back Lever Training

    Lever training is one of the most effective ways to build advanced bodyweight strength.

    Benefits include:

    • Builds elite pulling strength
    • Develops exceptional core stability
    • Improves shoulder and scapular control
    • Enhances grip and forearm strength
    • Increases body awareness and coordination
    • Unlocks advanced calisthenics performance

    Few exercises demonstrate upper-body mastery as effectively as levers.

    Muscles Worked in Front and Back Levers

    Levers activate multiple upper-body and core muscles simultaneously.

    Primary Muscles
    • Latissimus Dorsi (Lats)
    • Core Muscles
    • Shoulders (Deltoids)
    Secondary Muscles
    • Rhomboids
    • Trapezius
    • Forearms and Grip Muscles
    • Chest (Pectorals)
    • Glutes and Hamstrings

    This makes levers some of the most demanding bodyweight exercises in calisthenics.


    How to Do a Front Lever (Step-by-Step)

    Step 1: Hang From the Bar

    Grab the pull-up bar with a shoulder-width grip.

    • Arms fully straight
    • Core engaged
    • Shoulders active

    Tip: Start with a strong active hang.

    Step 2: Engage Full-Body Tension

    Tighten your entire body.

    • Squeeze glutes
    • Point toes forward
    • Keep the body rigid

    Step 3: Raise Your Body

    Pull your body upward while leaning backward.

    • Keep arms straight
    • Avoid bending at the hips

    Step 4: Reach Parallel Position

    Lift until your body becomes parallel to the ground.

    • Core tight
    • Legs straight
    • Shoulders depressed and stable
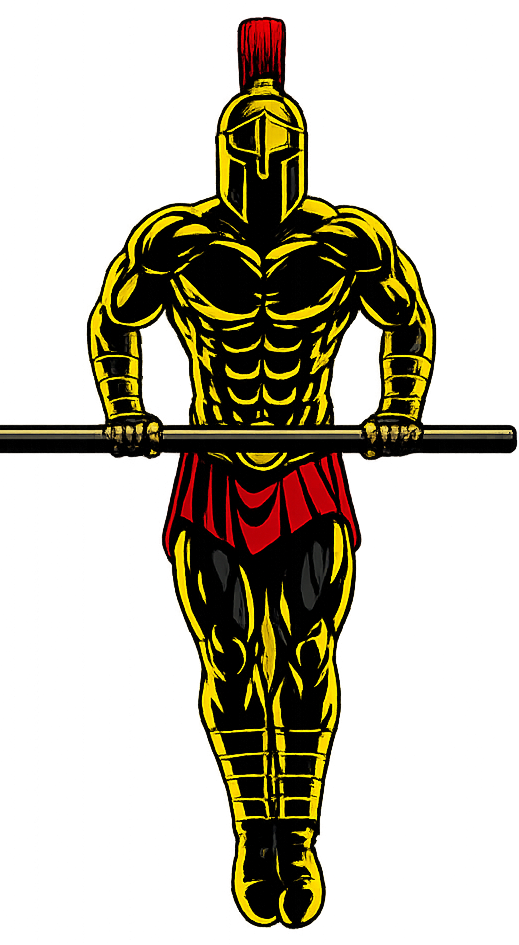
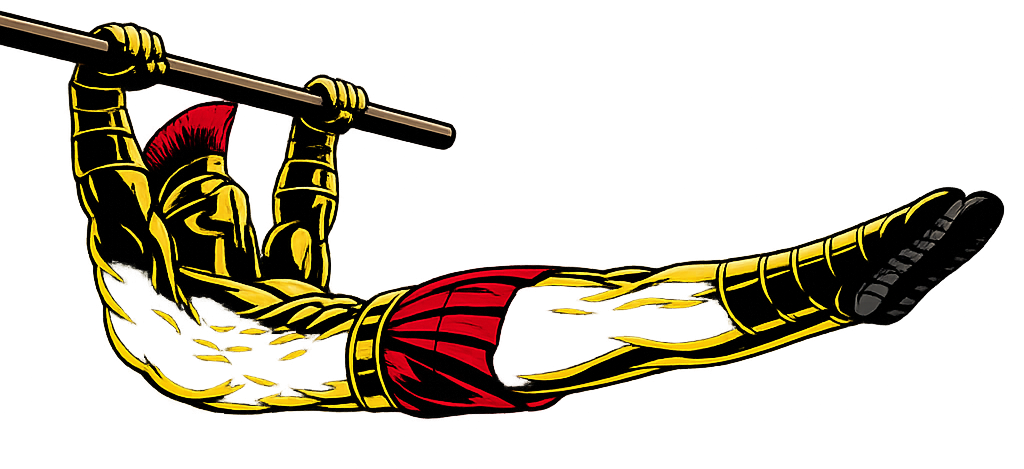
    Warrior showcasing How to do Front Lever and Back Lever with proper form

    Step 5: Hold the Position

    Maintain the front lever:

    • Keep body aligned
    • Breathe steadily
    • Stay rigid throughout

    Lower yourself slowly with control.


    How to Do a Back Lever (Step-by-Step)

    Step 1: Enter a Skin-the-Cat Position

    Use rings or a pull-up bar to rotate your body backward.

    • Arms straight
    • Shoulders mobile and controlled

    Step 2: Extend Your Body

    Straighten your legs behind you.

    • Keep core engaged
    • Maintain full-body tension

    Step 3: Lower Into Lever Position

    Slowly lower your body until it is parallel to the ground.

    • Keep arms locked
    • Maintain shoulder stability

    Step 4: Hold the Back Lever

    At the hold position:

    • Body straight
    • Toes pointed
    • Neck neutral
    Warrior showcasing How to do Front Lever and Back Lever with proper form

    Step 5: Return With Control

    Carefully exit the position.

    Avoid dropping or rushing the movement.


    Front and Back Lever Form Checklist

    Use this checklist to ensure proper form:

    • Keep arms straight
    • Engage your core fully
    • Maintain full-body tension
    • Point toes and lock legs
    • Control every phase of movement

    Perfect form builds strength safely and efficiently.


    Common Lever Mistakes

    Bent Arms

    Problem: Reduces straight-arm strength development.

    Fix: Keep elbows locked throughout the hold.

    Sagging Hips

    Problem: Breaks body alignment.

    Fix: Tighten core and glutes fully.

    Weak Shoulder Engagement

    Problem: Causes instability.

    Fix: Keep shoulders active and controlled.

    Holding Breath

    Problem: Reduces endurance and control.

    Fix: Maintain steady breathing.

    Progressing Too Quickly

    Problem: Increases injury risk.

    Fix: Master easier progressions first.


    Front and Back Lever Progressions

    These progressions help beginners safely build strength.

    Tuck Front Lever

    The best beginner front lever progression.

    How to Do Tuck Front Lever

    • Pull your knees toward your chest
    • Maintain straight arms
    • Hold with control

    Advanced Tuck Front Lever

    Builds greater lever strength.

    How to Do Advanced Tuck Front Lever

    • Open hips slightly
    • Extend the body farther
    • Maintain body tension

    Tuck Back Lever

    A beginner-friendly back lever progression.

    How to Do Tuck Back Lever

    • Tuck knees toward chest
    • Lower body carefully
    • Maintain shoulder stability

    Straddle Lever Variations

    Reduce leverage difficulty while increasing progression.

    How to Do Straddle Lever Variations

    • Spread legs apart
    • Keep the body parallel
    • Maintain full-body tension

    Full Front and Back Levers

    The ultimate progressions.

    How to Do Full Levers

    • Legs fully straight together
    • Body parallel to the ground
    • Hold with complete control

    Final Thoughts

    Front levers and back levers are among the most elite calisthenics skills you can master.

    They build:

    • Elite pulling strength
    • Straight-arm stability
    • Core control
    • Body awareness and coordination
    • Mental discipline

    Progress may take months or even years, depending on your consistency and strength level. However, every progression builds tremendous athletic ability and body control. Learn more about Calisthenics Skills here.

    Focus on patience, technique, and controlled progression.

    A warrior controls his body through strength — not momentum.


    Lever FAQ

    Q1: Are front levers harder than pull-ups?
    Yes, front levers require significantly more core strength, straight-arm control, and body tension than pull-ups.

    Q2: Are back levers dangerous for beginners?
    Back levers can stress the shoulders if mobility and strength are lacking. Beginners should progress gradually and warm up thoroughly.

    Q3: How often should I train lever progressions?
    You can train lever progressions 2–5 times per week, depending on recovery and shoulder health.
      How to Do Muscle-Ups Correctly: Step-by-Step Guide for Beginners

      Learn how to do muscle-ups with perfect form, avoid common mistakes, and discover the best progressions to build explosive upper-body strength and elite body control.

      The muscle-up is one of the most iconic calisthenics exercises, combining a powerful pull-up with a dip transition into one explosive movement. Whether you are training for calisthenics, gymnastics, or athletic performance, mastering the muscle-up is a major achievement.


      What Is a Muscle-Up?

      A muscle-up is an advanced bodyweight exercise where you pull your body above a bar or rings and transition into a straight-arm support position.

      This movement combines pulling strength, explosive power, coordination, and pushing strength.

      Muscle-ups are commonly used in:

      • Advanced calisthenics training
      • Gymnastics conditioning
      • Functional strength programs
      • Athletic performance training

      Unlike standard pull-ups, muscle-ups require explosive movement and advanced body control.

      Benefits of Muscle-Ups

      Muscle-ups are one of the most effective upper-body bodyweight exercises.

      Benefits include:

      • Builds explosive pulling strength
      • Develops pushing and dipping power
      • Improves coordination and athleticism
      • Enhances grip and forearm strength
      • Strengthens the core and shoulders
      • Unlocks advanced calisthenics performance

      Few exercises demonstrate upper-body power and control as effectively as muscle-ups.

      Muscles Worked in Muscle-Ups

      Muscle-ups activate multiple upper-body muscle groups simultaneously.

      Primary Muscles
      • Latissimus Dorsi (Lats)
      • Chest (Pectorals)
      • Triceps
      Secondary Muscles
      • Biceps
      • Shoulders (Deltoids)
      • Forearms and Grip Muscles
      • Core Muscles
      • Upper Back Muscles

      This makes muscle-ups one of the best compound bodyweight exercises for upper-body development.


      How to Do a Muscle-Up (Step-by-Step)

      Step 1: Grip the Bar

      Grab the pull-up bar using a slightly wider-than-shoulder-width grip.

      • Thumbs wrapped around the bar
      • Hands secure and tight

      Tip: A false grip can make the transition easier for beginners.

      Step 2: Start With an Active Hang

      Hang from the bar with your shoulders engaged.

      • Core tight
      • Legs controlled
      • Avoid excessive swinging

      Step 3: Pull Explosively

      Pull yourself upward with maximum power.

      • Drive elbows downward
      • Pull chest toward the bar
      • Aim to bring the bar toward your lower chest

      Step 4: Transition Over the Bar

      As your chest reaches the bar:

      • Lean your torso forward
      • Rotate your wrists over the bar
      • Move elbows above the bar quickly

      This is the most technical phase of the muscle-up.

      Step 5: Press to Lockout

      Push yourself upward until your arms are fully straight.

      • Stabilize at the top
      • Keep shoulders engaged
      • Lower yourself with control
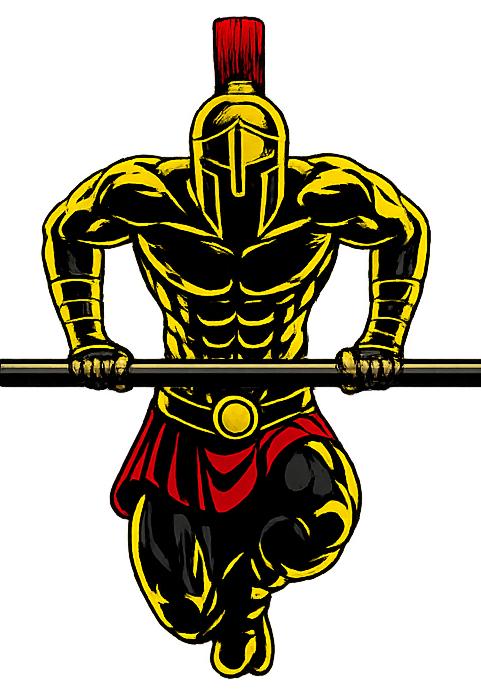
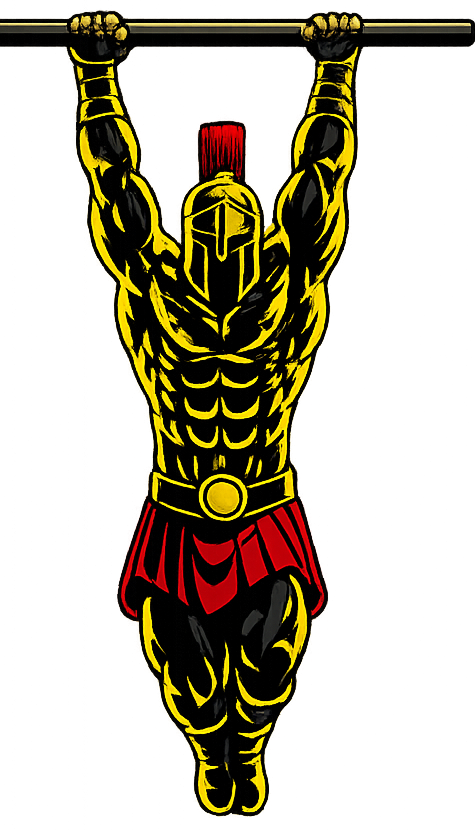
      Warrior showcasing How to do Muscle-Ups(Starting)

      Muscle-Up Form Checklist

      Use this checklist to ensure proper form:

      • Use explosive pulling power
      • Keep your core engaged
      • Transition quickly over the bar
      • Maintain strong grip control
      • Lower yourself with control

      Perfect form builds strength safely and efficiently.


      Common Muscle-Up Mistakes

      Weak Pulling Strength

      Problem: Prevents reaching the transition phase.

      Fix: Build explosive pull-up strength first.

      Pulling Too Vertically

      Problem: Makes transition difficult.

      Fix: Pull the bar toward your chest, not just upward.

      Slow Transition

      Problem: Causes failure at the midpoint.

      Fix: Practice fast wrist and elbow turnover.

      Excessive Swinging

      Problem: Reduces control and efficiency.

      Fix: Maintain tight body positioning.

      Weak Dip Lockout

      Problem: Prevents finishing the movement.

      Fix: Strengthen bar dips and triceps.


      Muscle-Up Progressions and Variations

      The muscle-up requires multiple strength components. These progressions help beginners develop safely.

      Explosive Pull-Ups

      Builds upward pulling power.

      How to Do Explosive Pull-Ups

      • Pull upward as powerfully as possible
      • Aim the chest toward the bar
      • Lower with control

      Chest-to-Bar Pull-Ups

      Improves transition positioning.

      How to Do Chest-to-Bar Pull-Ups

      • Pull until your chest touches the bar
      • Keep elbows driving backward
      • Maintain strict form

      Straight Bar Dips

      Builds lockout strength.

      How to Do Straight Bar Dips

      • Support yourself above the bar
      • Lower under control
      • Press back upward fully

      Band-Assisted Muscle-Ups

      Helps beginners learn the movement pattern.

      How to Do Band-Assisted Muscle-Ups

      • Attach a resistance band to the bar
      • Perform the movement with assistance
      • Focus on the transition technique

      Ring Muscle-Ups

      An advanced variation requiring greater stability.

      How to Do Ring Muscle-Ups

      • Perform the movement on gymnastics rings
      • Maintain shoulder control
      • Stabilize throughout the transition

      Final Thoughts

      The muscle-up is one of the most elite calisthenics skills you can master.

      It builds:

      • Explosive upper-body strength
      • Pulling and pushing power
      • Grip endurance
      • Coordination and body control
      • Mental discipline

      Progress may take time because muscle-ups require both strength and technique. However, every progression builds tremendous athletic ability and functional strength. Learn more about Calisthenics Skills here.

      Focus on explosive movement and clean technique.

      A warrior rises above the bar through power and discipline.


      Muscle-Up FAQ

      Q1: How many pull-ups should I have before learning muscle-ups?
      Most people should aim for at least 10–15 strict pull-ups and strong bar dips before training muscle-ups seriously.

      Q2: Are muscle-ups harder than pull-ups?
      Yes, muscle-ups are significantly harder because they require explosive strength, coordination, and transition skill.

      Q3: How often should I train muscle-ups?
      You can train muscle-up progressions 2–4 times per week, depending on recovery and joint health.

        How to Do an L-Sit Correctly: Step-by-Step Guide for Beginners

        Learn how to do an L-sit with perfect form, avoid common mistakes, and discover the best progressions to build elite core strength and body control.

        The L-sit is one of the most effective calisthenics exercises for developing core stability, hip flexor strength, and total-body control. Whether you are training for calisthenics, gymnastics, or athletic performance, mastering the L-sit is essential.


        What Is an L-Sit?

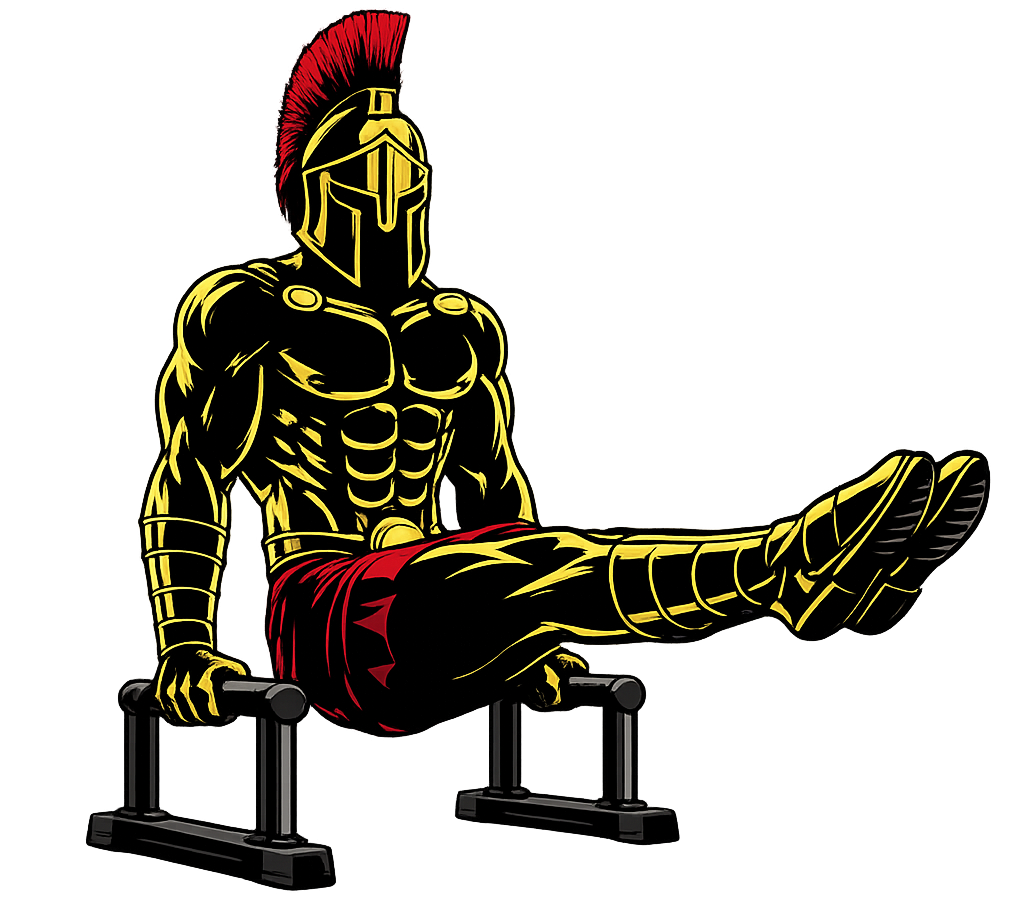
        An L-sit is a bodyweight static hold where you support yourself on your hands while keeping your legs extended straight in front of you, forming an “L” shape.

        This exercise requires strength, balance, flexibility, and full-body tension.

        The L-sit is commonly used in:

        • Calisthenics training
        • Gymnastics conditioning
        • Core strengthening workouts
        • Bodyweight skill development

        Unlike traditional ab exercises, the L-sit develops functional core strength and advanced body control.

        Benefits of L-Sits

        L-sits are one of the best exercises for building core stability and total-body tension.

        Benefits include:

        • Builds powerful core strength
        • Improves hip flexor endurance
        • Enhances shoulder stability
        • Develops body control and balance
        • Strengthens arms and wrists
        • Improves calisthenics performance

        Few exercises challenge the core as effectively as the L-sit.

        Muscles Worked in L-Sits

        The L-sit activates multiple upper-body and core muscles simultaneously.

        Primary Muscles
        • Core Muscles (Abdominals)
        • Hip Flexors
        Secondary Muscles
        • Shoulders (Deltoids)
        • Triceps
        • Quadriceps
        • Forearms and Wrists
        • Chest (Pectorals)

        This makes the L-sit one of the most effective full-body static holds.


        How to Do an L-Sit (Step-by-Step)

        Step 1: Sit on the Ground or Parallettes

        Sit upright with your legs extended straight in front of you.

        • Hands beside your hips
        • Arms straight
        • Chest upright

        Tip: Beginners may find parallettes easier than the floor.

        Step 2: Engage Your Core

        Tighten your abs and press your hands firmly into the ground or bars.

        • Shoulders active
        • Elbows locked
        • Core fully engaged

        Step 3: Lift Your Body Off the Ground

        Push through your hands and lift your hips upward.

        • Keep shoulders depressed
        • Maintain control

        Step 4: Raise Your Legs

        Lift both legs until they are parallel to the ground.

        • Keep legs straight
        • Point toes forward
        • Avoid bending knees
        Warrior showcasing How to do an L-sit with proper form

        Step 5: Hold the Position

        Maintain the L-sit:

        • Core tight
        • Legs fully extended
        • Breathing controlled

        Lower yourself slowly with control when finished.


        L-Sit Form Checklist

        Use this checklist to ensure proper form:

        • Keep arms straight
        • Maintain straight legs
        • Engage your core fully
        • Push your shoulders downward
        • Keep your chest upright

        Perfect form builds strength efficiently and safely.


        Common L-Sit Mistakes

        Bent Knees

        Problem: Reduces exercise difficulty and effectiveness.

        Fix: Keep legs as straight as possible.

        Rounded Shoulders

        Problem: Causes instability.

        Fix: Push shoulders down and maintain posture.

        Weak Core Engagement

        Problem: Makes holding the position difficult.

        Fix: Tighten your abs throughout the hold.

        Leaning Too Far Back

        Problem: Breaks body alignment.

        Fix: Keep your torso upright.

        Holding Breath

        Problem: Increases tension and fatigue.

        Fix: Maintain steady breathing.


        L-Sit Progressions and Variations

        These progressions help beginners build strength safely.

        Tucked L-Sit

        The best beginner progression.

        How to Do Tucked L-Sit

        • Bend your knees toward your chest
        • Lift hips off the ground
        • Hold the position with control

        One-Leg L-Sit

        Builds leg and core strength progressively.

        How to Do One-Leg L-Sit

        • Extend one leg fully
        • Keep the other leg bent
        • Alternate sides

        Parallette L-Sit

        Provides greater clearance and control.

        How to Do Parallette L-Sit

        • Use parallettes for support
        • Press downward strongly
        • Maintain full-body tension

        V-Sit Progression

        An advanced progression beyond the L-sit.

        How to Do V-Sit Progression

        • Raise legs higher above parallel
        • Maintain straight arms and posture
        • Hold with control

        Hanging L-Sit

        Builds grip and pulling endurance.

        How to Do Hanging L-Sit

        • Hang from a pull-up bar
        • Raise legs to parallel
        • Keep core engaged throughout

        Final Thoughts

        The L-sit is one of the most powerful calisthenics holds you can master.

        It builds:

        • Core strength
        • Hip flexor endurance
        • Shoulder stability
        • Body control and balance
        • Mental discipline

        Progress may feel difficult at first because the L-sit demands total-body tension and coordination. However, with consistent practice and proper progressions, your strength and control will improve rapidly. Learn more about Calisthenics Skills here.

        Focus on quality holds and consistency.

        A warrior controls his body through discipline — not momentum.


        L-Sit FAQ

        Q1: How long should beginners hold an L-sit?
        Beginners can start with 5–10-second holds and gradually increase the duration over time.

        Q2: Are L-sits good for abs?
        Yes, L-sits are among the best bodyweight exercises for developing strong, functional core muscles.

        Q3: How often should I train L-sits?
        You can train L-sits 3–5 times per week, depending on recovery and wrist health.

          How to Do a Handstand and Handstand Push-Up Correctly: Step-by-Step Guide for Beginners

          Learn how to do a handstand and handstand push-up with perfect form, avoid common mistakes, and discover the best progressions to build elite upper-body strength and balance.

          The handstand and handstand push-up are among the most powerful calisthenics exercises for developing shoulder strength, body control, and athletic coordination. Whether you are training for calisthenics, gymnastics, or military fitness, mastering these skills is a major milestone.


          What Is a Handstand and Handstand Push-Up?

          A handstand is a bodyweight balancing exercise where you support your body upside down on your hands.

          A handstand push-up builds on this skill by adding a pressing movement, in which you lower your head toward the ground and push back up.

          These exercises are commonly used in:

          • Calisthenics training
          • Gymnastics conditioning
          • Bodyweight strength programs
          • Advanced athletic performance training

          Unlike traditional overhead pressing exercises, handstands develop balance and total-body control simultaneously.

          Benefits of Handstand and Handstand Push-Ups

          Handstand training is one of the best methods for developing upper-body control and strength.

          Benefits include:

          • Builds elite shoulder strength
          • Improves balance and coordination
          • Develops core stability
          • Strengthens wrists and arms
          • Enhances body awareness and control
          • Unlocks advanced calisthenics skills

          Few exercises challenge the upper body as effectively as handstand push-ups.

          Muscles Worked in Handstand Push-Ups

          Handstand push-ups activate multiple upper-body and core muscles.

          Primary Muscles
          • Shoulders (Deltoids)
          • Triceps
          • Upper Chest
          Secondary Muscles
          • Core Muscles
          • Trapezius
          • Forearms and Wrists
          • Serratus Anterior

          This makes the handstand push-up one of the best upper-body bodyweight exercises.


          How to Do a Handstand (Step-by-Step)

          Step 1: Start in a Lunge Position

          Stand facing away from a wall.

          • Hands shoulder-width apart
          • Core engaged
          • Eyes focused forward

          Tip: Practice near a wall for safety and balance.

          Step 2: Place Hands on the Ground

          Lean forward and place your hands firmly on the floor.

          • Fingers spread wide
          • Arms straight
          • Shoulders active

          Step 3: Kick Your Legs Up

          Kick one leg upward while driving the other leg to follow.

          • Keep movements controlled
          • Tighten your core

          Step 4: Align Your Body

          At the top position:

          • Arms fully straight
          • Body stacked vertically
          • Core and glutes engaged

          Step 5: Hold the Position

          Maintain balance:

          • Push through your hands
          • Keep breathing steadily
          • Stay tight and controlled
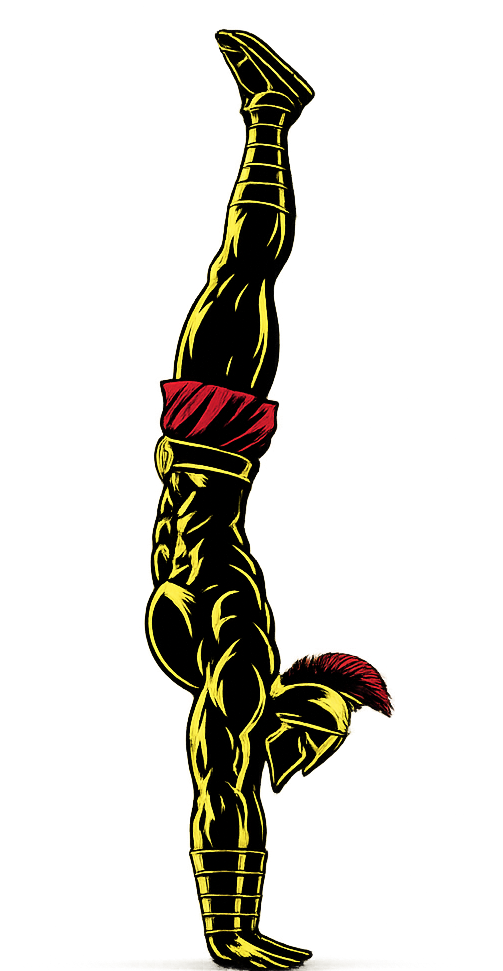
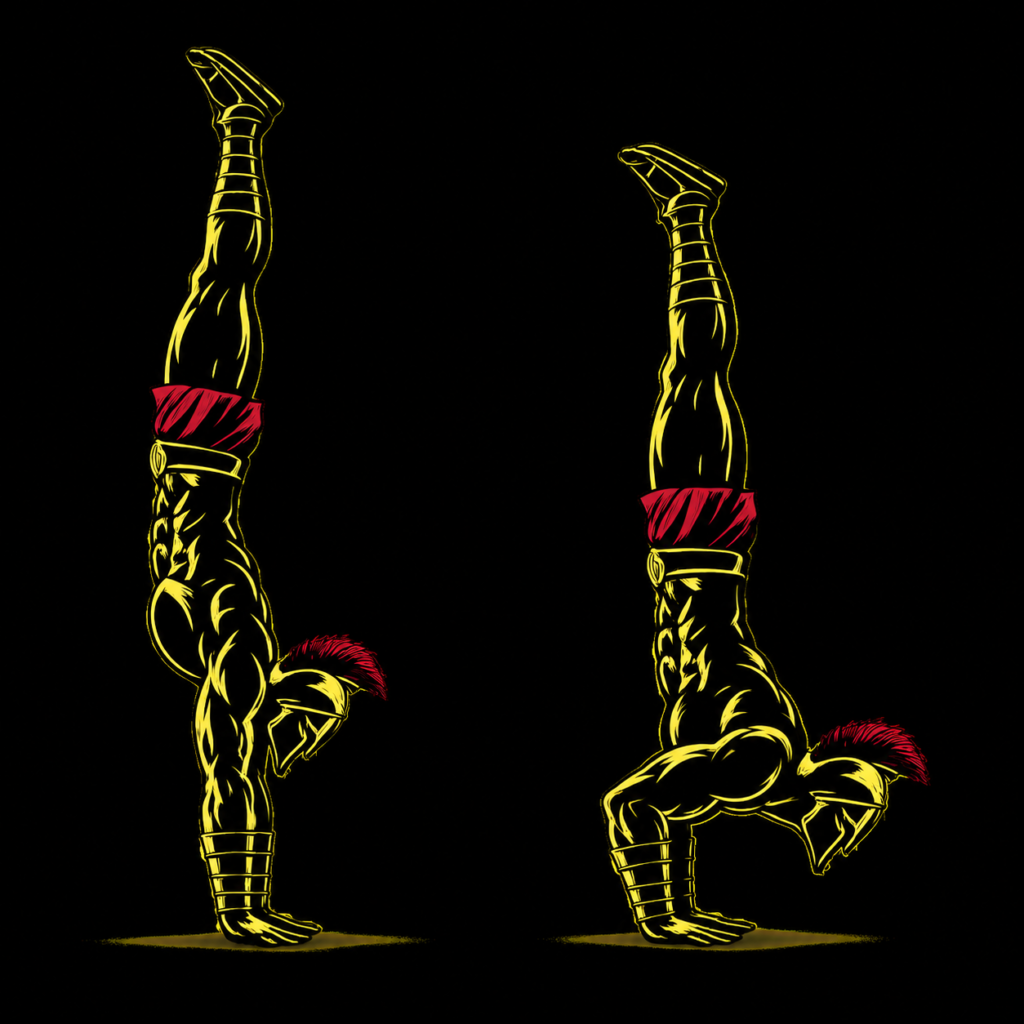
          Warrior showcasing How to How to do a Handstand and Handstand Push-Up with proper form.

          How to Do a Handstand Push-Up (Step-by-Step)

          Step 1: Enter a Handstand Position

          Kick into a handstand against a wall or freestanding.

          • Hands shoulder-width apart
          • Core tight
          • Body aligned vertically

          Step 2: Lower Yourself Slowly

          Bend your elbows and lower your head toward the ground.

          • Keep elbows controlled
          • Maintain body tension
          • Avoid collapsing

          Step 3: Reach the Bottom Position

          Lower until your head lightly touches the floor or target.

          • Maintain balance
          • Keep wrists stable

          Step 4: Press Back Up

          Push forcefully through your hands until your arms are fully extended.

          • Lock out elbows at the top
          • Keep core engaged

          Step 5: Maintain Control

          Complete each rep with smooth and controlled movement.

          Avoid rushing or losing alignment.

          Warrior showcasing How to How to do a Handstand and Handstand Push-Up with proper form.

          Handstand Push-Up Form Checklist

          Use this checklist to ensure proper form:

          • Keep arms active and stable
          • Maintain a tight core
          • Control the lowering phase
          • Push explosively but smoothly
          • Keep your body aligned vertically

          Perfect form builds strength safely and efficiently.


          Common Handstand Push-Up Mistakes

          Arching the Lower Back

          Problem: Reduces stability and control.

          Fix: Keep your core and glutes engaged.

          Flaring Elbows Excessively

          Problem: Places stress on the shoulders.

          Fix: Keep elbows at a controlled angle.

          Rushing the Descent

          Problem: Reduces control and increases the risk of injury.

          Fix: Lower slowly and steadily.

          Weak Shoulder Position

          Problem: Causes instability.

          Fix: Push actively through the shoulders.

          Ignoring Wrist Preparation

          Problem: Can lead to discomfort or injury.

          Fix: Warm up wrists thoroughly before training.


          Handstand and Handstand Push-Up Progressions

          These progressions help beginners safely build strength and balance.

          Wall Handstand Hold

          The best beginner progression.

          How to Do Wall Handstand Hold

          • Kick up against a wall
          • Maintain body alignment
          • Hold the position steadily

          Pike Push-Ups

          Builds pressing strength for handstand push-ups.

          How to Do Pike Push-Ups

          • Start in a pike position
          • Lower your head toward the floor
          • Push back upward

          Box Handstand Push-Ups

          A beginner-friendly pressing variation.

          How to Do Box Handstand Push-Ups

          • Place feet on a box or bench
          • Perform vertical pressing movement
          • Maintain control throughout

          Wall Handstand Push-Ups

          Builds full movement strength.

          How to Do Wall Handstand Push-Ups

          • Perform handstand push-ups against a wall
          • Lower slowly
          • Push back upward powerfully

          Freestanding Handstand Push-Ups

          The advanced progression.

          How to Do Freestanding Handstand Push-Ups

          • Balance without wall support
          • Lower and press under full control
          • Maintain total-body tension

          Final Thoughts

          The handstand and handstand push-up are among the most elite bodyweight exercises you can master.

          They build:

          • Shoulder strength
          • Body control and balance
          • Core stability
          • Upper-body endurance
          • Mental discipline

          Progress may take time because these skills demand strength, mobility, and coordination simultaneously. However, every progression builds elite athletic ability and body control. Learn more about Calisthenics Skills here.

          Focus on patience and precision.

          A warrior controls every movement — even upside down.


          Handstand Push-Up FAQ

          Q1: Are handstand push-ups good for building shoulders?
          Yes, handstand push-ups are one of the best bodyweight exercises for developing shoulder strength and size.

          Q2: Should beginners practice against a wall first?
          Yes, wall-supported handstands help beginners safely build balance and confidence.

          Q3: How often should I train handstands?
          You can practice handstands and progressions 3–5 times per week, depending on recovery and wrist health.

            How to Do a Planche Correctly: Step-by-Step Guide for Beginners

            Learn how to do a planche with perfect form, avoid common mistakes, and discover the best progressions to build elite upper-body strength and body control.

            The planche is one of the most advanced calisthenics skills, requiring incredible shoulder strength, core stability, and balance. Whether you are training for calisthenics, gymnastics, or elite bodyweight mastery, learning the planche is a major achievement.


            What Is a Planche?

            A planche is an advanced bodyweight exercise where you hold your entire body parallel to the ground while supporting yourself only with your hands.

            This movement demands full-body tension, balance, and immense pushing strength.

            The planche is commonly used in:

            • Advanced calisthenics training
            • Gymnastics strength programs
            • Static hold skill training
            • Elite bodyweight conditioning

            Unlike traditional strength exercises, the planche develops maximum relative strength and total-body control.

            Benefits of Planche Training

            Planche training is one of the most powerful methods for building advanced bodyweight strength.

            Benefits include:

            • Builds elite shoulder and arm strength
            • Develops exceptional core stability
            • Improves balance and body control
            • Strengthens wrists and scapular muscles
            • Enhances straight-arm strength
            • Unlocks advanced calisthenics performance

            Few exercises demonstrate upper-body mastery as effectively as the planche.

            Muscles Worked in Planche

            The planche activates nearly the entire body.

            Primary Muscles
            • Shoulders (Anterior Deltoids)
            • Core Muscles
            • Chest (Pectorals)
            Secondary Muscles
            • Triceps
            • Serratus Anterior
            • Forearms and Wrists
            • Upper Back Muscles
            • Hip Flexors and Glutes

            This makes the planche one of the most demanding bodyweight exercises ever created.


            How to Do a Planche (Step-by-Step)

            Step 1: Start With a Planche Lean

            Begin in a push-up position and lean your shoulders forward past your hands.

            • Arms straight
            • Hands shoulder-width apart
            • Fingers spread wide for balance

            Tip: Keep your shoulders protracted (pushed forward).

            Step 2: Engage Your Entire Body

            Create full-body tension.

            • Tighten your core
            • Squeeze your glutes
            • Lock your elbows

            Step 3: Shift Weight Forward

            Lean farther forward while keeping control.

            • Shoulders move ahead of wrists
            • Maintain straight-arm support

            Step 4: Lift Your Feet Off the Ground

            Carefully raise your legs from the floor.

            • Keep your body as straight as possible
            • Avoid excessive swinging

            Step 5: Hold the Position

            Maintain the planche hold:

            • Keep core tight
            • Push strongly through the floor
            • Breathe steadily

            Lower yourself with control when finished.

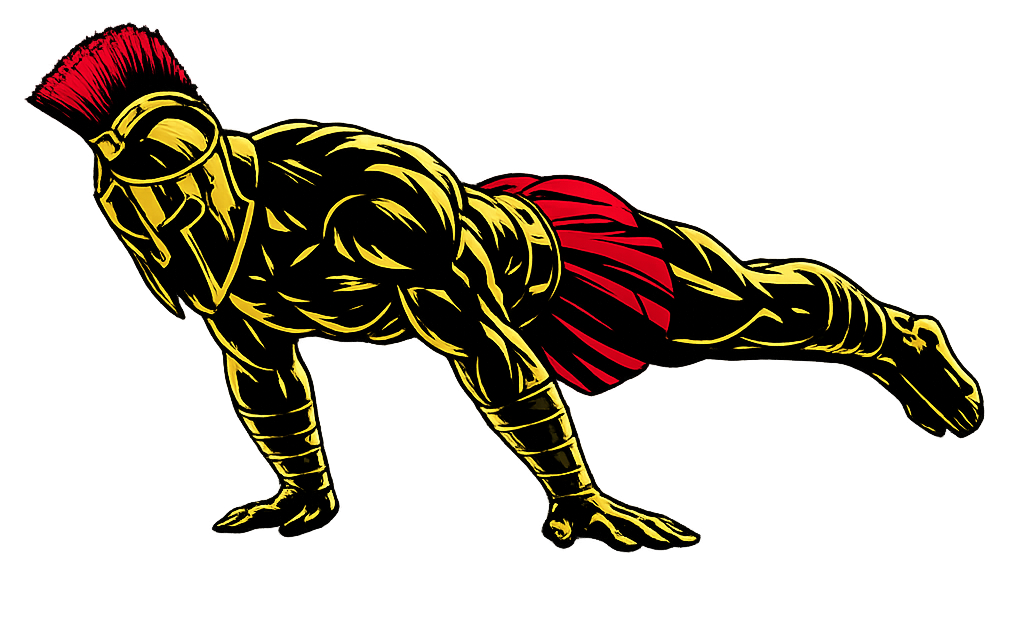
            Warrior showcasing How to do a Planche with proper form

            Planche Form Checklist

            Use this checklist to ensure proper form:

            • Keep arms straight
            • Protract your shoulders
            • Engage your core and glutes
            • Lean forward gradually
            • Maintain full-body tension

            Perfect form builds strength safely and efficiently.


            Common Planche Mistakes

            Bent Arms

            Problem: Reduces straight-arm strength development.

            Fix: Keep elbows locked throughout the movement.

            Sagging Hips

            Problem: Breaks body alignment.

            Fix: Keep your core and glutes fully engaged.

            Weak Shoulder Position

            Problem: Causes instability.

            Fix: Push shoulders forward and away from the ears.

            Leaning Too Little

            Problem: Prevents proper balance.

            Fix: Gradually increase forward lean over time.

            Ignoring Wrist Preparation

            Problem: Increases injury risk.

            Fix: Warm up wrists thoroughly before training.


            Planche Progressions and Variations

            The full planche is extremely advanced. These progressions help build strength gradually.

            Frog Hold

            The best beginner balance progression.

            How to Do Frog Hold

            • Rest knees on upper arms
            • Lean forward slowly
            • Hold your balance

            Tuck Planche

            A beginner planche progression. Like Frog Hold, but the knees are inside the elbows.

            How to Do Tuck Planche

            • Pull your knees toward your chest
            • Lift feet off the ground
            • Maintain straight arms

            Advanced Tuck Planche

            Increases leverage difficulty.

            How to Do an Advanced Tuck Planche

            • Open your hips slightly
            • Move knees farther from the chest
            • Hold with control

            Straddle Planche

            A more advanced progression.

            How to Do Straddle Planche

            • Spread legs apart
            • Maintain full-body tension
            • Keep body parallel to the floor

            Full Planche

            The ultimate progression.

            How to Do a Full Planche

            • Keep legs fully straight together
            • Maintain a parallel body position
            • Hold with complete control

            Final Thoughts

            The planche is one of the most elite calisthenics skills you can master.

            It builds:

            • Elite upper-body strength
            • Straight-arm stability
            • Core control
            • Balance and coordination
            • Mental discipline

            Progress can take months or even years, depending on your strength level and consistency. However, every progression builds tremendous body control and athletic ability. Learn more about Calisthenics skills here.

            Focus on patience, technique, and progression.

            A warrior earns mastery through control — not shortcuts.


            Planche FAQ

            Q1: Is the planche difficult to learn?
            Yes, the planche is one of the hardest calisthenics skills because it requires exceptional strength and balance.

            Q2: Should beginners start with the full planche?
            No, beginners should start with frog holds, planche leans, and tuck planche progressions.

            Q3: How often should I train planche?
            You can train planche progressions 2–5 times per week, depending on recovery and wrist health.

              How to Do Frog Holds Correctly: Step-by-Step Guide for Beginners

              Learn how to do frog holds with perfect form, avoid common mistakes, and discover the best variations to improve balance, arm strength, and body control.

              Frog holds are one of the best beginner calisthenics exercises for developing balance, wrist strength, and upper-body stability. Whether you are training for calisthenics, gymnastics, or athletic performance, mastering frog holds is essential.


              What Are Frog Holds?

              A frog hold is a bodyweight balancing exercise where you support your body using your hands while resting your knees on your elbows or upper arms.

              This movement teaches body control, balance, and coordination while strengthening the upper body and core.

              Frog holds are commonly used in:

              • Calisthenics training
              • Gymnastics progressions
              • Balance and stability workouts
              • Wrist and arm strengthening routines

              Unlike traditional strength exercises, frog holds develop static control and body awareness.

              Benefits of Frog Holds

              Frog holds are one of the best exercises for beginner balance training and upper-body control.

              Benefits include:

              • Builds wrist and forearm strength
              • Improves balance and coordination
              • Enhances core stability
              • Develops shoulder and arm endurance
              • Teaches body control for advanced calisthenics skills
              • Improves confidence in balancing movements

              Few exercises develop beginner calisthenics balance as effectively as frog holds.

              Muscles Worked in Frog Holds

              Frog holds activate multiple upper-body and core muscles.

              Primary Muscles
              • Shoulders (Deltoids)
              • Core Muscles
              • Wrists and Forearms
              Secondary Muscles
              • Triceps
              • Chest (Pectorals)
              • Upper Back Muscles
              • Hip Flexors

              This makes frog holds an excellent exercise for total-body stability and control.


              How to Do Frog Holds (Step-by-Step)

              Step 1: Start in a Squat Position

              Squat down with your feet slightly apart.

              • Hands placed shoulder-width apart on the ground
              • Fingers spread wide for stability

              Tip: Use a soft surface or exercise mat for comfort.

              Step 2: Place your knees on Your Arms

              Rest your knees against your elbows or upper arms.

              • Keep elbows bent slightly
              • Maintain strong hand pressure on the ground

              Step 3: Lean Forward Slowly

              Shift your body weight forward gradually.

              • Keep your eyes focused slightly ahead
              • Engage your core for balance

              Step 4: Lift Your Feet Off the Ground

              Carefully raise both feet off the floor.

              • Keep movements controlled
              • Balance your body weight evenly

              Step 5: Hold the Position

              Maintain the frog hold:

              • Keep core tight
              • Breathe steadily
              • Stay balanced and controlled
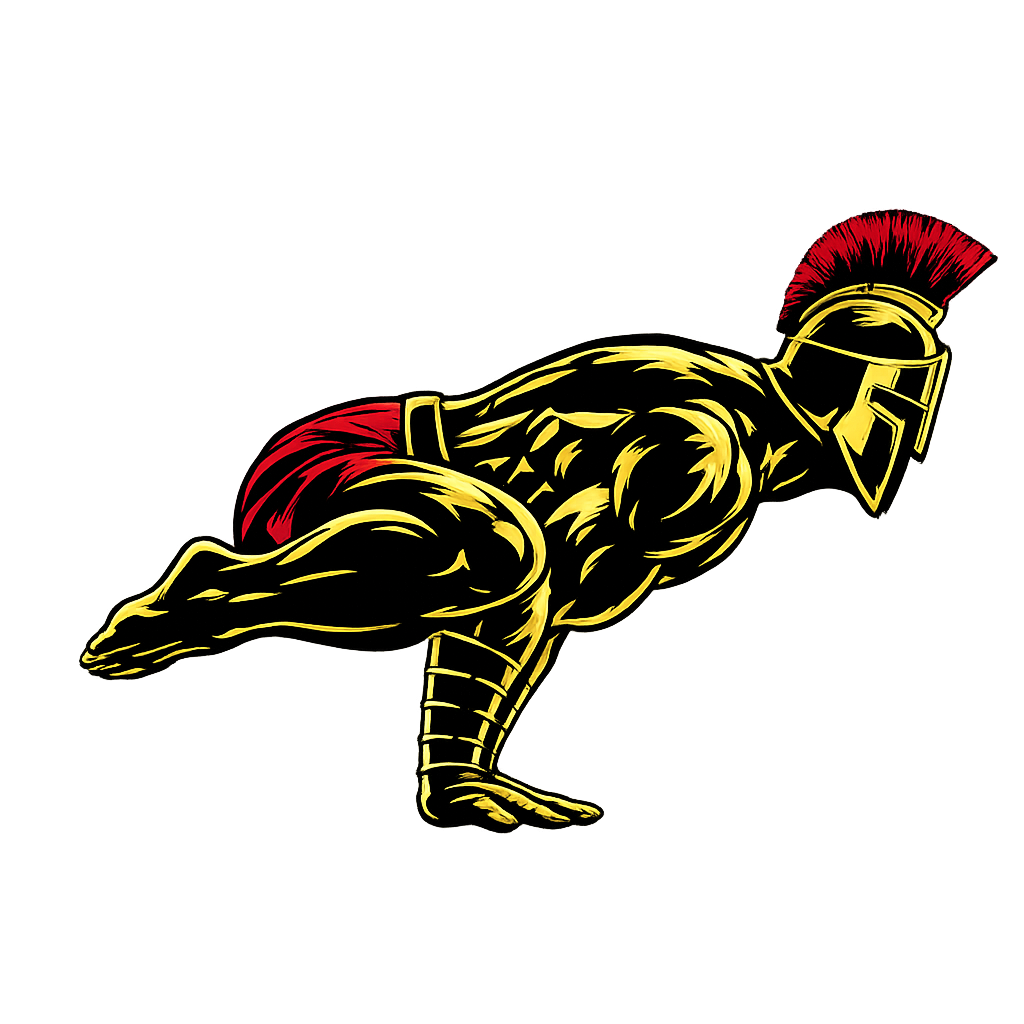
              Warrior showcasing How to do Frog Holds with proper form

              Slowly lower your feet back down when finished.


              Frog Holds Form Checklist

              Use this checklist to ensure proper form:

              • Spread fingers for balance
              • Keep core engaged
              • Lean forward gradually
              • Maintain steady breathing
              • Balance body weight evenly

              Perfect form improves stability and prevents injury.


              Common Frog Holds Mistakes

              Leaning Too Fast

              Problem: Causes loss of balance.

              Fix: Shift weight forward slowly and gradually.

              Weak Hand Position

              Problem: Reduces stability.

              Fix: Spread fingers wide and press firmly into the floor.

              Looking Straight Down

              Problem: Affects balance.

              Fix: Look slightly forward.

              Holding Breath

              Problem: Increases tension and instability.

              Fix: Maintain slow and controlled breathing.

              Elbows Collapsing

              Problem: Reduces support and balance.

              Fix: Keep arms stable and engaged.


              Frog Holds Variations

              Once you master basic frog holds, these variations can improve strength and balance further.

              Tucked Frog Hold

              A beginner-friendly variation.

              How to Do Tucked Frog Hold

              • Keep your knees closer to your chest
              • Balance carefully
              • Focus on control

              Straight-Arm Frog Hold

              Increases arm and shoulder demand.

              How to Do Straight-Arm Frog Hold

              • Keep arms straighter during the hold
              • Engage your shoulders strongly
              • Maintain balance carefully

              One-Leg Frog Hold

              Improves balance and control.

              How to Do One-Leg Frog Hold

              • Extend one leg backward
              • Keep the other leg supported
              • Alternate sides

              Frog Hold to Crow Pose

              Progresses toward advanced balance skills.

              How to Do Frog Hold to Crow Pose

              • Transition from frog hold
              • Bring knees closer toward triceps
              • Maintain a stable balance

              Final Thoughts

              Frog holds are one of the best beginner balance exercises you can master.

              They build:

              • Wrist strength
              • Balance and coordination
              • Core stability
              • Upper-body endurance
              • Calisthenics body control

              Progress may feel difficult at first because balancing exercises require patience and coordination. However, with consistent practice and proper form, your control and stability will improve rapidly. Learn more about Calisthenics Skills here.

              Focus on patience and balance.

              A warrior controls his body — not just his strength.


              Frog Holds FAQ

              Q1: How long should beginners hold a frog hold?
              Beginners can start with 5–10-second holds and gradually increase the duration over time.

              Q2: Are frog holds good for beginners in calisthenics?
              Yes, frog holds are one of the best beginner exercises for developing balance and body control.

              Q3: How often should I practice frog holds?
              You can train frog holds 3–5 times per week, depending on wrist recovery and training intensity.