Grip Slipping During Workouts? Here’s How to Fix It

Grip slipping during workouts is one of the most frustrating problems you can face in the gym.

Whether you’re doing pull-ups, chin-ups, deadlifts, rows, or climbing, losing your grip can end your set before your muscles are actually tired.

The good news?

You don’t always need stronger hands.

Sometimes, you simply need better grip.


Why Your Grip Keeps Slipping

If your hands keep slipping during workouts, it’s usually because of:

  • Sweaty palms
  • Humid weather
  • Smooth or painted bars
  • Long training sessions
  • Moisture reducing friction between your hands and the equipment

A weak grip isn’t always the problem.

Often, it’s your hands losing traction.

This can lead to:

  • ❌ Missed reps
  • ❌ Poor workout performance
  • ❌ Less muscle activation
  • ❌ Higher risk of losing control of the bar

The Simple Fix

Instead of squeezing the bar harder…

Use Gym Chalk (Magnesium Chalk).

Gym chalk absorbs moisture from your hands, creating more friction between your skin and the bar so you can hold on longer and train with confidence.

It’s one of the simplest and most effective upgrades for:

  • Pull-ups
  • Chin-ups
  • Deadlifts
  • Barbell Rows
  • Climbing
  • Gymnastics
  • Calisthenics
  • Powerlifting

Best Gym Chalk to Improve Your Grip

1. Weight Lifting Magnesium Chalk Block (Best Budget Choice)

Why This Works

This traditional magnesium chalk block delivers reliable grip at an affordable price.

Rub a small amount onto your palms before training, and it quickly absorbs sweat to help you maintain a secure hold throughout your workout.

Key Benefits

  • Excellent grip on bars and weights
  • Budget-friendly
  • Long-lasting block
  • Trusted by lifters, climbers, and calisthenics athletes

Best For:

  • Beginners
  • Home gym users
  • Outdoor calisthenics
  • Budget-conscious athletes

Reality:

If you’re looking for the most affordable way to stop your hands from slipping, this chalk block gets the job done.
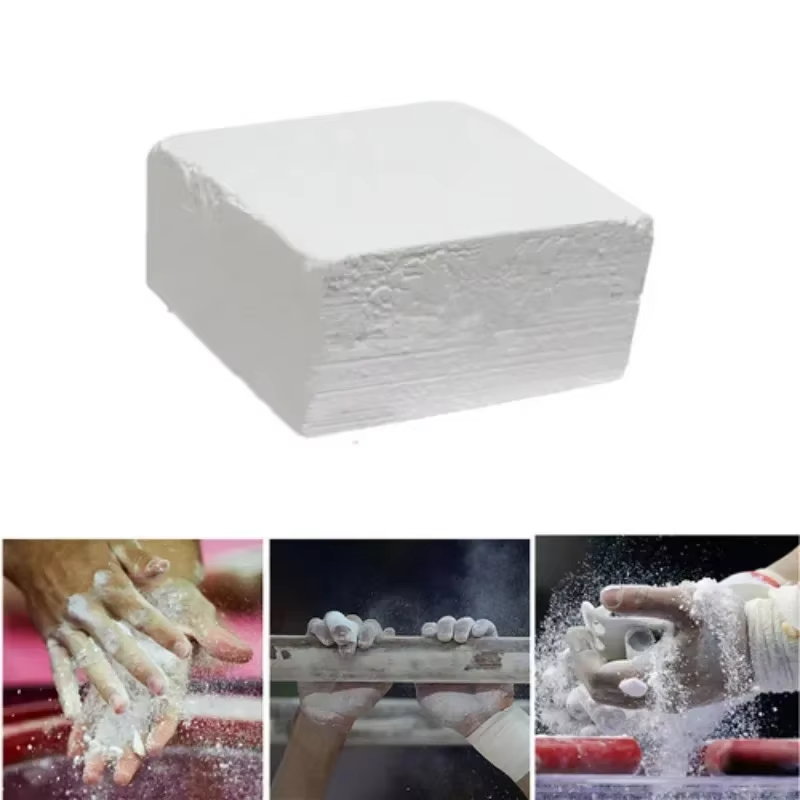
First of the Gym Chalk(Grip Slipping during Workouts)

2. Dry Hands Liquid Chalk (Best Overall)

Why This is Better

If you train regularly or have naturally sweaty hands, liquid chalk offers a cleaner and longer-lasting solution.

It dries within seconds and creates a strong grip without covering your equipment or clothes in chalk dust.

Key Benefits

  • Excellent sweat resistance
  • Long-lasting grip
  • Less mess than traditional chalk
  • Easy to carry in your gym bag
  • Quick-drying formula

Best For:

  • Regular gym-goers
  • Calisthenics athletes
  • Climbers
  • Powerlifters
  • Anyone with sweaty hands

Reality:

If you want maximum performance with minimal mess, liquid chalk is the better investment.
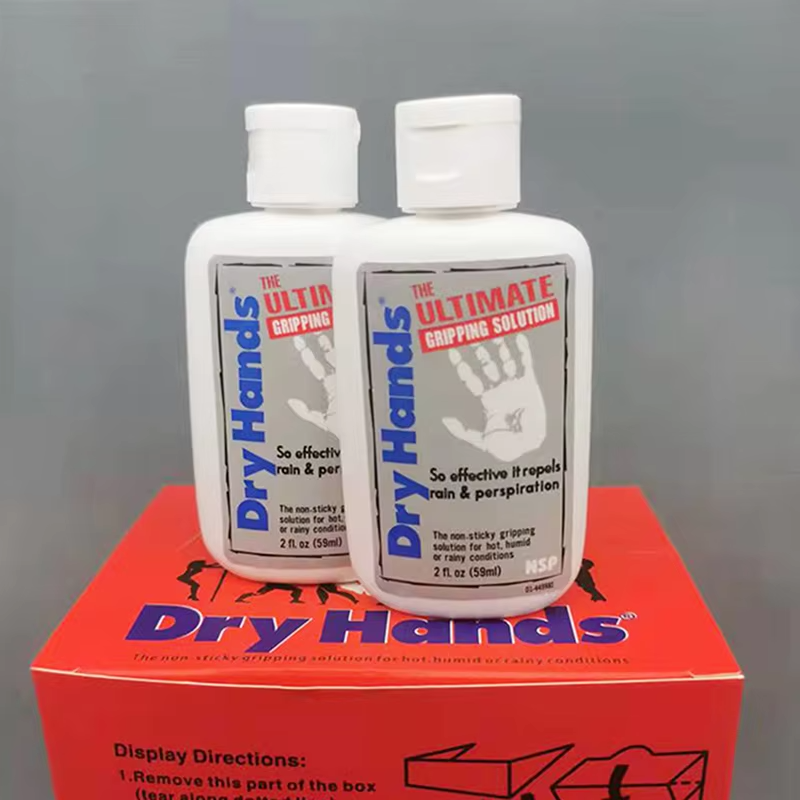
Second of the Gym Chalk(Grip Slipping during Workouts)

Which One Should You Choose?

Just starting?→ Choose theChalk Block.

It’s affordable, effective, and perfect for most beginners.

Train regularly or have sweaty hands?→ ChooseDry Hands Liquid Chalk.

It lasts longer on your hands and keeps your workouts cleaner.


How to Prevent Your Grip from Slipping

Follow these simple steps:

Before Training

  • Wash and dry your hands.
  • Apply a small amount of chalk.
  • Allow liquid chalk to dry completely before grabbing the bar.

During Training

  • Reapply only when needed.
  • Wipe excessive sweat from your hands between sets.

After Training

  • Wash off the chalk thoroughly.
  • Apply moisturizer if your skin feels dry.

Mistakes That Make Your Grip Worse

Avoid these common mistakes:

  • ❌ Using far too much chalk
  • ❌ Training with sweaty hands
  • ❌ Relying on lifting straps for every exercise
  • ❌ Ignoring grip-strength training

Remember, gym chalk improves your grip—but building stronger forearms and hands should still be part of your training.


Final Verdict

If your grip is slipping during workouts, the solution may be simpler than you think.

The Weight Lifting Magnesium Chalk Block is an excellent budget-friendly option that provides dependable grip for most athletes.

If you prefer a cleaner experience and train frequently, Dry Hands Liquid Chalk offers longer-lasting performance with less mess.

Both options help you hold onto the bar longer, perform more reps, and train with greater confidence.


Final Words

Your grip shouldn’t be the reason your workout ends early.

Whether you’re lifting weights, training calisthenics, or working toward your first pull-up, the right gym chalk can help you stay locked onto the bar and focused on your performance.

Choose the option that fits your training style, stay consistent, and keep getting stronger.

If you’re struggling to improve your pulling strength, check out our How to Do More Pull-Ups guide for practical tips to increase your reps.
    Wrist Pain During Workouts? Quick Fixes That Actually Work

    Wrist pain during workouts can turn even simple exercises into a frustrating experience.

    Whether you’re doing push-ups, pull-ups, dips, bench press, overhead press, or lifting weights, sore wrists can limit your performance and make you hesitant to train.

    The good news?

    Most workout-related wrist pain can be reduced with better preparation, proper technique, and the right support.


    Why Your Wrists Hurt During Workouts

    Your wrists absorb a lot of force during upper-body exercises.

    Pain usually happens because of:

    • Weak wrist stability
    • Poor exercise technique
    • Tight forearm muscles
    • Limited wrist mobility
    • Sudden increases in training intensity
    • Lack of wrist support during heavy lifts

    Ignoring these problems can lead to:

    ❌ Wrist pain

    ❌ Reduced lifting performance

    ❌ Less confidence during training

    ❌ Increased injury risk


    Quick Fixes Before Buying Anything

    Try these first.

    Warm Up Your Wrists

    Spend 3–5 minutes doing:

    • Wrist circles
    • Palm stretches
    • Finger extensions
    • Light wrist flexion and extension

    A proper warm-up prepares your joints for heavier loads.

    Improve Your Technique

    Many people bend their wrists too far backward during exercises.

    Keeping your wrists in a stronger, more neutral position often reduces unnecessary strain.

    Build Wrist Strength

    Add exercises like:

    • Wrist curls
    • Reverse wrist curls
    • Farmer’s carries
    • Dead hangs

    Stronger wrists handle heavier loads more comfortably.


    When Wrist Wraps Can Help

    If your wrists still hurt after improving your warm-up and technique, extra support can make a noticeable difference.

    Unlike gloves, wrist wraps stabilize the wrist joint without reducing your grip on the bar.

    They help by:

    • Supporting your wrist under load
    • Reducing unnecessary movement
    • Increasing confidence during pressing and pulling exercises
    • Providing extra stability during heavy sets

    Best Wrist Wraps for Workout Support

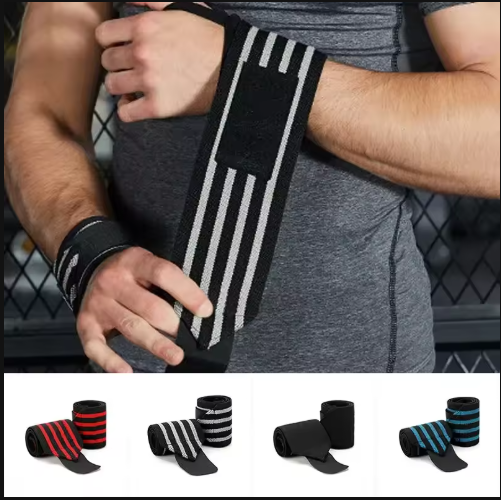
    1. Elastic Wrist Support Strap (Best for Beginners)

    Why This Works

    This lightweight wrist wrap provides comfortable support while still allowing natural wrist movement.

    It’s ideal if you’re starting strength training or experiencing occasional wrist discomfort.

    Key Benefits

    • Comfortable and breathable
    • Adjustable compression
    • Easy to wear
    • Lightweight design
    • Great everyday support

    Best For:

    • Beginners
    • General gym workouts
    • Push-ups
    • Pull-ups
    • Light to moderate training

    Reality:

    If you need everyday wrist support without feeling restricted, this wrap is an excellent starting point.

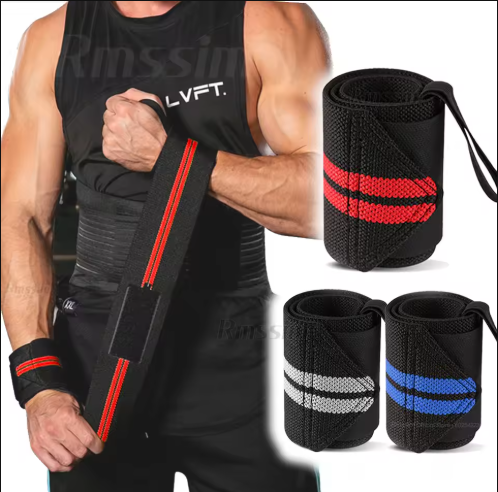
    First Wrist Wraps(Wrist Pain during Workouts)

    2. Heavy-Duty Wrist Wrap (Best for Heavy Lifting)

    Why This Is Better

    As the weight on the bar increases, your wrists need greater stability.

    This heavy-duty wrap offers firmer compression and stronger support, making it better suited for demanding workouts.

    Key Benefits

    • Superior wrist stabilization
    • Durable elastic construction
    • Better support for heavy lifts
    • Adjustable tightness

    Best For:

    • Bench press
    • Overhead press
    • Heavy push workouts
    • Dips
    • Powerlifting
    • Advanced strength training

    Reality:

    If you regularly lift heavy or perform high-volume upper-body workouts, the extra support is worth it.

    Second Wrist Wraps(Wrist Pain during Workouts)

    Which One Should You Choose?

    New to strength training? → Choose the Elastic Wrist Support Strap.

    It provides enough support for most people without restricting movement.

    Training heavy every week?→ Choose the Heavy-Duty Wrist Wrap.

    The additional stability is better suited for heavier loads.


    How to Prevent Wrist Pain During Workouts

    Before Training

    • Warm up your wrists.
    • Stretch your forearms.
    • Start with lighter sets.

    During Training

    • Keep your wrists in a neutral position.
    • Avoid increasing weight too quickly.
    • Wear wrist wraps during heavy sets if needed.

    After Training

    • Stretch your forearms.
    • Allow sore wrists to recover.
    • Reduce training volume if pain persists.

    Common Mistakes That Cause Wrist Pain

    Avoid these common errors:

    ❌ Skipping your warm-up

    ❌ Poor lifting technique

    ❌ Increasing weight too quickly

    ❌ Training through sharp pain

    ❌ Ignoring recovery

    Remember, wrist wraps support your wrists—they don’t replace good technique or proper recovery.


    Final Verdict

    If you’re experiencing wrist pain during workouts, don’t ignore it.

    Start by improving your warm-up, mobility, and lifting technique.

    If you still need extra support, a quality pair of wrist wraps can help reduce strain and make your workouts more comfortable.

    For most beginners, the Elastic Wrist Support Strap is the best choice.

    If you’re lifting heavier weights or training more intensely, the Heavy-Duty Wrist Wrap provides the extra stability you’ll appreciate.


    Final Words

    Don’t let wrist pain stop your progress.

    Take care of your wrists, train with proper form, and use supportive equipment when needed.

    A small change today can help you train stronger, longer, and with greater confidence tomorrow.

    If your hands keep slipping during workouts, check out our guide on the best Gym Chalk for Better Grip.

      Best Exercise Mats for Home Workouts (2026) – Train Without Pain

      Training on hard ground?

      Yeah… that’s how you destroy your elbows, knees, and consistency.

      If you’re doing:

      • Push-ups
      • Abs
      • Stretching

      You NEED a proper exercise mat.

      This guide shows you the best options—no fluff.


      Quick Answer (For Fast Decision Makers)

      Want the cheapest option that works?
      Go for the EVA Anti-Slip Yoga Mat

      Want long-term comfort + durability?
      Go for the Foldable TPE Exercise Mat


      Why an Exercise Mat is Non-Negotiable

      Let’s be real:

      Training on bare ground =
      ❌ Pain
      ❌ Slipping
      ❌ Shorter workouts

      A proper mat gives you:

      Joint protection
      Better grip
      More comfort = longer sessions

      Which means better results


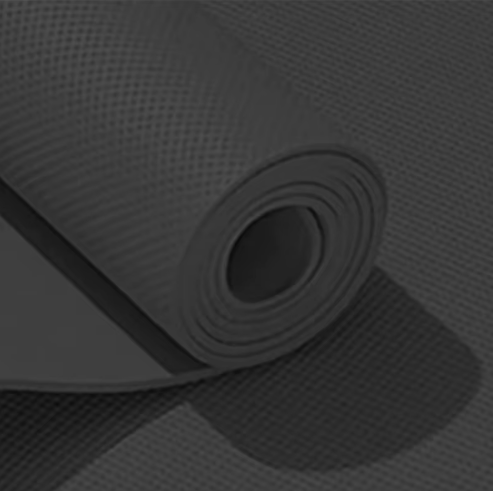
      1. EVA Anti-Slip Yoga Mat (Best Budget Pick)

      Key Features:

      • EVA foam cushioning
      • Anti-slip surface
      • Lightweight & portable
      • Beginner-friendly
      First of the Best Exercise Mat for Home Workouts

      Why This is a Smart Start:

      If you’re just starting your journey…

      This mat does everything you need without wasting money.

      Perfect for:

      • Push-ups
      • Sit-ups
      • Stretching

      Pros:

      Very affordable
      Soft enough for basic training
      Easy to carry

      Cons:

      ❌ Not super durable long-term
      ❌ Thinner than premium mats


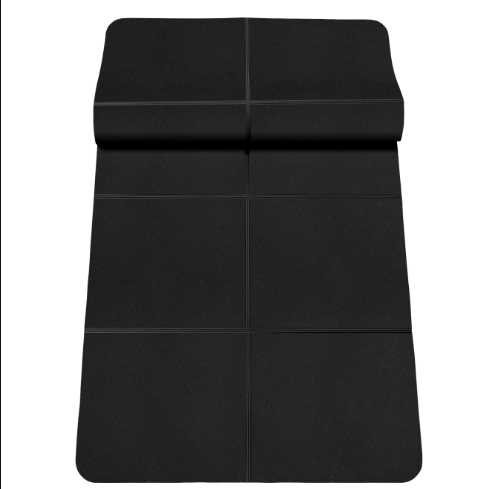
      2. Foldable TPE Exercise Mat (Best Overall)

      Key Features:

      • High-quality TPE material
      • Double-sided anti-slip grip
      • Foldable design (easy storage)
      • Durable build
      Second of the Best Exercise Mats for Home Workouts

      Why This One Wins:

      This is for people who are serious.

      Better grip = better performance
      Better durability = long-term value

      You can train HARD on this:

      • Push-ups
      • Core workouts
      • Mobility work

      Pros:

      Strong grip (no slipping)
      More comfortable
      Long-lasting

      Cons:

      ❌ Slightly higher price


      Comparison – Choose Smart

      FeatureEVA MatTPE Mat
      PriceLowerHigher
      ComfortGoodBetter
      DurabilityMediumHigh
      GripBasicStrong
      Best ForBeginnersSerious users

      Beginner Setup

      Don’t overcomplicate it. You can click the links below for their guides.

      Start with:

      Train 3–5 times/week

      Consistency > everything.


      Before You Buy

      Make sure:

      • The mat is thick enough for your joints
      • It doesn’t slip on your floor
      • You actually USE it

      Cheap + unused = waste
      Simple + consistent = results


      Final Verdict

      Want cheap & simple?
      Go for EVA Mat

      Want long-term quality?
      Go for TPE Mat


      Final Words

      A mat might seem small…

      But it decides whether you:

      • Train consistently
      • Or quit because of discomfort

      Choose one.

      Start training today.

        Best Dip Bars for Home Workouts (2026) – Build Real Strength Fast

        Want a stronger chest, bigger triceps, and real upper body power…

        Without a gym?

        Then you need dip bars.

        But here’s the problem:

        Most beginners either:

        • Buy unstable cheap bars
        • Or overpay for something they don’t need

        This guide fixes that.


        Quick Answer (Don’t Waste Time)

        Want the best budget option?
        Go for Non-Slip Push-Up/Dip Bars

        Want serious strength training?
        Go for Wooden Parallettes


        Why Dip Bars Are a Game-Changer

        Dip bars let you train:

        • Chest (deep stretch = better growth)
        • Triceps (key for pushing strength)
        • Shoulders
        • Core (L-sits, stability)

        All from home.


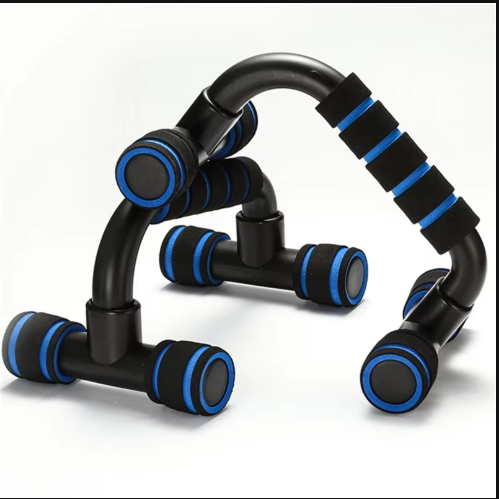
        1. Non-Slip Push-Up/Dip Bars (Best Budget Pick)

        Key Features:

        • Steel + plastic build
        • Non-slip foam grips
        • Lightweight and portable
        • Multi-angle push-up support
        First of the Best Dip Bars for Home Workouts

        Why This is a Smart Start:

        If you’re just starting…

        This gives you everything you need without spending big.

        Perfect for:

        • Push-ups
        • Assisted dips
        • Core work

        Pros:

        Affordable
        Easy to use anywhere
        Comfortable grip

        Cons:

        ❌ Less stable for advanced training
        ❌ Limited long-term progression


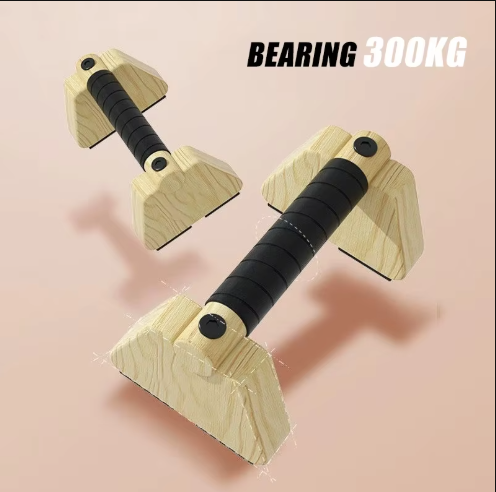
        2. Wooden Parallettes Dip Bars (Best Overall)

        Key Features:

        • Solid wood construction
        • 300KG weight capacity
        • Non-slip base
        • Ergonomic grip
        Second of the Best Dip Bars for Home Workouts

        Why This One Wins:

        This is for serious training.

        More stability
        More control
        More progression

        You can do:

        • Dips
        • L-sits
        • Planche work
        • Handstand training

        Pros:

        Extremely durable
        Stable and strong
        Premium feel

        Cons:

        ❌ Slightly more expensive
        ❌ Less portable


        Comparison – Choose Your Level

        FeatureBudget BarsWooden Bars
        PriceLowerHigher
        StabilityMediumHigh
        DurabilityGoodExcellent
        Best ForBeginnersSerious users

        Beginner Plan

        Don’t just buy—use it properly.

        Start with:

        Train 3–4 times/week
        Focus on form first


        Before You Buy

        Make sure:

        • Surface is flat (no wobbling)
        • Grip feels comfortable
        • You’ll actually use it consistently

        Equipment doesn’t build strength—YOU do.


        Final Verdict

        Want cheap & simple?
        Go for Non-Slip Dip Bars

        Want long-term strength & progression?
        Go for Wooden Parallettes


        Final Words

        You don’t need machines.

        You don’t need a gym.

        You need:

        • The right tool
        • Consistency
        • Discipline

        Pick your bars.

        Start training.

          Can’t Do Pull-Ups? Fix It Fast (Beginner Guide)

          Struggling to do even ONE pull-up?

          You’re not alone.

          Most beginners fail at pull-ups not because they’re lazy—but because they’re missing one thing:

          • Progressive strength training

          The good news?
          You don’t need a gym, machines, or years of training.

          You need the right method.


          Why You Can’t Do Pull-Ups (The Real Reasons)

          If you can’t do a pull-up yet, it usually comes down to:

          • Weak back muscles (lats)
          • Poor grip strength
          • Lack of pulling practice
          • Bodyweight too heavy (for current strength)

          Doing random attempts won’t fix this.

          You need assisted progression.


          The Fastest Way to Fix It (Beginner Method)

          Here’s the smartest way to build your first pull-up:

          Step 1: Use Assisted Pull-Ups

          Step 2: Train 3–4 times per week

          Step 3: Gradually reduce assistance

          And the BEST tool for this?

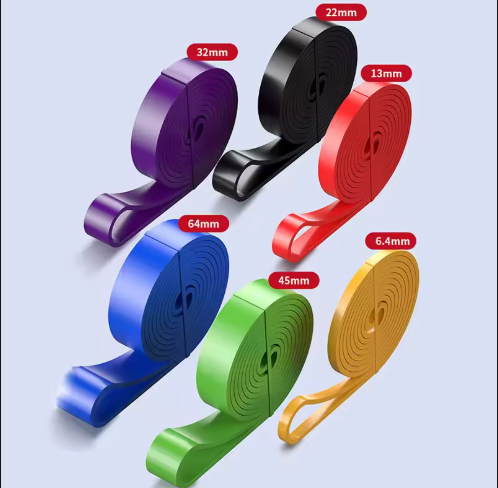
          Resistance Bands


          Best Resistance Bands to Fix Pull-Ups

          1. Heavy Duty Resistance Band (Best for Beginners)

          Why This Works:

          This band helps “lift” part of your bodyweight, making pull-ups easier.

          Key Benefits:

          • Perfect for beginners
          • Lightweight and portable
          • Multiple resistance levels
          • Great for learning proper form
          can’t do pull-ups, here is one of the best resistance bands for a fix

          Best For:

          • First pull-up
          • Weak beginners
          • Home workouts

          Reality:

          If you can’t do a pull-up yet, this is your starting point.


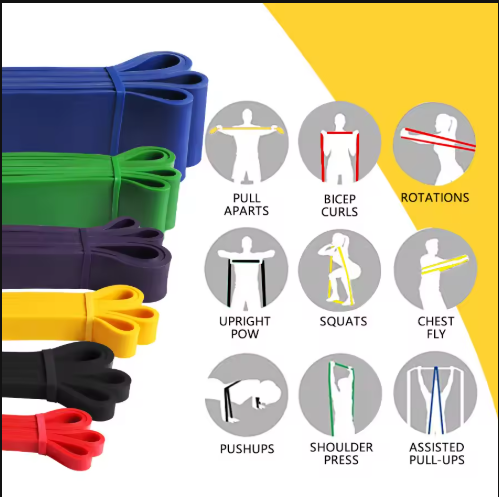
          2. Heavy Duty Latex Resistance Band (Best for Progression)

          Why This is Better Long-Term:

          As you get stronger, you’ll need less assistance.

          This band gives you:

          • More resistance options
          • Better durability
          • Long-term progression
          can’t do pull-ups, here is another Resistance band for a quick fix

          Best For:

          • Beginners → Intermediate
          • Full-body strength training
          • Gradual overload

          Which One Should You Choose?

          • On a tight budget? → Go for the first band
          • Serious about progress? → Go for the latex band

          How to Train for Your First Pull-Up

          Follow this simple plan:

          Day 1–4 Training:

          Goal:

          • Reduce band support over time
          • Build strength gradually

          Bonus: Mistakes That Are Holding You Back

          Avoid these:

          ❌ Trying full pull-ups too early
          ❌ Training randomly
          ❌ Ignoring grip strength
          ❌ No consistency

          Fix these, and you WILL get your first pull-up.


          Final Verdict

          Here’s the truth:

          You don’t need expensive equipment.

          You don’t need a gym.

          You need a system.

          And resistance bands give you exactly that.


          Final Words

          Your first pull-up isn’t about talent.

          It’s about:

          • Consistency
          • Smart progression
          • The right tools

          Start today.

          And don’t stop until you get that first rep.

            Best Pull-Up Bars for Home Workouts (2026) – Build Real Strength Fast

            If you’re serious about building a strong back, powerful arms, and real grip strength…

            You need ONE thing:

            A pull-up bar.

            No gym. No excuses.

            But here’s the problem:

            Most beginners either:

            • Buy the wrong bar
            • Or never start because they’re confused

            This guide fixes that.


            Quick Answer (Don’t Overthink It)

            Want the BEST overall setup?
            Go for the Wall-Mounted Pull-Up Bar with Rings
            (More exercises = faster progress)

            Want something simple and strong?
            Go for the Classic Wall-Mounted Pull-Up Bar


            Why a Pull-Up Bar is Non-Negotiable

            A pull-up bar builds:

            • Back (lats = V-shape)
            • Arms (biceps + forearms)
            • Grip strength (critical for SSG-level strength)
            • Core stability

            And the best part?

            You can train every day at home


            1. Wall-Mounted Pull-Up Bar with Rings (Best Overall)

            Key Features:

            • Heavy-duty steel construction
            • Adjustable width
            • Includes resistance rings (BIG advantage)
            • Wall-mounted = maximum stability
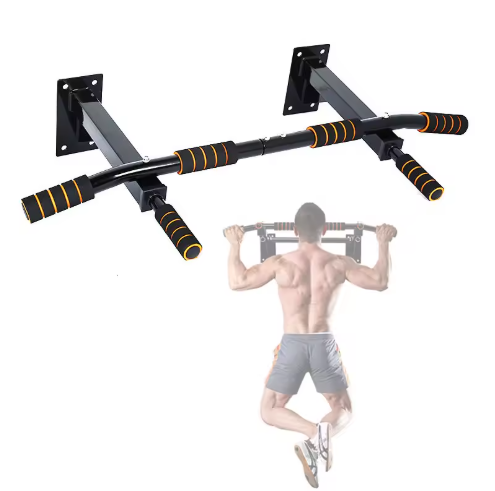
            Photo of One of the best Pull-up Bars for Home Workouts

            Why This One Wins:

            This is not just a bar.

            It’s a complete calisthenics setup

            With rings, you unlock:

            • Ring rows
            • Hanging leg raises
            • Core work
            • Advanced holds

            This means faster strength gains compared to a basic bar.

            Pros:

            Extremely stable
            More exercises (huge advantage)
            Long-term investment

            Cons:

            ❌ Requires wall installation
            ❌ Not portable


            2. Classic Wall-Mounted Pull-Up Bar (Simple & Strong)

            Key Features:

            • Strong steel frame
            • Minimal design
            • Built for pull-ups & chin-ups
            Photo of Second Best Pull-up Bars for Home Workouts

            Why Choose This:

            If you want:

            “Just give me a solid bar that works.”

            This is it.

            No extras. No distractions.

            Pros:

            Strong and reliable
            Clean setup
            Great for beginners

            Cons:

            ❌ No rings (less versatility)
            ❌ Requires installation


            Comparison – Choose Your Weapon

            FeatureBar with RingsClassic Bar
            VersatilityHighMedium
            ExercisesFull-bodyPull-ups only
            StabilityExcellentExcellent
            Best ForSerious trainingBeginners

            Beginner Plan

            Listen carefully—this is where most people fail.

            Even with the BEST bar, you won’t progress if you don’t train smart.

            Start with:

            Train 3–4 times/week

            That’s it.


            Important Buying Advice

            Before you click:

            Make sure:

            • Your wall is strong enough (concrete/brick preferred)
            • You have space for full hanging movement
            • You actually plan to use it (discipline > equipment)

            Final Verdict

            Want maximum results?
            Go for Bar with Rings

            Want simple & effective?
            Go for Classic Bar


            Final Words

            You don’t need a gym.

            You don’t need fancy machines.

            You need:

            • A pull-up bar
            • Consistency
            • Discipline

            Install it.

            Start today.