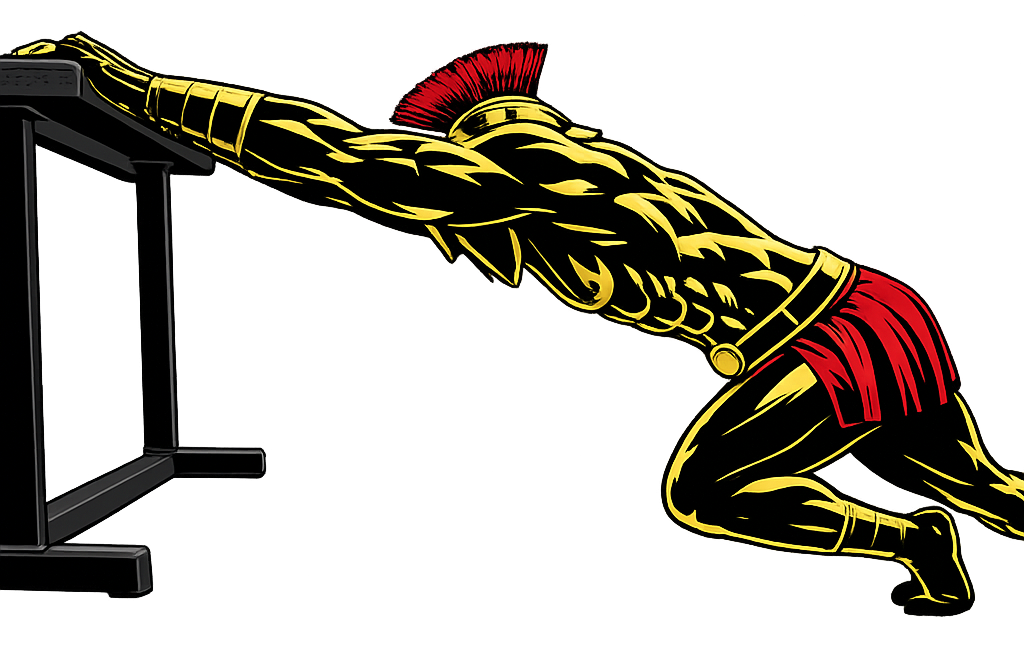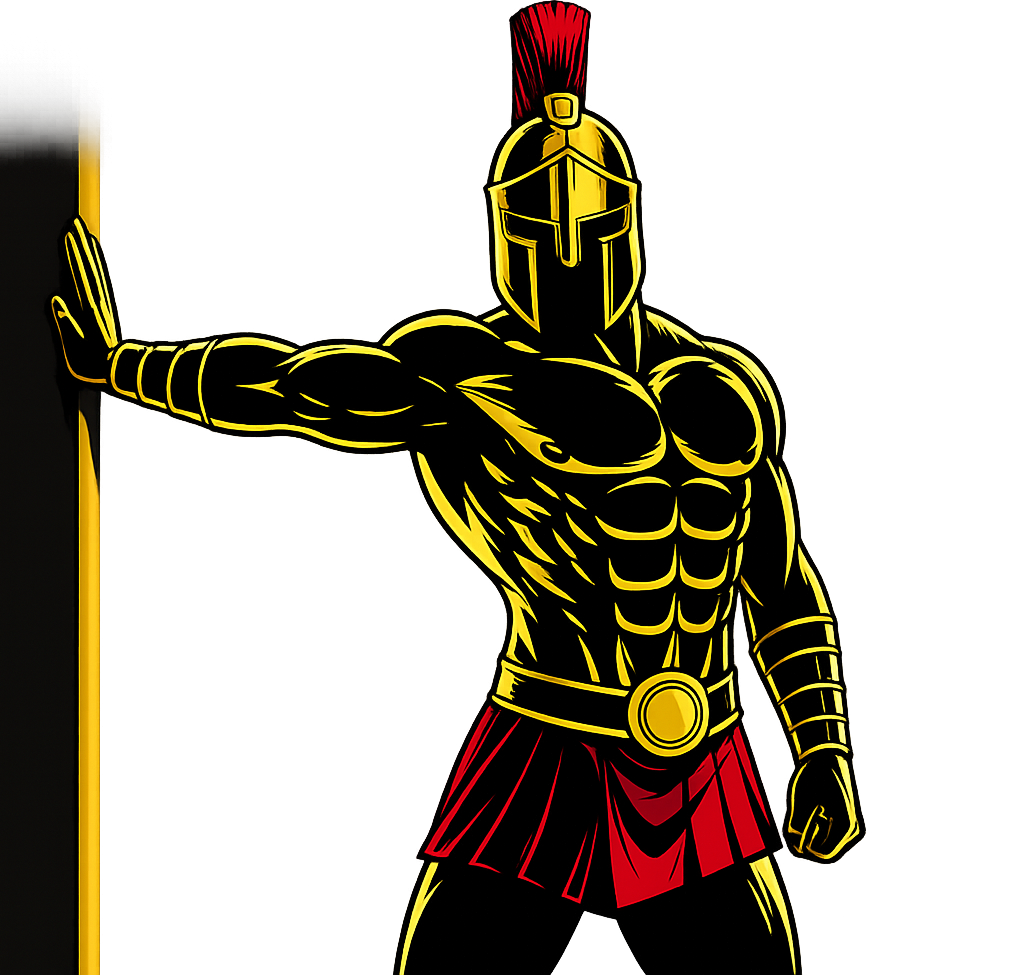
How to Do Wrist Extensor Stretch Correctly: Step-by-Step Guide for Beginners

Learn how to do Wrist Extensor Stretch with perfect form, avoid common mistakes, and discover the best Wrist Extensor Stretch variations to improve wrist mobility, reduce forearm tightness, and maintain healthy wrists for calisthenics, strength training, sports, and everyday activities.

The Wrist Extensor Stretch is one of the most effective mobility exercises for improving flexibility in the muscles along the top of the forearm. It is especially beneficial for people who regularly perform pull-ups, push-ups, weightlifting, climbing, racket sports, or spend long hours typing or using a computer mouse. Performing this stretch regularly helps maintain healthy wrists, improve range of motion, and reduce the risk of overuse injuries.


What Is the Wrist Extensor Stretch?

The Wrist Extensor Stretch is a static stretching exercise that targets the wrist extensor muscles located along the top of the forearm. It is performed by extending one arm in front of your body with the palm facing downward while gently bending the wrist downward using the opposite hand.

This movement lengthens the muscles responsible for extending the wrist and fingers, helping improve flexibility and relieve muscle tightness.

The Wrist Extensor Stretch is commonly used in:

  • Warm-up routines
  • Cool-down sessions
  • Calisthenics training
  • Weightlifting programs
  • Rehabilitation exercises
  • Office mobility breaks

It is one of the simplest and most effective stretches for maintaining wrist and forearm health.

Benefits of the Wrist Extensor Stretch

The Wrist Extensor Stretch offers several mobility and recovery benefits.

Benefits include:

  • Improves wrist flexibility
  • Reduces forearm tightness
  • Increases wrist range of motion
  • Promotes muscle recovery
  • Helps prevent overuse injuries
  • Improves comfort during gripping exercises
  • Requires no equipment

Few stretches are as effective for improving wrist mobility as the Wrist Extensor Stretch.

Muscles Stretched During the Wrist Extensor Stretch

The Wrist Extensor Stretch primarily targets the muscles on the back of the forearm.

Primary Muscles
  • Extensor Carpi Radialis Longus
  • Extensor Carpi Radialis Brevis
  • Extensor Carpi Ulnaris
  • Extensor Digitorum
Secondary Muscles
  • Extensor Indicis
  • Extensor Digiti Minimi
  • Wrist and Finger Tendons

Because of this muscle involvement, the Wrist Extensor Stretch is especially beneficial after exercises that heavily tax your grip and forearms.


How to Do the Wrist Extensor Stretch (Step-by-Step)

Step 1: Extend Your Arm

Stand or sit comfortably.

Extend one arm straight in front of your body.

Maintain:

  • Elbow fully extended
  • Palm facing downward
  • Shoulder relaxed

Tip: Keep your arm at shoulder height to maximize the effectiveness of the stretch.

Step 2: Position Your Wrist

Allow your wrist to bend downward naturally.

Keep:

  • Fingers together
  • Arm straight
  • Shoulder relaxed

Avoid rotating your arm during the movement.

Step 3: Apply Gentle Pressure

Use your opposite hand to gently pull the back of your hand downward toward your body.

Focus on:

  • Feeling the stretch along the top of your forearm
  • Applying slow, gentle pressure
  • Avoiding pain or discomfort

The stretch should feel comfortable and controlled.

Step 4: Hold the Stretch

Maintain the position for:

  • 20-30 seconds
  • Slow, controlled breathing
  • Relaxed shoulders

Avoid bouncing or forcing the stretch.

Step 5: Repeat on the Opposite Side

Slowly release the stretch.

Switch arms and repeat using the same technique.

Perform 2-4 rounds on each side.


Wrist Extensor Stretch Form Checklist

Use this quick checklist to ensure perfect Wrist Extensor Stretch form.

  • Keep your elbow straight
  • Keep your palm facing downward
  • Stretch gently without forcing the movement
  • Relax your shoulders
  • Breathe normally throughout the stretch

Proper technique improves flexibility while minimizing unnecessary joint stress.


Common Wrist Extensor Stretch Mistakes

Pulling Too Hard

Problem: Using excessive force may irritate the wrist or forearm muscles.

Fix: Stretch only until you feel gentle tension.

Bending the Elbow

Problem: Reduces the effectiveness of the stretch.

Fix: Keep your arm fully extended throughout the exercise.

Rotating the Forearm

Problem: Changes the target muscles and reduces the quality of the stretch.

Fix: Keep your palm facing downward for the entire movement.

Bouncing During the Stretch

Problem: Can increase the risk of muscle irritation.

Fix: Hold the stretch steadily without bouncing.

Holding Your Breath

Problem: Creates unnecessary muscle tension.

Fix: Take slow, controlled breaths throughout the stretch.

A slow, controlled stretch always produces better results than forcing a greater range of motion.


Wrist Extensor Stretch Variations

Once you master the standard Wrist Extensor Stretch, these variations can further improve wrist mobility.

Kneeling Wrist Extensor Stretch

Provides a deeper stretch.

How to Do the Kneeling Wrist Extensor Stretch

  • Kneel on the floor.
  • Place the backs of your hands on the floor with your fingers pointing toward your knees.
  • Slowly shift your body backward until you feel a stretch across the tops of your forearms.
  • Hold the position comfortably.

Wall Wrist Extensor Stretch

Ideal for beginners.

How to Do the Wall Wrist Extensor Stretch

  • Place the back of your hand lightly against a wall.
  • Keep your elbow straight.
  • Lean your body slightly until you feel a comfortable stretch.

Fist Wrist Stretch

Improves wrist mobility through a slightly different angle.

How to Do the Fist Wrist Stretch

  • Make a gentle fist.
  • Use your opposite hand to bend your wrist downward.
  • Hold the stretch without forcing the movement.

Assisted Wrist Extensor Stretch

Provides greater control over the stretch intensity.

How to Do the Assisted Wrist Extensor Stretch

  • Perform the standard Wrist Extensor Stretch.
  • Adjust the pressure using your opposite hand.
  • Hold the stretch for the desired duration.

Final Thoughts

The Wrist Extensor Stretch is one of the most effective mobility exercises for improving forearm flexibility and maintaining healthy wrists.

It improves:

  • Wrist flexibility
  • Forearm mobility
  • Muscle recovery
  • Grip comfort
  • Injury prevention

Whether you train with weights, practice calisthenics, climb, play sports, or work at a computer, regularly performing the Wrist Extensor Stretch can help keep your wrists healthy and pain-free. Learn more about StretchingHere,

Focus on gentle, controlled stretching and never force your range of motion.

A warrior maintains flexibility to preserve strength for every challenge ahead.

Essential Gear for the Wrist Extensor Stretch

Although the Wrist Extensor Stretch requires no equipment, these items can complement your mobility routine.

  • Exercise Mat: Provides a comfortable surface for kneeling wrist stretch variations.
  • Foam Roller: Helps loosen tight forearm muscles before stretching.
  • Massage Ball: Allows targeted release of tight spots in the wrist extensor muscles.
  • Wrist Wraps: Can provide additional wrist support during heavy training sessions, though regular stretching should remain your primary method for maintaining wrist mobility.

Wrist Extensor Stretch FAQ

Q1: When should I perform the Wrist Extensor Stretch?
The Wrist Extensor Stretch is best performed after workouts, during cool-downs, or after activities that heavily use the forearms, such as typing, climbing, racquet sports, or strength training.

Q2: How long should I hold the Wrist Extensor Stretch?
Most people should hold the stretch for 20-30 seconds per side and repeat it 2-4 times while maintaining gentle, steady tension.

Q3: Can the Wrist Extensor Stretch help reduce forearm tightness?
Yes. Regularly performing the Wrist Extensor Stretch can improve flexibility, reduce muscle tightness, and help maintain healthy wrist function. If you experience persistent pain or an existing injury, consult a qualified healthcare professional before beginning a stretching routine.
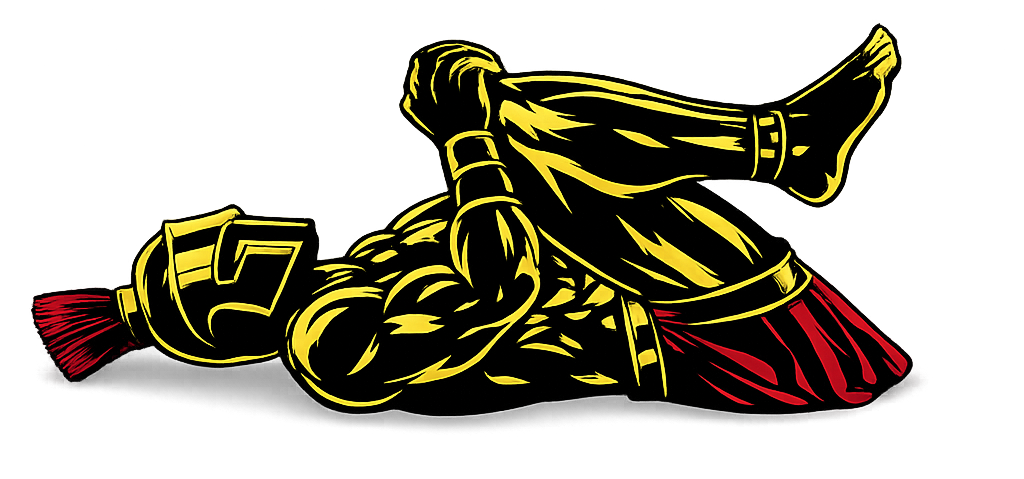

    How to Do Wrist Flexor Stretch Correctly: Step-by-Step Guide for Beginners

    Learn how to do Wrist Flexor Stretch with perfect form, avoid common mistakes, and discover the best Wrist Flexor Stretch variations to improve wrist flexibility, reduce forearm tightness, and maintain healthy wrists for strength training, calisthenics, and everyday activities.

    The Wrist Flexor Stretch is one of the most effective mobility exercises for improving wrist flexibility and reducing tension in the forearm muscles. It is especially beneficial for athletes who perform pull-ups, push-ups, climbing, weightlifting, racket sports, or spend long hours typing at a computer. Regularly performing this stretch helps maintain healthy wrists, improve range of motion, and reduce the risk of overuse injuries.


    What Is the Wrist Flexor Stretch?

    The Wrist Flexor Stretch is a static stretching exercise that targets the wrist flexor muscles located along the inside of the forearm. It is performed by extending one arm in front of the body with the palm facing upward while gently pulling the fingers downward using the opposite hand.

    This movement lengthens the muscles responsible for wrist flexion and gripping, helping restore flexibility after training or prolonged repetitive use.

    The Wrist Flexor Stretch is commonly used in:

    • Warm-up routines
    • Cool-down sessions
    • Calisthenics training
    • Weightlifting programs
    • Rehabilitation exercises
    • Office mobility breaks

    It is one of the simplest and most effective stretches for maintaining healthy wrists and forearms.

    Benefits of the Wrist Flexor Stretch

    The Wrist Flexor Stretch provides several important mobility and recovery benefits.

    Benefits include:

    • Improves wrist flexibility
    • Reduces forearm tightness
    • Increases wrist range of motion
    • Promotes faster muscle recovery
    • Helps prevent overuse injuries
    • Improves grip comfort during training
    • Requires no equipment

    Few stretches are as beneficial for wrist health as the Wrist Flexor Stretch.

    Muscles Stretched During the Wrist Flexor Stretch

    The Wrist Flexor Stretch primarily lengthens the muscles on the front of the forearm.

    Primary Muscles
    • Flexor Carpi Radialis
    • Flexor Carpi Ulnaris
    • Palmaris Longus
    • Flexor Digitorum Superficialis
    Secondary Muscles
    • Flexor Digitorum Profundus
    • propagator Teres
    • Wrist and Finger Tendons

    Because of this muscle involvement, the Wrist Flexor Stretch is particularly useful after exercises requiring strong grip strength.


    How to Do the Wrist Flexor Stretch (Step-by-Step)

    Step 1: Extend Your Arm

    Stand or sit comfortably.

    Extend one arm straight in front of your body.

    Maintain:

    • Elbow fully extended
    • Palm facing upward
    • Shoulder relaxed

    Tip: Keep your arm at shoulder height for the most effective stretch.

    Step 2: Position Your Hand

    Allow your wrist to bend backward naturally.

    Keep:

    • Fingers together
    • Arm straight
    • Shoulder relaxed

    Avoid locking your shoulder or shrugging.

    Step 3: Apply Gentle Pressure

    Use your opposite hand to gently pull your fingers downward toward the floor.

    Focus on:

    • Feeling the stretch along the inside of your forearm
    • Applying slow, gentle pressure
    • Avoiding pain

    You should feel a comfortable stretch, not discomfort.

    Step 4: Hold the Stretch

    Maintain the position for:

    • 20-30 seconds
    • Steady breathing
    • Relaxed shoulders

    Avoid bouncing during the stretch.

    Step 5: Repeat on the Opposite Side

    Slowly release the stretch.

    Switch arms and repeat using the same technique.

    Perform 2-4 rounds on each side.


    Wrist Flexor Stretch Form Checklist

    Use this quick checklist to ensure perfect Wrist Flexor Stretch form.

    • Keep your elbow straight
    • Keep your palm facing upward
    • Stretch gently without forcing the movement
    • Relax your shoulders
    • Breathe normally throughout the stretch

    Proper technique improves flexibility while minimizing unnecessary stress on the joints.


    Common Wrist Flexor Stretch Mistakes

    Pulling Too Hard

    Problem: Excessive force may irritate the wrist or forearm muscles.

    Fix: Stretch only until you feel mild to moderate tension.

    Bending the Elbow

    Problem: Reduces the effectiveness of the stretch.

    Fix: Keep your arm fully extended throughout the movement.

    Shrugging the Shoulders

    Problem: Creates unnecessary upper-body tension.

    Fix: Relax your shoulders and keep your neck neutral.

    Bouncing During the Stretch

    Problem: May increase the risk of muscle irritation.

    Fix: Hold the stretch steadily without any bouncing.

    Holding Your Breath

    Problem: Creates unnecessary muscle tension.

    Fix: Take slow, controlled breaths throughout the stretch.

    A gentle, controlled stretch is always more effective than forcing a greater range of motion.


    Wrist Flexor Stretch Variations

    Once you master the standard Wrist Flexor Stretch, these variations can further improve wrist mobility.

    Kneeling Wrist Flexor Stretch

    Provides a deeper stretch.

    How to Do the Kneeling Wrist Flexor Stretch

    • Kneel on the floor.
    • Place your palms on the ground with your fingers pointing toward your knees.
    • Slowly shift your body backward until you feel a stretch in your forearms.
    • Hold the position comfortably.

    Wall Wrist Flexor Stretch

    Ideal for beginners.

    How to Do the Wall Wrist Flexor Stretch

    • Place your palm against a wall with your fingers pointing downward.
    • Keep your elbow straight.
    • Lean gently away from the wall until you feel a stretch.

    Prayer Stretch

    Improves flexibility in both wrists simultaneously.

    How to Do the Prayer Stretch

    • Place your palms together in front of your chest.
    • Slowly lower your hands while keeping your palms pressed together.
    • Hold the stretch comfortably.

    Assisted Wrist Flexor Stretch

    Provides greater control.

    How to Do the Assisted Wrist Flexor Stretch

    • Perform the standard stretch.
    • Use your opposite hand to adjust the amount of pressure gradually.
    • Hold for the desired duration.

    Final Thoughts

    The Wrist Flexor Stretch is one of the simplest yet most valuable mobility exercises for maintaining healthy wrists and forearms.

    It improves:

    • Wrist flexibility
    • Forearm mobility
    • Recovery
    • Grip comfort
    • Injury prevention

    Whether you train with weights, practice calisthenics, climb, or spend hours using a keyboard, adding the Wrist Flexor Stretch to your daily routine can help keep your wrists healthy and mobile. Learn more about StretchingHere.

    Focus on slow, controlled stretches and never force your range of motion.

    A warrior protects his joints as carefully as he builds his strength.

    Essential Gear for the Wrist Flexor Stretch

    Although this stretch requires no equipment, the right accessories can make your mobility sessions more comfortable and help support long-term wrist health.

    • Exercise Mat: Provides a comfortable surface if performing kneeling wrist stretch variations.
    • Foam Roller: Helps release tension in the forearms before stretching.
    • Massage Ball: Useful for targeting tight spots in the forearm muscles before or after stretching.
    • Wrist Wraps: Can provide additional support during heavy training sessions, though they should not replace regular mobility work.

    Wrist Flexor Stretch FAQ

    Q1: When should I perform the Wrist Flexor Stretch?
    The Wrist Flexor Stretch is best performed after workouts, during cool-downs, or after long periods of repetitive wrist activity such as typing or gripping. It can also be included in a mobility routine on rest days.

    Q2: How long should I hold the Wrist Flexor Stretch?
    Most people should hold the stretch for 20-30 seconds per side and repeat it 2-4 times while maintaining gentle, steady tension.

    Q3: Can the Wrist Flexor Stretch help prevent wrist pain?
    Yes. Regularly stretching the wrist flexor muscles can improve flexibility, reduce muscle tightness, and lower the risk of overuse injuries. However, if you have persistent wrist pain or an existing injury, consult a qualified healthcare professional before stretching.

      How to Do a Lower Back Stretch Correctly: Step-by-Step Guide for Beginners

      Learn how to do a lower back stretch with perfect form, avoid common mistakes, and discover the best variations to improve mobility and reduce tension.

      The lower back stretch is one of the most effective exercises for relieving tightness, improving spinal mobility, and supporting healthy posture. Whether you are training for military fitness tests, calisthenics, or general fitness, mastering the lower back stretch is essential.


      What Is a Lower Back Stretch?

      A lower back stretch is a flexibility exercise designed to reduce tension and improve mobility in the muscles surrounding the lumbar spine.

      Tight lower back muscles can limit movement, affect posture, and increase discomfort during daily activities or training.

      Lower back stretches are commonly used in:

      • Warm-up routines
      • Cool-down sessions
      • Mobility and flexibility training
      • Recovery and rehabilitation programs

      Unlike strength exercises, lower back stretches focus on flexibility, relaxation, and recovery.

      Benefits of Lower Back Stretch

      The lower back stretch is essential for maintaining spinal health and mobility.

      Benefits include:

      • Reduces lower back tightness and stiffness
      • Improves spinal mobility and flexibility
      • Supports better posture
      • Relieves muscle tension
      • Enhances movement efficiency
      • Aids recovery after workouts

      Few stretches are as important for spinal mobility as the lower back stretch.

      Muscles Worked in Lower Back Stretch

      Lower back stretches target several muscles around the spine and hips.

      Primary Muscles
      • Erector Spinae
      • Quadratus Lumborum
      Secondary Muscles
      • Glutes
      • Hamstrings
      • Core Muscles
      • Hip Flexors

      This makes the lower back stretch highly effective for improving overall movement and comfort.


      How to Do a Lower Back Stretch (Step-by-Step)

      Step 1: Lie Flat on the Ground

      Lie on your back with your legs extended and arms relaxed by your sides.

      • Spine neutral
      • Shoulders relaxed
      • Core lightly engaged

      Tip: Use a comfortable surface or exercise mat.

      Step 2: Bring Knees Toward Your Chest

      Slowly pull both knees toward your chest.

      • Use your hands to hold your shins
      • Keep movement controlled

      Step 3: Gently Pull Inward

      Pull your knees slightly closer until you feel a stretch in your lower back.

      • Keep shoulders relaxed
      • Avoid excessive force

      Step 4: Hold the Stretch

      Maintain the position:

      • Hold for 15–30 seconds
      • Breathe steadily
      • Stay relaxed
      Warrior showcasing How to do a Lower Back Stretch with proper form

      Step 5: Return Slowly

      Slowly release your legs back to the starting position.

      Avoid jerking or rushing the movement.


      Lower Back Stretch Form Checklist

      Use this checklist to ensure proper form:

      • Move slowly and with control
      • Keep shoulders relaxed
      • Avoid forcing the stretch
      • Maintain steady breathing
      • Use a comfortable range of motion

      Proper form improves flexibility and prevents discomfort.


      Common Lower Back Stretch Mistakes

      Pulling Too Aggressively

      Problem: Can strain the lower back.

      Fix: Stretch gently and gradually.

      Holding Breath

      Problem: Increases muscle tension.

      Fix: Breathe slowly and consistently.

      Lifting the Head Excessively

      Problem: Creates neck tension.

      Fix: Keep your head relaxed on the ground.

      Rushing the Movement

      Problem: Reduces effectiveness.

      Fix: Perform slow, controlled movements.

      Stretching Through Pain

      Problem: May worsen discomfort.

      Fix: Stretch only within a comfortable range.


      Lower Back Stretch Variations

      Once you master the basic lower back stretch, these variations can improve mobility further.

      Single Knee-to-Chest Stretch

      Targets one side at a time.

      How to Do a Single Knee-to-Chest Stretch

      • Keep one leg extended
      • Pull the opposite knee toward your chest
      • Hold and switch sides

      Child’s Pose

      A relaxing full-back stretch.

      How to Do Child’s Pose

      • Sit back onto your heels
      • Extend your arms forward
      • Lower your chest toward the ground

      Seated Lower Back Stretch

      Improves spinal mobility.

      How to Do a Seated Lower Back Stretch

      • Sit with legs extended
      • Reach forward slowly
      • Maintain a straight back

      Cat-Cow Stretch

      A dynamic mobility variation.

      How to Do Cat-Cow Stretch

      • Alternate between arching and rounding your back
      • Move slowly with control
      • Coordinate breathing with movement

      Final Thoughts

      The lower back stretch is one of the most important mobility exercises you can master.

      It improves:

      • Spinal mobility
      • Flexibility
      • Recovery
      • Posture
      • Overall movement quality

      Progress may feel gradual if your lower back is tight. However, with consistent practice, your mobility and comfort will improve significantly. Learn more about Stretching Here.

      Focus on control and consistency.

      A warrior maintains mobility — not just strength.


      Lower Back Stretch FAQ

      Q1: How long should I hold a lower back stretch?
      Hold each stretch for 15–30 seconds and repeat 2–3 times.

      Q2: When should I do lower back stretches?
      Perform static stretches after workouts or during recovery sessions. Gentle mobility work can also be done daily.

      Q3: Can lower back stretches reduce stiffness?
      Yes, regular stretching improves mobility and helps reduce lower back tension and stiffness.

        How to Do a Quad Stretch Correctly: Step-by-Step Guide for Beginners

        Learn how to do a quad stretch with perfect form, avoid common mistakes, and discover the best variations to improve lower-body mobility and flexibility.

        The quad stretch is one of the most effective exercises for improving leg flexibility, reducing muscle tightness, and enhancing athletic performance. Whether you are training for military fitness tests, running, or general fitness, mastering the quad stretch is essential.


        What Is a Quad Stretch?

        A quad stretch is a flexibility exercise designed to lengthen the quadriceps muscles located at the front of your thighs.

        Tight quadriceps can reduce mobility, affect posture, and increase the risk of lower-body injuries.

        Quad stretches are commonly used in:

        • Warm-up routines
        • Cool-down sessions
        • Mobility and flexibility training
        • Injury prevention programs

        Unlike strength exercises, quad stretches focus on mobility, recovery, and muscle relaxation.

        Benefits of Quad Stretch

        The quad stretch is essential for lower-body mobility and movement efficiency.

        Benefits include:

        • Improves quadriceps flexibility
        • Reduces muscle tightness and stiffness
        • Enhances knee and hip mobility
        • Supports better posture and movement
        • Reduces risk of lower-body injuries
        • Aids recovery after leg workouts

        Few stretches are as important for leg mobility as the quad stretch.

        Muscles Worked in Quad Stretch

        Quad stretches target several lower-body muscles.

        Primary Muscles
        • Quadriceps (Rectus Femoris, Vastus Lateralis, Vastus Medialis, Vastus Intermedius)
        Secondary Muscles
        • Hip Flexors
        • Glutes
        • Knee Stabilizers

        This makes the quad stretch essential for maintaining balanced lower-body flexibility.


        How to Do a Quad Stretch (Step-by-Step)

        Step 1: Stand Tall

        Stand upright with your feet shoulder-width apart.

        • Core engaged
        • Chest upright
        • Balance stable

        Tip: Hold onto a wall or stable object if needed for balance.

        Step 2: Bend One Knee

        Lift one foot behind you by bending your knee.

        • Keep knees close together
        • Maintain upright posture

        Step 3: Grab Your Ankle

        Reach back and hold your ankle with the same-side hand.

        • Pull gently
        • Avoid forcing the movement

        Step 4: Push Your Hips Forward

        Slightly push your hips forward while pulling your foot toward your glutes.

        • Feel the stretch in the front of your thigh
        • Keep your chest upright
        Warrior showcasing How to do a Quad Stretch

        Step 5: Hold and Switch Sides

        Maintain the stretch:

        • Hold for 15–30 seconds
        • Breathe steadily

        Then repeat on the other leg.


        Quad Stretch Form Checklist

        Use this checklist to ensure proper form:

        • Keep your torso upright
        • Keep knees close together
        • Push hips forward gently
        • Avoid arching your lower back
        • Maintain steady breathing

        Proper form improves flexibility and prevents injury.


        Common Quad Stretch Mistakes

        Pulling Too Hard

        Problem: Can cause strain or discomfort.

        Fix: Stretch gently and with control.

        Arching the Lower Back

        Problem: Reduces effectiveness.

        Fix: Engage your core and keep your spine neutral.

        Knees Flaring Out

        Problem: Reduces quad activation.

        Fix: Keep your knees close together.

        Leaning Forward

        Problem: Reduces stretch quality.

        Fix: Keep your chest upright.

        Holding Breath

        Problem: Increases muscle tension.

        Fix: Breathe slowly and consistently.


        Quad Stretch Variations

        Once you master the basic quad stretch, these variations can improve flexibility further.

        Side-Lying Quad Stretch

        A beginner-friendly and controlled variation.

        How to Do Side-Lying Quad Stretch

        • Lie on your side
        • Grab your top ankle
        • Pull gently toward your glutes

        Kneeling Quad Stretch

        Provides a deeper stretch.

        How to Do Kneeling Quad Stretch

        • Kneel on one knee
        • Grab the ankle of the back leg
        • Push hips forward slowly

        Couch Stretch

        An advanced and intense variation.

        How to Do Couch Stretch

        • Place one foot against a wall or bench
        • Move into a lunge position
        • Keep torso upright and hips forward

        Dynamic Quad Stretch

        Ideal for warm-ups.

        How to Do Dynamic Quad Stretch

        • Perform controlled walking quad stretches
        • Alternate legs
        • Maintain balance and posture

        Final Thoughts

        The quad stretch is one of the most important flexibility exercises you can master.

        It improves:

        • Leg flexibility
        • Hip mobility
        • Recovery
        • Injury prevention
        • Athletic performance

        Progress may feel gradual if your quadriceps are tight. However, with consistent practice, your mobility and movement quality will improve significantly. Learn more about Stretching Here.

        Focus on control and consistency.

        A warrior maintains mobility — not just strength.

        Essential Gear for Quad Stretch

        While the quad stretch requires no equipment, the right gear can improve comfort, support proper form, and help you increase lower-body mobility.

        • Exercise Mat: Cushions your knees during kneeling quad stretch variations.
        • Stretching Strap: Helps you reach your foot comfortably and maintain proper form.
        • Foam Roller: Loosens tight quadriceps before or after stretching.
        • Yoga Blocks: Provide extra support and improve balance during stretches.
        • Resistance Bands: Add light resistance for dynamic quad mobility drills.

        Quad Stretch FAQ

        Q1: How long should I hold a quad stretch?
        Hold each stretch for 15–30 seconds and repeat 2–3 times per leg.

        Q2: When should I do quad stretches?
        Perform static stretches after workouts or during mobility sessions. Dynamic stretches are ideal before exercise.

        Q3: Can quad stretches improve running performance?
        Yes, flexible quadriceps improve movement efficiency and reduce injury risk during running and athletic activity.

          How to Do a Lat Stretch Correctly: Step-by-Step Guide for Beginners

          Learn how to do a lat stretch with perfect form, avoid common mistakes, and discover the best variations to improve upper-body mobility and flexibility.

          The lat stretch is one of the most effective exercises for improving shoulder mobility, reducing upper-body tightness, and enhancing movement efficiency. Whether you are training for military fitness tests, calisthenics, or general fitness, mastering the lat stretch is essential.


          What Is a Lat Stretch?

          A lat stretch is a flexibility exercise designed to lengthen the latissimus dorsi muscles, commonly known as the lats, which are the large muscles along the sides of your back.

          Tight lats can restrict shoulder movement, affect posture, and reduce athletic performance.

          Lat stretches are commonly used in:

          • Warm-up routines
          • Cool-down sessions
          • Mobility and flexibility training
          • Recovery and injury prevention programs

          Unlike strength exercises, lat stretches focus on mobility, flexibility, and muscle recovery.

          Benefits of Lat Stretch

          The lat stretch is essential for maintaining upper-body mobility and posture.

          Benefits include:

          • Improves shoulder and upper-back mobility
          • Reduces muscle tightness and stiffness
          • Enhances overhead movement
          • Supports better posture
          • Helps relieve upper-body tension
          • Aids recovery after pull workouts

          Few stretches are as effective for upper-back flexibility as the lat stretch.

          Muscles Worked in Lat Stretch

          Lat stretches target several upper-body muscles.

          Primary Muscles
          • Latissimus Dorsi (Lats)
          Secondary Muscles
          • Teres Major
          • Rear Deltoids
          • Triceps
          • Upper Back Muscles
          • Shoulder Stabilizers

          This makes the lat stretch highly important for maintaining healthy shoulder function and mobility.


          How to Do a Lat Stretch (Step-by-Step)

          Step 1: Stand Near a Stable Surface

          Stand facing a bench, wall, or sturdy object.

          • Feet shoulder-width apart
          • Core engaged
          • Spine neutral

          Tip: Use a stable surface to maintain balance and control.

          Step 2: Place Your Hands Forward

          Extend your arms and place your hands on the surface.

          • Arms straight
          • Hands shoulder-width apart
          • Shoulders relaxed

          Step 3: Push Your Hips Back

          Slowly push your hips backward while lowering your chest.

          • Keep your back straight
          • Feel the stretch along your sides and upper back

          Step 4: Hold the Stretch

          Maintain the stretch position:

          • Hold for 15–30 seconds
          • Breathe steadily
          • Stay relaxed
          Warrior showcasing How to do a Lat Stretch with proper form

          Step 5: Return Slowly

          Slowly return to the starting position with control.

          Avoid jerking or rushing the movement.


          Lat Stretch Form Checklist

          Use this checklist to ensure proper form:

          • Keep your arms straight
          • Push your hips backward slowly
          • Maintain a neutral spine
          • Avoid shrugging your shoulders
          • Breathe steadily throughout

          Proper form improves flexibility and prevents injury.


          Common Lat Stretch Mistakes

          Rounding the Back

          Problem: Reduces stretch effectiveness.

          Fix: Keep your spine neutral throughout the movement.

          Shrugging the Shoulders

          Problem: Causes tension in the neck.

          Fix: Keep shoulders relaxed and down.

          Bending the Arms

          Problem: Reduces lat engagement.

          Fix: Keep your arms fully extended.

          Overstretching

          Problem: Can cause discomfort or strain.

          Fix: Stretch only to a comfortable level.

          Holding Breath

          Problem: Increases muscle tension.

          Fix: Maintain slow, controlled breathing.


          Lat Stretch Variations

          Once you master the basic lat stretch, these variations can improve mobility further.

          Kneeling Lat Stretch

          A deeper and more controlled variation.

          How to Do Kneeling Lat Stretch

          • Kneel on the ground
          • Place your hands on a bench or chair
          • Push your hips backward slowly

          Wall Lat Stretch

          Great for beginners and mobility work.

          How to Do Wall Lat Stretch

          • Place one hand on a wall
          • Lean your body away
          • Feel the stretch through the side of your back

          Child’s Pose Lat Stretch

          Targets both the lats and lower back.

          How to Do Child’s Pose Lat Stretch

          • Sit back onto your heels
          • Extend your arms forward
          • Lower your chest toward the floor

          Resistance Band Lat Stretch

          Adds controlled tension for deeper stretching.

          How to Do Resistance Band Lat Stretch

          • Hold a resistance band overhead
          • Lean slightly backward or sideways
          • Maintain tension throughout

          Final Thoughts

          The lat stretch is one of the most important mobility exercises you can master.

          It improves:

          • Shoulder mobility
          • Upper-back flexibility
          • Posture
          • Recovery
          • Athletic performance

          Progress may feel gradual if your lats are tight. However, with consistent practice, your mobility and movement quality will improve significantly. Learn more about Stretching Here.

          Focus on control and consistency.

          A warrior maintains mobility — not just strength.

          Essential Gear for Lat Stretch

          While the lat stretch requires little to no equipment, the right gear can help you improve flexibility, increase comfort, and enhance shoulder mobility.

          • Resistance Bands: Add gentle tension for deeper lat stretches and mobility work.
          • Exercise Mat: Provides a comfortable surface for kneeling and floor-based lat stretch variations.
          • Foam Roller: Helps loosen tight lats and upper-back muscles before or after stretching.
          • Yoga Blocks: Support proper positioning during kneeling and floor stretches.
          • Pull-Up Bar: Allows you to perform hanging lat stretches to improve shoulder and back mobility.

          Lat Stretch FAQ

          Q1: How long should I hold a lat stretch?
          Hold each stretch for 15–30 seconds and repeat 2–3 times.

          Q2: When should I do lat stretches?
          Perform static stretches after workouts or during mobility sessions. Dynamic stretches are ideal before training.

          Q3: Can lat stretches improve pull-up performance?
          Yes, improving lat flexibility and shoulder mobility can enhance pulling mechanics and movement efficiency.

            How to Do a Calf Stretch Correctly: Step-by-Step Guide for Beginners

            Learn how to do a calf stretch with perfect form, avoid common mistakes, and discover the best variations to improve flexibility and lower-leg mobility.

            The calf stretch is one of the most effective exercises for improving ankle mobility, reducing muscle tightness, and preventing lower-leg injuries. Whether you are training for military fitness tests, running, or general fitness, mastering the calf stretch is essential.


            What Is a Calf Stretch?

            A calf stretch is a flexibility exercise designed to lengthen the muscles at the back of your lower leg.

            Tight calves can limit ankle mobility, affect performance, and increase the risk of injury.

            Calf stretches are commonly used in:

            • Warm-up routines
            • Cool-down sessions
            • Mobility and flexibility training
            • Injury prevention programs

            Unlike strength exercises, calf stretches improve movement efficiency and recovery.

            Benefits of Calf Stretch

            The calf stretch is essential for lower-leg flexibility and performance.

            Benefits include:

            • Improves calf flexibility
            • Enhances ankle mobility
            • Reduces muscle tightness and stiffness
            • Supports better running and jumping performance
            • Reduces risk of injuries (e.g., strains, cramps)
            • Aids recovery after leg workouts

            Few stretches are as important for lower-leg mobility as the calf stretch.

            Muscles Worked in Calf Stretch

            Calf stretches target key lower-leg muscles.

            Primary Muscles
            • Gastrocnemius
            • Soleus
            Secondary Muscles
            • Achilles Tendon
            • Hamstrings
            • Ankle Stabilizers

            This makes the calf stretch crucial for maintaining lower-body balance and mobility.


            How to Do a Calf Stretch (Step-by-Step)

            Step 1: Stand Facing a Wall

            Stand upright facing a wall with your hands placed against it.

            Tip: Keep your posture straight and core engaged.

            Step 2: Step One Foot Back

            Move one foot backward while keeping the other foot forward.

            • Back leg straight
            • Front knee slightly bent
            • Both feet flat on the ground

            Step 3: Push Into the Wall

            Lean forward slightly and press your hands into the wall.

            • Feel the stretch in the back calf
            • Keep your heel on the ground

            Step 4: Hold the Stretch

            Maintain the position:

            • Hold for 15–30 seconds
            • Breathe steadily
            • Stay relaxed

            Step 5: Switch Legs

            Slowly return to the starting position and repeat on the other leg.

            Warrior showcasing How to do a Calf Stretch

            Calf Stretch Form Checklist

            Use this checklist to ensure proper form:

            • Keep your back leg straight
            • Keep your heel on the ground
            • Lean forward gently
            • Maintain steady breathing
            • Avoid bouncing

            Proper form improves flexibility and prevents injury.


            Common Calf Stretch Mistakes

            Lifting the Heel

            Problem: Reduces stretch effectiveness.

            Fix: Keep your heel firmly on the ground.

            Bending the Back Knee

            Problem: Shifts the stretch away from the calf.

            Fix: Keep the back leg straight (for gastrocnemius stretch).

            Overstretching

            Problem: Can cause strain.

            Fix: Stretch to a comfortable level.

            Bouncing

            Problem: Increases injury risk.

            Fix: Hold the stretch steadily.

            Poor Foot Position

            Problem: Reduces effectiveness.

            Fix: Keep feet pointing forward.


            Calf Stretch Variations

            Once you master the basic calf stretch, these variations can improve flexibility further.

            Bent-Knee Calf Stretch

            Targets the deeper soleus muscle.

            How to Do Bent-Knee Calf Stretch

            • Slightly bend your back knee
            • Keep heel on the ground
            • Lean forward gently

            Seated Calf Stretch

            A controlled and beginner-friendly option.

            How to Do Seated Calf Stretch

            • Sit with legs extended
            • Loop a towel or band around your foot
            • Pull gently toward you

            Stair Calf Stretch

            Increases range of motion.

            How to Do Stair Calf Stretch

            • Stand on the edge of a step
            • Lower your heels downward
            • Hold the stretch

            Dynamic Calf Stretch

            Ideal for warm-ups.

            How to Do Dynamic Calf Stretch

            • Perform controlled ankle movements
            • Rise onto toes and lower down
            • Move smoothly

            Final Thoughts

            The calf stretch is one of the most important flexibility exercises you can master.

            It improves:

            • Lower-leg flexibility
            • Ankle mobility
            • Injury prevention
            • Recovery
            • Athletic performance

            Progress may feel gradual if your calves are tight. However, with consistent practice, your mobility and performance will improve significantly. Learn more about Stretching Here.

            Focus on control and consistency.

            A warrior maintains mobility — not just strength.

            Essential Gear for Calf Stretch

            While the calf stretch requires no equipment, the right gear can make your stretching sessions more comfortable, improve flexibility, and support better lower-leg mobility.

            • Exercise Mat: Cushions your feet and provides a comfortable surface for floor stretches.
            • Stretching Strap: Helps deepen calf stretches while maintaining proper form.
            • Slant Board: Increases ankle range of motion for more effective calf stretching.
            • Foam Roller: Loosens tight calf muscles before or after stretching.
            • Resistance Bands: Add light resistance for calf mobility drills and ankle strengthening.

            Calf Stretch FAQ

            Q1: How long should I hold a calf stretch?
            Hold each stretch for 15–30 seconds and repeat 2–3 times per leg.

            Q2: When should I do calf stretches?
            Perform static stretches after workouts or during mobility sessions. Use dynamic stretches before workouts.

            Q3: Can calf stretches improve running performance?
            Yes, flexible calves improve stride efficiency and reduce injury risk.

              How to Do a Hip Flexor Stretch Correctly: Step-by-Step Guide for Beginners

              Learn how to do a hip flexor stretch with perfect form, avoid common mistakes, and discover the best variations to improve mobility and reduce stiffness.

              The hip flexor stretch is one of the most effective exercises for improving lower-body mobility, reducing tightness, and enhancing movement efficiency. Whether you are training for military fitness tests, running, or general fitness, mastering the hip flexor stretch is essential.


              What Is a Hip Flexor Stretch?

              A hip flexor stretch is a flexibility exercise designed to lengthen the muscles at the front of your hips, which are responsible for lifting your legs and stabilizing your pelvis.

              Tight hip flexors are common due to prolonged sitting and intense training, and they can limit mobility and cause discomfort.

              Hip flexor stretches are commonly used in:

              • Warm-up routines
              • Cool-down sessions
              • Mobility and flexibility training
              • Injury prevention programs

              Unlike strength exercises, hip flexor stretches improve joint mobility and muscle recovery.

              Benefits of Hip Flexor Stretch

              The hip flexor stretch is essential for maintaining lower-body mobility and posture.

              Benefits include:

              • Improves hip flexibility and mobility
              • Reduces muscle tightness and stiffness
              • Enhances stride and movement efficiency
              • Supports better posture and pelvic alignment
              • Reduces the risk of lower back pain
              • Aids recovery after leg workouts

              Few stretches are as important for hip mobility as the hip flexor stretch.

              Muscles Worked in Hip Flexor Stretch

              Hip flexor stretches target several key lower-body muscles.

              Primary Muscles
              • Hip Flexors (Iliopsoas, Rectus Femoris)
              Secondary Muscles
              • Quadriceps
              • Glutes
              • Lower Back Muscles

              This makes the hip flexor stretch crucial for maintaining balanced lower-body function.


              How to Do a Hip Flexor Stretch (Step-by-Step)

              Step 1: Get Into a Lunge Position

              Start in a kneeling lunge position with one knee on the ground and the other foot in front.

              • Front knee bent at 90 degrees
              • Back knee resting on the ground

              Tip: Keep your torso upright.

              Step 2: Engage Your Core

              Tighten your core and keep your spine neutral.

              • Avoid arching your lower back
              • Maintain control

              Step 3: Push Your Hips Forward

              Gently push your hips forward.

              • Feel the stretch in the front of your hip
              • Keep movement controlled

              Step 4: Hold the Stretch

              Maintain the position:

              • Hold for 15–30 seconds
              • Breathe steadily
              • Stay relaxed
              Warrior showcasing How to do a Hip Flexor stretch with proper form

              Step 5: Switch Sides

              Slowly return to the starting position and repeat on the other side.


              Hip Flexor Stretch Form Checklist

              Use this checklist to ensure proper form:

              • Keep your torso upright
              • Engage your core
              • Push hips forward gently
              • Avoid arching your lower back
              • Maintain steady breathing

              Proper form improves mobility and prevents injury.


              Common Hip Flexor Stretch Mistakes

              Arching the Lower Back

              Problem: Reduces effectiveness and causes strain.

              Fix: Keep your core engaged and spine neutral.

              Leaning Forward

              Problem: Shifts the stretch away from the hip flexors.

              Fix: Keep your torso upright.

              Overstretching

              Problem: Can cause discomfort or injury.

              Fix: Stretch to a comfortable level.

              Poor Knee Position

              Problem: Reduces stability.

              Fix: Keep your front knee aligned over your ankle.

              Holding Breath

              Problem: Increases tension.

              Fix: Breathe slowly and consistently.


              Hip Flexor Stretch Variations

              Once you master the basic hip flexor stretch, these variations can further improve flexibility.

              Standing Hip Flexor Stretch

              A simple and accessible variation.

              How to Do Standing Hip Flexor Stretch

              • Stand upright
              • Step one leg backward
              • Push hips forward gently

              Couch Stretch

              A deeper and more intense stretch.

              How to Do Couch Stretch

              • Place your back foot on a bench or wall
              • Move into a lunge position
              • Keep torso upright and push hips forward

              Dynamic Hip Flexor Stretch

              Ideal for warm-ups.

              How to Do Dynamic Hip Flexor Stretch

              • Perform controlled lunges
              • Move in and out of the stretch
              • Maintain proper form

              Elevated Hip Flexor Stretch

              Increases range of motion.

              How to Do Elevated Hip Flexor Stretch

              • Place your front foot on an elevated surface
              • Perform the stretch
              • Maintain control throughout

              Final Thoughts

              The hip flexor stretch is one of the most important mobility exercises you can master.

              It improves:

              • Hip mobility
              • Posture
              • Movement efficiency
              • Injury prevention
              • Athletic performance

              Progress may feel gradual if your hips are tight. However, with consistent practice, your mobility and comfort will significantly improve. Learn more about StretchingHere.

              Focus on control and consistency.

              A warrior maintains mobility — not just strength.

              Essential Gear for Hip Flexor Stretch

              While the hip flexor stretch requires no equipment, the right gear can make your stretching sessions more comfortable, improve stability, and help you progress safely.

              • Exercise Mat: Cushions your knees and provides a comfortable surface for kneeling stretches.
              • Resistance Bands: Add light resistance for advanced hip flexor stretch variations and mobility work.
              • Yoga Blocks: Help improve balance and support proper positioning during stretches.
              • Foam Roller: Loosens tight hip flexors and surrounding muscles before or after stretching.
              • Stretching Strap: Assists with flexibility exercises and helps improve lower-body mobility.

              Hip Flexor Stretch FAQ

              Q1: How long should I hold a hip flexor stretch?
              Hold each stretch for 15–30 seconds and repeat 2–3 times per side.

              Q2: When should I do hip flexor stretches?
              Perform static stretches after workouts or during mobility sessions. Use dynamic versions before workouts.

              Q3: Can hip flexor stretches reduce back pain?
              Yes, improving hip flexibility can reduce strain on the lower back and improve posture.

                How to Do a Hamstring Stretch Correctly: Step-by-Step Guide for Beginners

                Learn how to do a hamstring stretch with perfect form, avoid common mistakes, and discover the best variations to improve flexibility and lower-body mobility.

                The hamstring stretch is one of the most effective exercises for improving flexibility, reducing muscle tightness, and preventing injuries in the lower body. Whether you are training for military fitness tests, running, or general fitness, mastering the hamstring stretch is essential.


                What Is a Hamstring Stretch?

                A hamstring stretch is a flexibility exercise designed to lengthen the hamstring muscles located at the back of your thighs.

                Tight hamstrings can limit mobility, reduce performance, and increase the risk of injury.

                Hamstring stretches are commonly used in:

                • Warm-up routines
                • Cool-down sessions
                • Mobility and flexibility training
                • Injury prevention programs

                Unlike strength exercises, hamstring stretches improve movement efficiency and recovery.

                Benefits of Hamstring Stretch

                The hamstring stretch is essential for lower-body flexibility and performance.

                Benefits include:

                • Improves hamstring flexibility
                • Reduces muscle tightness and stiffness
                • Enhances range of motion
                • Supports better posture
                • Reduces risk of injuries (especially during running)
                • Aids recovery after leg workouts

                Few stretches are as important for lower-body mobility as the hamstring stretch.

                Muscles Worked in Hamstring Stretch

                Hamstring stretches target several lower-body muscles.

                Primary Muscles
                • Hamstrings (Biceps Femoris, Semitendinosus, Semimembranosus)
                Secondary Muscles
                • Calves (Gastrocnemius)
                • Glutes
                • Lower Back Muscles

                This makes the hamstring stretch crucial for maintaining lower-body balance and mobility.


                How to Do a Hamstring Stretch (Step-by-Step)

                Step 1: Stand Tall

                Stand upright with your feet hip-width apart.

                Keep your posture straight and core engaged.

                Step 2: Extend One Leg Forward

                Place one leg slightly in front of you with your heel on the ground and toes pointing upward.

                • Keep the leg straight
                • Maintain balance

                Step 3: Hinge at the Hips

                Slowly bend forward from your hips toward your extended leg.

                • Keep your back straight
                • Avoid rounding your spine

                Step 4: Feel the Stretch

                Lower yourself until you feel a stretch in the back of your thigh.

                • Do not force the movement
                • Keep it controlled

                Step 5: Hold and Switch

                Hold the stretch:

                • 15–30 seconds
                • Breathe steadily

                Then switch to the other leg.

                Warrior showcasing How to do a Hamstring Stretch with proper form

                Hamstring Stretch Form Checklist

                Use this checklist to ensure proper form:

                • Keep your back straight
                • Hinge from your hips, not your lower back
                • Keep your leg straight
                • Move slowly into the stretch
                • Avoid bouncing

                Proper form improves flexibility and prevents injury.


                Common Hamstring Stretch Mistakes

                Rounding the Back

                Problem: Reduces stretch effectiveness.

                Fix: Keep your spine neutral and hinge at the hips.

                Bouncing

                Problem: Increases risk of injury.

                Fix: Hold the stretch steadily.

                Overstretching

                Problem: Can cause muscle strain.

                Fix: Stretch to a comfortable level.

                Bending the Knee

                Problem: Reduces hamstring activation.

                Fix: Keep the leg straight.

                Holding Breath

                Problem: Increases tension.

                Fix: Breathe slowly and consistently.


                Hamstring Stretch Variations

                Once you master the basic hamstring stretch, these variations can improve flexibility further.

                Seated Hamstring Stretch

                A simple and effective variation.

                How to Do Seated Hamstring Stretch

                • Sit on the ground with legs extended
                • Reach toward your toes
                • Keep your back straight

                Lying Hamstring Stretch

                Great for controlled stretching.

                How to Do Lying Hamstring Stretch

                • Lie on your back
                • Lift one leg upward
                • Hold behind your thigh or calf

                Standing Toe Touch Stretch

                A common flexibility exercise.

                How to Do Standing Toe Touch

                • Stand upright
                • Bend forward and reach toward your toes
                • Keep legs straight

                Dynamic Hamstring Stretch

                Ideal for warm-ups.

                How to Do Dynamic Hamstring Stretch

                • Perform controlled leg swings
                • Gradually increase the range of motion
                • Avoid excessive force

                Final Thoughts

                The hamstring stretch is one of the most important flexibility exercises you can master.

                It improves:

                • Lower-body flexibility
                • Range of motion
                • Injury prevention
                • Recovery
                • Athletic performance

                Progress may feel slow if your hamstrings are tight. However, with consistent practice, your flexibility and movement will significantly improve. Learn more about Stretching Here.

                Focus on control and consistency.

                A warrior maintains mobility — not just strength.

                Essential Gear for the Hamstring Stretch

                The right equipment can make hamstring stretches more effective, comfortable, and easier to perform. Here are the essentials every warrior should consider:

                • Yoga Strap: Helps achieve a deeper hamstring stretch.
                • Exercise Mat: Provides comfort for seated and lying variations.
                • Foam Roller: Loosens tight hamstrings before stretching.
                • Resistance Bands: Add gentle tension for dynamic hamstring stretches.
                • Stretching Strap: Assists with controlled flexibility training.

                Explore our Equipment Guides to find the best gear for your training and take your performance to the next level.


                Hamstring Stretch FAQ

                Q1: How long should I hold a hamstring stretch?
                Hold each stretch for 15–30 seconds and repeat 2–3 times per leg.

                Q2: When should I do hamstring stretches?
                Perform static stretches after workouts or during mobility sessions. Use dynamic stretches before workouts.

                Q3: Can hamstring stretches improve running performance?
                Yes, flexible hamstrings improve stride efficiency and reduce injury risk.

                  How to Do a Shoulder Stretch Correctly: Step-by-Step Guide for Beginners

                  Learn how to do a shoulder stretch with perfect form, avoid common mistakes, and discover the best variations to improve mobility and reduce stiffness.

                  The shoulder stretch is one of the most effective exercises for improving shoulder flexibility, reducing tension, and preventing injuries. Whether you are training for military fitness tests, calisthenics, or general fitness, mastering the shoulder stretch is essential.


                  What Is a Shoulder Stretch?

                  A shoulder stretch is a flexibility exercise designed to improve the range of motion in the shoulder joint while reducing muscle tightness.

                  It helps counteract stiffness caused by heavy training, poor posture, and prolonged sitting.

                  Shoulder stretches are commonly used in:

                  • Warm-up routines
                  • Cool-down sessions
                  • Mobility and flexibility training
                  • Injury prevention programs

                  Unlike strength exercises, shoulder stretches focus on mobility, recovery, and joint health.

                  Benefits of Shoulder Stretch

                  The shoulder stretch is essential for maintaining upper-body mobility and preventing injuries.

                  Benefits include:

                  • Improves shoulder flexibility and mobility
                  • Reduces muscle tightness and stiffness
                  • Prevents shoulder injuries
                  • Enhances range of motion
                  • Supports better posture
                  • Aids recovery after upper-body workouts

                  Few exercises are as effective for maintaining healthy shoulders as proper stretching.

                  Muscles Worked in Shoulder Stretch

                  Shoulder stretches target multiple upper-body muscles.

                  Primary Muscles
                  • Deltoids (Anterior, Lateral, Posterior)
                  Secondary Muscles
                  • Trapezius
                  • Rotator Cuff Muscles
                  • Rhomboids
                  • Upper Back Muscles

                  This makes shoulder stretching crucial for overall shoulder health and function.


                  How to Do a Shoulder Stretch (Step-by-Step)

                  Step 1: Stand Tall

                  Stand upright with your feet shoulder-width apart.

                  Keep your posture straight and core engaged.

                  Step 2: Bring Your Arm Across Your Body

                  Lift one arm and bring it across your chest.

                  • Keep the arm straight
                  • Shoulder relaxed
                  • Chest upright

                  Step 3: Support With Opposite Arm

                  Use your opposite hand to gently pull the arm closer to your chest.

                  • Apply light pressure
                  • Avoid jerking movements

                  Step 4: Hold the Stretch

                  Maintain the position:

                  • Hold for 15–30 seconds
                  • Breathe steadily
                  • Stay relaxed

                  Step 5: Switch Sides

                  Slowly release and repeat on the other arm.

                  Warrior showcasing How to do a Shoulder Stretch with proper form

                  Shoulder Stretch Form Checklist

                  Use this checklist to ensure proper form:

                  • Keep your posture upright
                  • Pull your arm gently across your body
                  • Avoid shrugging your shoulders
                  • Maintain steady breathing
                  • Do not force the stretch

                  Proper form improves mobility and prevents injury.


                  Common Shoulder Stretch Mistakes

                  Pulling Too Hard

                  Problem: Can cause strain or injury.

                  Fix: Use gentle, controlled pressure.

                  Shrugging the Shoulder

                  Problem: Reduces stretch effectiveness.

                  Fix: Keep your shoulders relaxed and down.

                  Bending the Arm

                  Problem: Limits muscle stretch.

                  Fix: Keep your arm straight.

                  Twisting the Body

                  Problem: Reduces shoulder isolation.

                  Fix: Keep your torso facing forward.

                  Holding Breath

                  Problem: Increases tension.

                  Fix: Breathe slowly and consistently.


                  Shoulder Stretch Variations

                  Once you master the basic shoulder stretch, these variations can improve mobility further.

                  Overhead Shoulder Stretch

                  Targets upper shoulders and triceps.

                  How to Do Overhead Shoulder Stretch

                  • Raise one arm overhead
                  • Bend the elbow behind your head
                  • Use the opposite hand to gently press the elbow

                  Wall Shoulder Stretch

                  Improves shoulder and chest mobility.

                  How to Do Wall Shoulder Stretch

                  • Place your hand on a wall
                  • Rotate your body away
                  • Feel the stretch across your shoulder

                  Dynamic Shoulder Stretch

                  Ideal for warm-ups.

                  How to Do a Dynamic Shoulder Stretch

                  • Perform arm circles
                  • Keep movements controlled
                  • Gradually increase the range

                  Resistance Band Shoulder Stretch

                  Adds controlled tension.

                  How to Do Resistance Band Shoulder Stretch

                  • Hold a resistance band with both hands
                  • Raise arms overhead and backward
                  • Maintain control throughout

                  Final Thoughts

                  The shoulder stretch is one of the most important exercises for maintaining shoulder health and mobility.

                  It improves:

                  • Flexibility
                  • Range of motion
                  • Injury prevention
                  • Recovery
                  • Overall upper-body performance

                  Progress may feel gradual, especially if your shoulders are tight. However, with consistent stretching, your mobility and comfort will significantly improve. Learn more about Stretching Here.

                  Focus on control and consistency.

                  A warrior maintains mobility — not just strength.

                  Essential Gear for the Shoulder Stretch

                  The right equipment can make shoulder stretches more effective, comfortable, and easier to perform. Here are the essentials every warrior should consider:

                  • Resistance Bands: Add gentle tension for shoulder mobility exercises.
                  • Yoga Strap: Helps achieve a deeper shoulder stretch.
                  • Foam Roller: Loosens tight shoulder and upper back muscles.
                  • Exercise Mat: Provides comfort for floor-based shoulder stretch variations.
                  • Massage Ball: Helps release tight shoulder muscles before stretching.

                  Explore our Equipment Guides to find the best gear for your training and take your performance to the next level.


                  Shoulder Stretch FAQ

                  Q1: How long should I hold a shoulder stretch?
                  Hold each stretch for 15–30 seconds and repeat 2–3 times per side.

                  Q2: When should I do shoulder stretches?
                  You can perform shoulder stretches after workouts or during mobility sessions. Dynamic stretches are ideal before workouts.

                  Q3: Can shoulder stretches prevent injuries?
                  Yes, regular stretching improves mobility and reduces the risk of strains and injuries.

                    How to Do a Chest Stretch Correctly: Step-by-Step Guide for Beginners

                    Learn how to do a chest stretch with perfect form, avoid common mistakes, and discover the best variations to improve flexibility and posture.

                    The chest stretch is one of the most effective exercises for opening up the chest, reducing muscle tightness, and improving posture. Whether you are training for military fitness tests, calisthenics, or general health, mastering the chest stretch is essential.


                    What Is a Chest Stretch?

                    A chest stretch is a flexibility exercise designed to lengthen the chest muscles (pectorals) and relieve tightness caused by poor posture or intense training.

                    This stretch helps counteract the effects of prolonged sitting, push workouts, and forward-rounded shoulders.

                    Chest stretches are commonly used in:

                    • Warm-up routines
                    • Cool-down sessions
                    • Mobility and flexibility training
                    • Rehabilitation and posture correction programs

                    Unlike strength exercises, chest stretches improve mobility and muscle recovery.

                    Benefits of Chest Stretch

                    The chest stretch is one of the most important movements for maintaining upper-body mobility and posture.

                    Benefits include:

                    • Improves chest and shoulder flexibility
                    • Corrects rounded shoulder posture
                    • Reduces muscle tightness and stiffness
                    • Enhances range of motion
                    • Supports better breathing mechanics
                    • Aids recovery after upper-body workouts

                    Few stretches are as effective for posture improvement as the chest stretch.

                    Muscles Worked in the Chest Stretch

                    The chest stretch targets and activates several upper-body muscles.

                    Primary Muscles
                    • Pectoralis Major
                    • Pectoralis Minor
                    Secondary Muscles
                    • Anterior Deltoids
                    • Biceps
                    • Upper Chest Muscles
                    • Shoulder Stabilizers

                    This makes the chest stretch essential for maintaining upper-body mobility and balance.


                    How to Do a Chest Stretch (Step-by-Step)

                    Step 1: Stand Tall Near a Wall or Doorway

                    Stand upright next to a wall or doorway.

                    Place one hand or forearm against the surface at shoulder height.

                    Tip: Keep your posture straight and core engaged.

                    Step 2: Position Your Arm

                    Extend your arm slightly behind your body with your palm against the wall.

                    • Arm at shoulder height
                    • Slight bend in the elbow
                    • Chest open

                    Step 3: Rotate Your Body Away

                    Gently rotate your torso away from your arm.

                    • Feel a stretch across your chest
                    • Keep movement slow and controlled

                    Step 4: Hold the Stretch

                    Maintain the stretch position:

                    • Hold for 15–30 seconds
                    • Breathe steadily
                    • Avoid bouncing

                    Step 5: Switch Sides

                    Slowly release and repeat on the opposite side.

                    Warrior showcasing How to do a Chest Stretch with proper form

                    Chest Stretch Form Checklist

                    Use this checklist to ensure proper form:

                    • Keep your chest open and lifted
                    • Avoid arching your lower back
                    • Move slowly into the stretch
                    • Maintain steady breathing
                    • Do not force the stretch

                    Proper form improves flexibility and prevents injury.


                    Common Chest Stretch Mistakes

                    Overstretching

                    Problem: Can lead to muscle strain.

                    Fix: Stretch to a comfortable level, not pain.

                    Arching the Lower Back

                    Problem: Reduces effectiveness.

                    Fix: Keep your core engaged and spine neutral.

                    Bouncing During Stretch

                    Problem: Increases risk of injury.

                    Fix: Hold the stretch steadily.

                    Poor Arm Position

                    Problem: Limits stretch effectiveness.

                    Fix: Keep your arm aligned with your shoulder.

                    Holding Breath

                    Problem: Reduces relaxation.

                    Fix: Breathe slowly and deeply.


                    Chest Stretch Variations

                    Once you master the basic chest stretch, these variations can further improve your flexibility.

                    Doorway Chest Stretch

                    A highly effective and beginner-friendly variation.

                    How to Do Doorway Chest Stretch

                    • Place both arms on a doorway
                    • Step forward slowly
                    • Stretch both sides of the chest simultaneously

                    Overhead Chest Stretch

                    Targets the upper chest and shoulders.

                    How to Do Overhead Chest Stretch

                    • Raise your arms overhead
                    • Clasp your hands behind your head or back
                    • Gently pull elbows backward

                    Floor Chest Stretch

                    Improves deep chest mobility.

                    How to Do Floor Chest Stretch

                    • Lie face down
                    • Extend one arm outward
                    • Rotate your body away from the arm

                    Dynamic Chest Stretch

                    Great for warm-ups.

                    How to Do Dynamic Chest Stretch

                    • Swing your arms open and closed
                    • Maintain controlled movement
                    • Avoid excessive force

                    Final Thoughts

                    The chest stretch is one of the most important flexibility exercises you can master.

                    It improves:

                    • Chest flexibility
                    • Posture
                    • Shoulder mobility
                    • Recovery
                    • Overall upper-body function

                    Progress may feel gradual, especially if your chest muscles are tight. However, with consistent practice, your flexibility and posture will significantly improve. Learn more about Stretching Here.

                    Focus on control and consistency.

                    A warrior maintains mobility — not just strength.

                    Essential Gear for the Chest Stretch

                    The right equipment can make chest stretches more effective, comfortable, and easier to perform. Here are the essentials every warrior should consider:

                    • Resistance Bands: Add gentle resistance for dynamic chest stretches.
                    • Foam Roller: Helps loosen the chest before stretching.
                    • Yoga Strap: Assists with deeper, controlled stretches.
                    • Exercise Mat: Provides comfort for floor-based chest stretch variations.
                    • Massage Ball: Helps release tight chest muscles before mobility work.

                    Explore our Equipment Guides to find the best gear for your training and take your performance to the next level.


                    Chest Stretch FAQ

                    Q1: How long should I hold a chest stretch?
                    Hold each stretch for 15–30 seconds and repeat 2–3 times per side.

                    Q2: When should I do chest stretches?
                    You can perform chest stretches after workouts or during mobility sessions. Dynamic versions can be used in warm-ups.

                    Q3: Can chest stretches improve posture?
                    Yes, chest stretches help open up tight chest muscles and correct rounded shoulders, improving posture over time.