How to Do a Chest Stretch Correctly: Step-by-Step Guide for Beginners

Learn how to do a chest stretch with perfect form, avoid common mistakes, and discover the best variations to improve flexibility and posture.

The chest stretch is one of the most effective exercises for opening up the chest, reducing muscle tightness, and improving posture. Whether you are training for military fitness tests, calisthenics, or general health, mastering the chest stretch is essential.


What Is a Chest Stretch?

A chest stretch is a flexibility exercise designed to lengthen the chest muscles (pectorals) and relieve tightness caused by poor posture or intense training.

This stretch helps counteract the effects of prolonged sitting, push workouts, and forward-rounded shoulders.

Chest stretches are commonly used in:

  • Warm-up routines
  • Cool-down sessions
  • Mobility and flexibility training
  • Rehabilitation and posture correction programs

Unlike strength exercises, chest stretches improve mobility and muscle recovery.

Benefits of Chest Stretch

The chest stretch is one of the most important movements for maintaining upper-body mobility and posture.

Benefits include:

• Improves chest and shoulder flexibility
• Corrects rounded shoulder posture
• Reduces muscle tightness and stiffness
• Enhances range of motion
• Supports better breathing mechanics
• Aids recovery after upper-body workouts

Few stretches are as effective for posture improvement as the chest stretch.

Muscles Worked in the Chest Stretch

The chest stretch targets and activates several upper-body muscles.

Primary Muscles

• Pectoralis Major
• Pectoralis Minor

Secondary Muscles

• Anterior Deltoids
• Biceps
• Upper Chest Muscles
• Shoulder Stabilizers

This makes the chest stretch essential for maintaining upper-body mobility and balance.


How to Do a Chest Stretch (Step-by-Step)

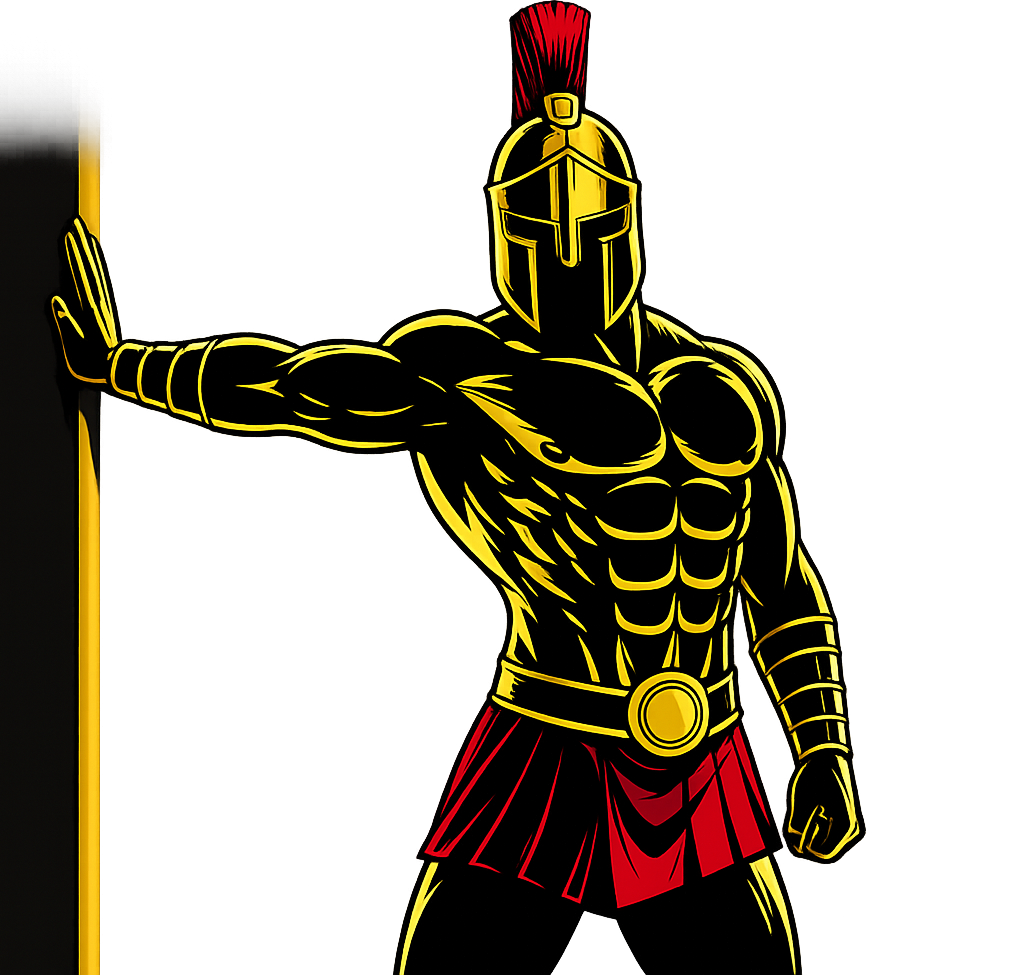
Step 1: Stand Tall Near a Wall or Doorway

Stand upright next to a wall or doorway.

Place one hand or forearm against the surface at shoulder height.

Tip: Keep your posture straight and core engaged.

Step 2: Position Your Arm

Extend your arm slightly behind your body with your palm against the wall.

• Arm at shoulder height
• Slight bend in the elbow
• Chest open

Step 3: Rotate Your Body Away

Gently rotate your torso away from your arm.

• Feel a stretch across your chest
• Keep movement slow and controlled

Warrior showcasing How to do a Chest Stretch with proper form

Step 4: Hold the Stretch

Maintain the stretch position:

• Hold for 15–30 seconds
• Breathe steadily
• Avoid bouncing

Step 5: Switch Sides

Slowly release and repeat on the opposite side.


Chest Stretch Form Checklist

Use this checklist to ensure proper form:

  • Keep your chest open and lifted
  • Avoid arching your lower back
  • Move slowly into the stretch
  • Maintain steady breathing
  • Do not force the stretch

Proper form improves flexibility and prevents injury.


Common Chest Stretch Mistakes

Overstretching

Problem: Can lead to muscle strain.

Fix: Stretch to a comfortable level, not pain.

Arching the Lower Back

Problem: Reduces effectiveness.

Fix: Keep your core engaged and spine neutral.

Bouncing During Stretch

Problem: Increases risk of injury.

Fix: Hold the stretch steadily.

Poor Arm Position

Problem: Limits stretch effectiveness.

Fix: Keep your arm aligned with your shoulder.

Holding Breath

Problem: Reduces relaxation.

Fix: Breathe slowly and deeply.


Chest Stretch Variations

Once you master the basic chest stretch, these variations can improve flexibility further.

Doorway Chest Stretch

A highly effective and beginner-friendly variation.

How to Do Doorway Chest Stretch

• Place both arms on a doorway
• Step forward slowly
• Stretch both sides of the chest simultaneously

Overhead Chest Stretch

Targets the upper chest and shoulders.

How to Do Overhead Chest Stretch

• Raise your arms overhead
• Clasp your hands behind your head or back
• Gently pull elbows backward
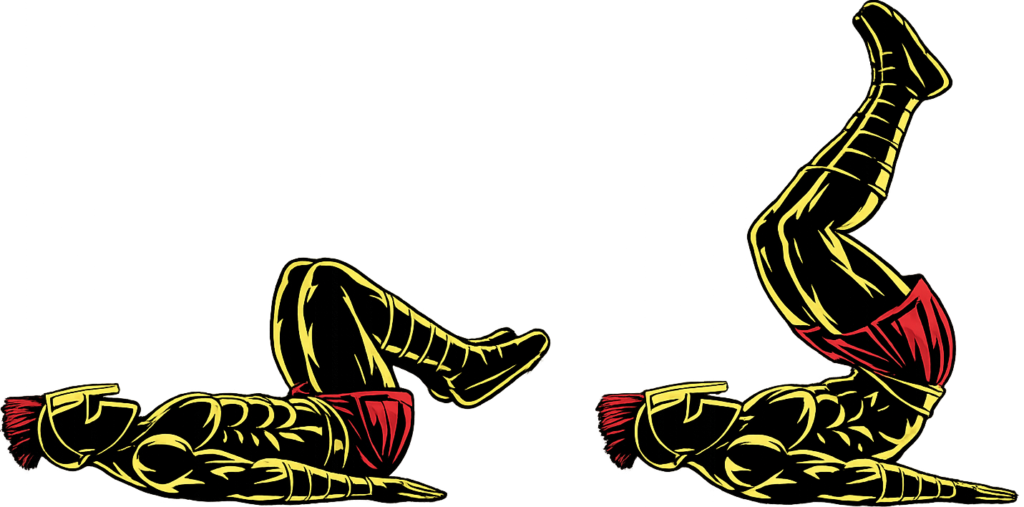
Floor Chest Stretch

Improves deep chest mobility.

How to Do Floor Chest Stretch

• Lie face down
• Extend one arm outward
• Rotate your body away from the arm

Dynamic Chest Stretch

Great for warm-ups.

How to Do Dynamic Chest Stretch

• Swing your arms open and closed
• Maintain controlled movement
• Avoid excessive force


Final Thoughts

The chest stretch is one of the most important flexibility exercises you can master.

It improves:

• Chest flexibility
• Posture
• Shoulder mobility
• Recovery
• Overall upper-body function

Progress may feel gradual, especially if your chest muscles are tight. However, with consistent practice, your flexibility and posture will significantly improve. Learn more about Stretching Here.

Focus on control and consistency.

A warrior maintains mobility — not just strength.


Chest Stretch FAQ

Q1: How long should I hold a chest stretch?
Hold each stretch for 15–30 seconds and repeat 2–3 times per side.

Q2: When should I do chest stretches?
You can perform chest stretches after workouts or during mobility sessions. Dynamic versions can be used in warm-ups.

Q3: Can chest stretches improve posture?
Yes, chest stretches help open up tight chest muscles and correct rounded shoulders, improving posture over time.

    Pull-Ups Hurting Your Hands? Fix This (Beginner Guide)

    Feel pain in your hands or wrists every time you do pull-ups?

    That burning, strain, or discomfort isn’t just “part of training.”

    It’s a problem you can fix—and fast.


    Why Pull-Ups Hurt Your Hands (Real Reasons)

    If your hands or wrists hurt during pull-ups, it’s usually because of:

    • Weak wrist stability
    • Poor grip positioning
    • Excess pressure on joints
    • Lack of support during training

    Most beginners ignore this…

    And that leads to:
    ❌ Pain
    ❌ Slower progress
    ❌ Injury risk


    The Simple Fix (Train Smart, Not Just Hard)

    You don’t need gloves.

    In fact, gloves can:

    • Reduce grip strength
    • Kill natural callus development

    The smarter solution?

    Wrist Wraps (Wrist Bandages)

    They:

    • Support your wrist joint
    • Reduce strain under load
    • Let you keep a natural grip

    Best Wrist Wraps to Fix Hand & Wrist Pain

    1. Elastic Wrist Support Strap (Best for Beginners)

    Why This Works:

    This wrap gives light support while keeping your wrist mobile.

    Key Benefits:

    • Comfortable and breathable
    • Easy to use
    • Adjustable tightness
    • Great for beginners
    Wrist Wrap to fix Pull-Ups hurting your hands

    Best For:

    • Pull-up beginners
    • Light workouts
    • Daily training

    Reality:

    If your wrists hurt slightly, this is all you need.


    2. Heavy-Duty Wrist Wrap Bandage (Best for Strength Training)

    Why This is Better:

    When intensity increases, your wrists need more support.

    This wrap gives:

    • Stronger stabilization
    • Better control during tough sets
    • More durability
    Second Wrist Wrap to fix Pull-Ups hurting your hands

    Best For:

    • Dips and advanced push-ups
    • Heavy training
    • Serious progression

    Which One Should You Choose?

    • Just starting? → Go for the Elastic Wrap
    • Training harder? → Go for Heavy-Duty Wrap

    How to Fix Hand Pain During Pull-Ups

    Follow this:

    Before Training:

    • Warm up wrists (circles, light hangs)

    During Training:

    • Use wrist wraps for support
    • Avoid over-gripping too hard

    After Training:

    • Stretch forearms
    • Let hands recover

    Mistakes That Are Causing Your Pain

    Avoid these:

    ❌ Using gloves instead of building grip
    ❌ Ignoring wrist weakness
    ❌ Training through pain
    ❌ No recovery

    Fix these, and your pain disappears FAST.


    Final Verdict

    If pull-ups are hurting your hands:

    It’s NOT only a strength problem.
    It’s a support-and-technique problem.

    Wrist wraps fix that instantly.


    Final Words

    You don’t need to quit pull-ups.

    You just need to train smarter.

    • Protect your wrists
    • Build real grip strength
    • Stay consistent

    And you’ll progress without pain. If you are struggling to even do one pull-up? Check this guide.

      How to Do Mountain Climbers Correctly: Step-by-Step Guide for Beginners

      Learn how to do mountain climbers with perfect form, avoid common mistakes, and discover the best variations to build a strong core and elite conditioning.

      Mountain climbers are one of the most effective bodyweight exercises for developing core strength, improving cardiovascular endurance, and burning fat. Whether you are training for military fitness tests, calisthenics, or athletic performance, mastering mountain climbers is essential.


      What Are Mountain Climbers?

      Mountain climbers are a dynamic bodyweight exercise performed in a high plank position where you rapidly drive your knees toward your chest in an alternating motion.

      This exercise combines core training with cardio, making it highly effective for full-body conditioning.

      Mountain climbers are commonly used in:

      • Military fitness training
      • HIIT (High-Intensity Interval Training) workouts
      • Fat-loss programs
      • Athletic conditioning

      Unlike static exercises, mountain climbers train both strength and endurance simultaneously.

      Benefits of Mountain Climbers

      Mountain climbers are one of the most powerful exercises for building endurance and core strength.

      Benefits include:

      • Strengthens the core and abs
      • Improves cardiovascular endurance
      • Burns calories and supports fat loss
      • Enhances coordination and agility
      • Builds full-body endurance
      • Essential for military and tactical fitness

      Few exercises combine cardio and strength as effectively as mountain climbers.

      Muscles Worked in Mountain Climbers

      Mountain climbers activate multiple muscle groups across the body.

      Primary Muscles

      • Rectus Abdominis
      • Lower Abdominals
      • Hip Flexors

      Secondary Muscles

      • Shoulders (Deltoids)
      • Chest (Pectorals)
      • Quadriceps
      • Hamstrings
      • Glutes

      This makes mountain climbers a highly effective full-body exercise.


      How to Do Mountain Climbers (Step-by-Step)

      Step 1: Get Into a High Plank Position

      Start in a push-up position with:

      • Hands directly under shoulders
      • Arms fully extended
      • Body in a straight line

      Tip: Engage your core to maintain stability.

      Step 2: Drive One Knee Toward Your Chest

      Bring one knee forward toward your chest.

      • Keep your core tight
      • Avoid lifting your hips too high

      Step 3: Switch Legs Quickly

      Return the leg to the starting position and immediately switch legs.

      • Alternate knees in a running motion
      • Keep movement controlled

      Warrior showcasing How to do Mountain Climbers with proper form

      Step 4: Maintain Proper Form

      Throughout the movement:

      • Keep hips low
      • Maintain a straight body line
      • Engage your core continuously

      Step 5: Control Your Speed

      Perform the exercise at a steady pace.

      Avoid going too fast — proper form is more important than speed.


      Mountain Climbers Form Checklist

      Use this checklist to ensure perfect form:

      Keep your body in a straight line
      Engage your core throughout
      Keep hips low and stable
      Drive your knees toward your chest
      Control your movement

      Perfect form maximizes results and prevents injury.


      Common Mountain Climbers Mistakes

      Hips Too High

      Problem: Reduces core engagement.

      Fix: Keep your body in a straight plank position.

      Moving Too Fast

      Problem: Leads to poor form and less effectiveness.

      Fix: Focus on controlled movement before increasing speed.

      Not Engaging the Core

      Problem: Turns it into a leg exercise.

      Fix: Keep your abs tight throughout.

      Short Range of Motion

      Problem: Limits effectiveness.

      Fix: Bring knees fully toward your chest.

      Bouncing or Sloppy Form

      Problem: Reduces muscle activation.

      Fix: Stay controlled and stable.


      Mountain Climbers Variations

      Once you master basic mountain climbers, these variations can increase intensity and effectiveness.

      Slow Mountain Climbers

      Focuses on control and core strength.

      How to Do Slow Mountain Climbers

      • Perform the movement slowly
      • Hold each knee drive briefly
      • Maintain strict plank form

      Cross-Body Mountain Climbers

      Targets the obliques more effectively.

      How to Do Cross-Body Mountain Climbers

      • Drive your knee toward the opposite elbow
      • Keep your core tight
      • Move in a controlled manner

      Elevated Mountain Climbers

      Increases upper-body involvement.

      How to Do Elevated Mountain Climbers

      • Place hands on an elevated surface
      • Perform standard movement
      • Maintain stability

      Sliding Mountain Climbers (Advanced)

      Adds instability and difficulty.

      How to Do Sliding Mountain Climbers

      • Place feet on sliders or a smooth surface
      • Slide knees toward your chest
      • Control the movement throughout


      Final Thoughts

      Mountain climbers are one of the most effective full-body exercises you can master.

      They build:

      • Core strength
      • Cardiovascular endurance
      • Full-body coordination
      • Fat-burning capacity
      • Functional athletic performance

      Progress may feel challenging at first, especially when maintaining form under fatigue. However, with consistent training and proper technique, your endurance and strength will rapidly improve. Learn more about Conditioning Exercises here.

      Focus on control before speed.

      A warrior moves with precision — even at high intensity.


      Mountain Climbers FAQ

      Q1: How long should beginners do mountain climbers?
      Beginners can start with 20–30 seconds per set and gradually increase to 45–60 seconds.

      Q2: Are mountain climbers good for fat loss?
      Yes, mountain climbers are excellent for burning calories and improving overall conditioning.

      Q3: How often should I do mountain climbers?
      You can train mountain climbers 3–5 times per week as part of your workouts, depending on recovery.

        Best Exercise Mats for Home Workouts (2026) – Train Without Pain

        Training on hard ground?

        Yeah… that’s how you destroy your elbows, knees, and consistency.

        If you’re doing:

        • Push-ups
        • Abs
        • Stretching

        You NEED a proper exercise mat.

        This guide shows you the best options—no fluff.


        Quick Answer (For Fast Decision Makers)

        Want the cheapest option that works?
        Go for the EVA Anti-Slip Yoga Mat

        Want long-term comfort + durability?
        Go for the Foldable TPE Exercise Mat


        Why an Exercise Mat is Non-Negotiable

        Let’s be real:

        Training on bare ground =
        ❌ Pain
        ❌ Slipping
        ❌ Shorter workouts

        A proper mat gives you:

        Joint protection
        Better grip
        More comfort = longer sessions

        Which means better results


        1. EVA Anti-Slip Yoga Mat (Best Budget Pick)

        Key Features:

        • EVA foam cushioning
        • Anti-slip surface
        • Lightweight & portable
        • Beginner-friendly
        First of the Best Exercise Mat for Home Workouts

        Why This is a Smart Start:

        If you’re just starting your journey…

        This mat does everything you need without wasting money.

        Perfect for:

        • Push-ups
        • Sit-ups
        • Stretching

        Pros:

        Very affordable
        Soft enough for basic training
        Easy to carry

        Cons:

        ❌ Not super durable long-term
        ❌ Thinner than premium mats


        2. Foldable TPE Exercise Mat (Best Overall)

        Key Features:

        • High-quality TPE material
        • Double-sided anti-slip grip
        • Foldable design (easy storage)
        • Durable build
        Second of the Best Exercise Mats for Home Workouts

        Why This One Wins:

        This is for people who are serious.

        Better grip = better performance
        Better durability = long-term value

        You can train HARD on this:

        • Push-ups
        • Core workouts
        • Mobility work

        Pros:

        Strong grip (no slipping)
        More comfortable
        Long-lasting

        Cons:

        ❌ Slightly higher price


        Comparison – Choose Smart

        FeatureEVA MatTPE Mat
        PriceLowerHigher
        ComfortGoodBetter
        DurabilityMediumHigh
        GripBasicStrong
        Best ForBeginnersSerious users

        Beginner Setup

        Don’t overcomplicate it. You can click the links below for their guides.

        Start with:

        Train 3–5 times/week

        Consistency > everything.


        Before You Buy

        Make sure:

        • The mat is thick enough for your joints
        • It doesn’t slip on your floor
        • You actually USE it

        Cheap + unused = waste
        Simple + consistent = results


        Final Verdict

        Want cheap & simple?
        Go for EVA Mat

        Want long-term quality?
        Go for TPE Mat


        Final Words

        A mat might seem small…

        But it decides whether you:

        • Train consistently
        • Or quit because of discomfort

        Choose one.

        Start training today.

          How to Do Reverse Crunches Correctly: Step-by-Step Guide for Beginners

          Learn how to do reverse crunches with perfect form, avoid common mistakes, and discover the best variations to build strong, defined lower abs.

          Reverse crunches are one of the most effective bodyweight exercises for targeting the lower abdominal muscles, improving core strength, and enhancing control. Whether you are training for military fitness tests, calisthenics, or athletic performance, mastering reverse crunches is essential.


          What Are Reverse Crunches?

          A reverse crunch is a bodyweight core exercise where you lift your hips off the ground by bringing your knees toward your chest.

          Unlike traditional crunches, reverse crunches emphasize the lower abs rather than the upper abs.

          Reverse crunches are commonly used in:

          • Core strengthening workouts
          • Fat-loss training programs
          • Athletic conditioning
          • Military fitness routines

          This exercise builds real core strength that translates directly into better performance and control.

          Benefits of Reverse Crunches

          Reverse crunches are one of the best exercises for targeting the lower abs.

          Benefits include:

          • Strengthens lower abdominal muscles
          • Improves core control and stability
          • Reduces strain on the neck and upper back
          • Enhances pelvic control
          • Supports better posture
          • Essential for military and tactical fitness

          Few exercises isolate the lower abs as effectively as reverse crunches.

          Muscles Worked in Reverse Crunches

          Reverse crunches activate multiple core muscles.

          Primary Muscles

          • Lower Abdominals
          • Rectus Abdominis

          Secondary Muscles

          • Obliques
          • Hip Flexors
          • Lower Back Stabilizers

          This makes reverse crunches highly effective for building a strong and controlled core.


          How to Do Reverse Crunches (Step-by-Step)

          Step 1: Lie Flat on the Ground

          Lie on your back with your arms by your sides and knees bent at 90 degrees.

          Tip: Keep your lower back pressed into the ground.

          Step 2: Bring Knees Toward Chest

          Lift your feet off the ground and bring your knees toward your chest.

          • Keep movement controlled
          • Core engaged
          • Legs relaxed

          Step 3: Lift Your Hips

          Using your core, lift your hips slightly off the ground.

          Focus on curling your pelvis upward rather than swinging your legs.

          Warrior showcasing How to do Reverse Crunches

          Step 4: Pause at the Top

          At the top of the movement:

          • Hips slightly elevated
          • Core fully engaged
          • Movement controlled

          Pause briefly to maximize muscle activation.

          Step 5: Lower With Control

          Slowly lower your hips back down to the starting position.

          Avoid dropping your legs quickly — control is key.


          Reverse Crunch Form Checklist

          Use this checklist to ensure perfect form:

          Keep your lower back pressed into the ground
          Lift hips using your core, not momentum
          Use slow and controlled reps
          Avoid swinging your legs
          Maintain constant tension on the abs

          Perfect form builds stronger abs and prevents injury.


          Common Reverse Crunch Mistakes

          Using Momentum

          Problem: Swinging the legs reduces core activation.

          Fix: Focus on slow, controlled movement.

          Not Lifting the Hips

          Problem: Turns the exercise into a basic leg raise.

          Fix: Actively curl your pelvis upward.

          Arching the Lower Back

          Problem: Reduces effectiveness and causes strain.

          Fix: Keep your lower back pressed into the ground.

          Fast Reps

          Problem: Reduces muscle engagement.

          Fix: Use a controlled tempo:

          • 1–2 seconds up
          • 2–3 seconds down

          Pulling With Legs Instead of Core

          Problem: Shifts focus away from abs.

          Fix: Initiate movement from your core.


          Reverse Crunch Variations

          Once you master the basic reverse crunch, these variations can increase difficulty and effectiveness.

          Hanging Reverse Crunch

          A more advanced version using a pull-up bar.

          How to Do Hanging Reverse Crunch

          • Hang from a bar with legs extended
          • Bring your knees toward your chest
          • Lift hips slightly upward

          Decline Reverse Crunch

          Increases resistance and range of motion.

          How to Do Decline Reverse Crunch

          • Lie on a decline bench
          • Perform reverse crunch with controlled movement
          • Focus on lifting hips

          Straight-Leg Reverse Crunch

          Adds intensity by keeping legs straight.

          How to Do Straight-Leg Reverse Crunch

          • Keep legs extended
          • Lift hips using core strength
          • Lower slowly with control

          Assisted Reverse Crunch (Beginner Variation)

          Easier version for beginners.

          How to Do Assisted Reverse Crunch

          • Place hands under hips for support
          • Perform a smaller range of motion
          • Focus on control


          Final Thoughts

          Reverse crunches are one of the most effective lower ab exercises you can master.

          They build:

          • Lower ab strength
          • Core stability
          • Pelvic control
          • Functional athletic strength
          • Improved body control

          Progress may feel slow at first, especially when learning to control the movement. However, with consistent training and proper form, your core strength will steadily improve. Learn more about Core Workouts here.

          Focus on control — not speed.

          A warrior trains the core with precision — not momentum.


          FAQ

          Q1: Are reverse crunches better than regular crunches?
          Reverse crunches are better for targeting the lower abs, while regular crunches focus more on the upper abs. Both have their place in a complete core routine.

          Q2: How many reverse crunches should beginners do?
          Beginners can start with 10–15 reps per set and gradually increase as strength improves.

          Q3: How often should I do reverse crunches?
          You can train reverse crunches 3–5 times per week as part of your core routine, depending on recovery.

            Best Dip Bars for Home Workouts (2026) – Build Real Strength Fast

            Want a stronger chest, bigger triceps, and real upper body power…

            Without a gym?

            Then you need dip bars.

            But here’s the problem:

            Most beginners either:

            • Buy unstable cheap bars
            • Or overpay for something they don’t need

            This guide fixes that.


            Quick Answer (Don’t Waste Time)

            Want the best budget option?
            Go for Non-Slip Push-Up/Dip Bars

            Want serious strength training?
            Go for Wooden Parallettes


            Why Dip Bars Are a Game-Changer

            Dip bars let you train:

            • Chest (deep stretch = better growth)
            • Triceps (key for pushing strength)
            • Shoulders
            • Core (L-sits, stability)

            All from home.


            1. Non-Slip Push-Up/Dip Bars (Best Budget Pick)

            Key Features:

            • Steel + plastic build
            • Non-slip foam grips
            • Lightweight and portable
            • Multi-angle push-up support
            First of the Best Dip Bars for Home Workouts

            Why This is a Smart Start:

            If you’re just starting…

            This gives you everything you need without spending big.

            Perfect for:

            • Push-ups
            • Assisted dips
            • Core work

            Pros:

            Affordable
            Easy to use anywhere
            Comfortable grip

            Cons:

            ❌ Less stable for advanced training
            ❌ Limited long-term progression


            2. Wooden Parallettes Dip Bars (Best Overall)

            Key Features:

            • Solid wood construction
            • 300KG weight capacity
            • Non-slip base
            • Ergonomic grip
            Second of the Best Dip Bars for Home Workouts

            Why This One Wins:

            This is for serious training.

            More stability
            More control
            More progression

            You can do:

            • Dips
            • L-sits
            • Planche work
            • Handstand training

            Pros:

            Extremely durable
            Stable and strong
            Premium feel

            Cons:

            ❌ Slightly more expensive
            ❌ Less portable


            Comparison – Choose Your Level

            FeatureBudget BarsWooden Bars
            PriceLowerHigher
            StabilityMediumHigh
            DurabilityGoodExcellent
            Best ForBeginnersSerious users

            Beginner Plan

            Don’t just buy—use it properly.

            Start with:

            Train 3–4 times/week
            Focus on form first


            Before You Buy

            Make sure:

            • Surface is flat (no wobbling)
            • Grip feels comfortable
            • You’ll actually use it consistently

            Equipment doesn’t build strength—YOU do.


            Final Verdict

            Want cheap & simple?
            Go for Non-Slip Dip Bars

            Want long-term strength & progression?
            Go for Wooden Parallettes


            Final Words

            You don’t need machines.

            You don’t need a gym.

            You need:

            • The right tool
            • Consistency
            • Discipline

            Pick your bars.

            Start training.

              What Is a Warrior Body? The Ultimate Guide to Building Strength, Power, and Discipline

              In a world obsessed with aesthetics, the idea of a “warrior body” stands apart. It’s not just about looking muscular—it’s about building a body that is strong, resilient, agile, and capable under pressure. A warrior’s body reflects discipline, endurance, and functional power—the kind of physique that performs just as well as it looks.

              Whether your goal is to dominate physical challenges, prepare for military-level fitness, or simply become the strongest version of yourself, this guide will show you exactly what a warrior body is, why it matters, and how to build one.


              What Is a Warrior Body?

              A warrior body is a physique built for performance, durability, and real-world strength, not just appearance.

              Key Characteristics of a Warrior Body

              • Functional Strength – Ability to lift, carry, push, and pull efficiently
              • Endurance – Stamina to sustain effort over long periods
              • Agility & Speed – Quick, explosive movement
              • Lean Muscle Mass – Muscular but not bulky; optimized for performance
              • Mental Toughness – Discipline, resilience, and the ability to push through discomfort

              Unlike bodybuilding physiques, which prioritize size and symmetry, a warrior body is about capability over cosmetics.

              A Warrior body achieved on the Path of a Warrior

              Warrior Body vs Aesthetic Body

              FeatureWarrior BodyAesthetic Body
              FocusPerformance & functionAppearance & symmetry
              Training StyleFunctional, athleticIsolation & hypertrophy
              Body FatLow to moderateVery low
              StrengthHigh, practicalModerate
              EnduranceHighOften low

              A warrior body doesn’t just look powerful—it is powerful.


              Why You Should Build a Warrior Body

              1. Real-World Strength

              You’ll be able to handle physical challenges—lifting, running, climbing, and fighting fatigue.

              2. Military-Level Fitness

              If you’re preparing for elite forces or physically demanding careers, this is the ideal physique.

              3. Injury Resistance

              Stronger muscles, joints, and connective tissue reduce your risk of injury.

              4. Mental Discipline

              Training like a warrior builds grit, consistency, and self-control.

              5. Balanced Physique

              You won’t just look good—you’ll move better, feel stronger, and perform at your peak.


              How to Build a Warrior Body

              1. Train for Strength AND Endurance

              A warrior trains for both power and stamina.

              Focus on:

              • Push-ups, pull-ups, dips
              • Squats, lunges, deadlifts
              • Sprinting and long-distance running
              • Loaded carries (using backpack weights)

              Goal: Be strong enough to lift your bodyweight and endure long physical effort.

              2. Master Bodyweight Training

              Bodyweight exercises are the foundation of a warrior physique.

              Core movements:

              • Pull-ups
              • Push-ups
              • Planks
              • Burpees
              • Hanging leg raises

              These develop relative strength, which is crucial for agility and control.

              3. Build Explosive Power

              A warrior must be fast and explosive.

              Include:

              • Sprint intervals
              • Jump squats
              • Box jumps
              • Hill sprints

              Goal: Develop speed and reaction ability.

              4. Develop Endurance

              Endurance separates average from elite.

              Train with:

              • Long-distance running
              • Circuit training
              • High-intensity interval training (HIIT)

              Goal: Perform under fatigue without breaking.

              5. Follow a Warrior Diet

              Fuel your body for performance, not just size.

              Eat:

              • Lean proteins (chicken, eggs, lentils)
              • Complex carbs (rice, oats, potatoes)
              • Healthy fats (nuts, olive oil)
              • Plenty of water

              Avoid:

              • Junk food
              • Excess sugar
              • Overeating

              Rule: Eat to perform, not just to look good.

              6. Train Your Mind

              A warrior body is incomplete without a warrior mindset.

              Develop:

              • Discipline (train even when you don’t feel like it)
              • Consistency (show up daily)
              • Resilience (push through discomfort)

              Mental toughness is what turns training into transformation.


              Sample Weekly Warrior Training Structure

              Day 1: Strength + Core
              Day 2: Running + Sprints
              Day 3: Upper Body + Pull Focus
              Day 4: HIIT + Conditioning
              Day 5: Lower Body + Explosiveness
              Day 6: Long Run / Endurance
              Day 7: Rest or Active Recovery


              Common Mistakes to Avoid

              • ❌ Training only for aesthetics
              • ❌ Ignoring endurance
              • ❌ Skipping recovery
              • ❌ Poor nutrition
              • ❌ Inconsistency

              Final Thoughts

              A warrior body is not built overnight. It is forged through discipline, struggle, and relentless effort. It’s not about looking like a warrior—it’s about becoming one.

              If you commit to the process—training hard, eating right, and staying consistent—you won’t just transform your body. You’ll transform your mindset, your confidence, and your entire life. Learn more about The Mind and Body relationhere.


              Ready to Begin?

              Start your journey today. Train like a warrior. Eat like a warrior. Think like a warrior.

              Because warriors aren’t born—they’re built.

                Can’t Do Pull-Ups? Fix It Fast (Beginner Guide)

                Struggling to do even ONE pull-up?

                You’re not alone.

                Most beginners fail at pull-ups not because they’re lazy—but because they’re missing one thing:

                • Progressive strength training

                The good news?
                You don’t need a gym, machines, or years of training.

                You need the right method.


                Why You Can’t Do Pull-Ups (The Real Reasons)

                If you can’t do a pull-up yet, it usually comes down to:

                • Weak back muscles (lats)
                • Poor grip strength
                • Lack of pulling practice
                • Bodyweight too heavy (for current strength)

                Doing random attempts won’t fix this.

                You need assisted progression.


                The Fastest Way to Fix It (Beginner Method)

                Here’s the smartest way to build your first pull-up:

                Step 1: Use Assisted Pull-Ups

                Step 2: Train 3–4 times per week

                Step 3: Gradually reduce assistance

                And the BEST tool for this?

                Resistance Bands


                Best Resistance Bands to Fix Pull-Ups

                1. Heavy Duty Resistance Band (Best for Beginners)

                Why This Works:

                This band helps “lift” part of your bodyweight, making pull-ups easier.

                Key Benefits:

                • Perfect for beginners
                • Lightweight and portable
                • Multiple resistance levels
                • Great for learning proper form
                can’t do pull-ups, here is one of the best resistance bands for a fix

                Best For:

                • First pull-up
                • Weak beginners
                • Home workouts

                Reality:

                If you can’t do a pull-up yet, this is your starting point.


                2. Heavy Duty Latex Resistance Band (Best for Progression)

                Why This is Better Long-Term:

                As you get stronger, you’ll need less assistance.

                This band gives you:

                • More resistance options
                • Better durability
                • Long-term progression
                can’t do pull-ups, here is another Resistance band for a quick fix

                Best For:

                • Beginners → Intermediate
                • Full-body strength training
                • Gradual overload

                Which One Should You Choose?

                • On a tight budget? → Go for the first band
                • Serious about progress? → Go for the latex band

                How to Train for Your First Pull-Up

                Follow this simple plan:

                Day 1–4 Training:

                Goal:

                • Reduce band support over time
                • Build strength gradually

                Bonus: Mistakes That Are Holding You Back

                Avoid these:

                ❌ Trying full pull-ups too early
                ❌ Training randomly
                ❌ Ignoring grip strength
                ❌ No consistency

                Fix these, and you WILL get your first pull-up.


                Final Verdict

                Here’s the truth:

                You don’t need expensive equipment.

                You don’t need a gym.

                You need a system.

                And resistance bands give you exactly that.


                Final Words

                Your first pull-up isn’t about talent.

                It’s about:

                • Consistency
                • Smart progression
                • The right tools

                Start today.

                And don’t stop until you get that first rep.

                  Best Pull-Up Bars for Home Workouts (2026) – Build Real Strength Fast

                  If you’re serious about building a strong back, powerful arms, and real grip strength…

                  You need ONE thing:

                  A pull-up bar.

                  No gym. No excuses.

                  But here’s the problem:

                  Most beginners either:

                  • Buy the wrong bar
                  • Or never start because they’re confused

                  This guide fixes that.


                  Quick Answer (Don’t Overthink It)

                  Want the BEST overall setup?
                  Go for the Wall-Mounted Pull-Up Bar with Rings
                  (More exercises = faster progress)

                  Want something simple and strong?
                  Go for the Classic Wall-Mounted Pull-Up Bar


                  Why a Pull-Up Bar is Non-Negotiable

                  A pull-up bar builds:

                  • Back (lats = V-shape)
                  • Arms (biceps + forearms)
                  • Grip strength (critical for SSG-level strength)
                  • Core stability

                  And the best part?

                  You can train every day at home


                  1. Wall-Mounted Pull-Up Bar with Rings (Best Overall)

                  Key Features:

                  • Heavy-duty steel construction
                  • Adjustable width
                  • Includes resistance rings (BIG advantage)
                  • Wall-mounted = maximum stability
                  Photo of One of the best Pull-up Bars for Home Workouts

                  Why This One Wins:

                  This is not just a bar.

                  It’s a complete calisthenics setup

                  With rings, you unlock:

                  • Ring rows
                  • Hanging leg raises
                  • Core work
                  • Advanced holds

                  This means faster strength gains compared to a basic bar.

                  Pros:

                  Extremely stable
                  More exercises (huge advantage)
                  Long-term investment

                  Cons:

                  ❌ Requires wall installation
                  ❌ Not portable


                  2. Classic Wall-Mounted Pull-Up Bar (Simple & Strong)

                  Key Features:

                  • Strong steel frame
                  • Minimal design
                  • Built for pull-ups & chin-ups
                  Photo of Second Best Pull-up Bars for Home Workouts

                  Why Choose This:

                  If you want:

                  “Just give me a solid bar that works.”

                  This is it.

                  No extras. No distractions.

                  Pros:

                  Strong and reliable
                  Clean setup
                  Great for beginners

                  Cons:

                  ❌ No rings (less versatility)
                  ❌ Requires installation


                  Comparison – Choose Your Weapon

                  FeatureBar with RingsClassic Bar
                  VersatilityHighMedium
                  ExercisesFull-bodyPull-ups only
                  StabilityExcellentExcellent
                  Best ForSerious trainingBeginners

                  Beginner Plan

                  Listen carefully—this is where most people fail.

                  Even with the BEST bar, you won’t progress if you don’t train smart.

                  Start with:

                  Train 3–4 times/week

                  That’s it.


                  Important Buying Advice

                  Before you click:

                  Make sure:

                  • Your wall is strong enough (concrete/brick preferred)
                  • You have space for full hanging movement
                  • You actually plan to use it (discipline > equipment)

                  Final Verdict

                  Want maximum results?
                  Go for Bar with Rings

                  Want simple & effective?
                  Go for Classic Bar


                  Final Words

                  You don’t need a gym.

                  You don’t need fancy machines.

                  You need:

                  • A pull-up bar
                  • Consistency
                  • Discipline

                  Install it.

                  Start today.

                    Fat-Loss Nutrition: What, How & When to Eat for Maximum Results

                    Fuel Like a Warrior. Burn Fat. Build Strength.


                    Introduction

                    Training is only half the battle.
                    If your nutrition is weak, your results will be weak.

                    Fat loss doesn’t come from starving yourself—it comes from strategic fueling that forces your body to burn fat while preserving (and even building) muscle.

                    This is your complete guide to eating like a warrior.


                    1. The Golden Rule of Fat Loss

                    To lose fat, you must be in a calorie deficit.

                    That means:

                    • You burn more calories than you consume

                    But here’s where most people fail…

                    They cut calories too aggressively → lose muscle → slow metabolism → look worse.

                    Warrior Rule:
                    Lose fat. Keep muscle. Stay strong.


                    2. What to Eat

                    Protein (Your #1 Weapon)

                    Protein preserves muscle and increases fat loss.

                    Best Sources:

                    • Eggs
                    • Chicken
                    • Beef
                    • Fish
                    • Daal (lentils)
                    • Yogurt

                    Target:
                    1.6 – 2.2g per kg bodyweight daily

                    Carbohydrates (Fuel for Performance)

                    Carbs are NOT the enemy—they fuel your workouts.

                    Best Sources:

                    • Rice
                    • Roti
                    • Oats
                    • Potatoes
                    • Fruits

                    Rule:
                    Eat carbs around training, not all day.

                    Fats (Hormone Control)

                    Healthy fats keep your body functioning properly.

                    Sources:

                    • Nuts
                    • Olive oil
                    • Egg yolks

                    Keep moderate—not excessive.


                    3. How to Eat (Structure & Strategy)

                    The Perfect Plate Method

                    Each meal should look like:

                    • 40% Protein
                    • 30% Carbs
                    • 30% Vegetables/Fats

                    Meal Frequency

                    You don’t need 6 meals a day.

                    3–4 solid meals are enough

                    Consistency matters more than timing.

                    Hydration Rule

                    • 3–4 liters of water daily
                    • More if you train hard

                    Dehydration slows fat loss.


                    4. Whento Eat (Timing for Maximum Fat Loss)

                    Pre-Workout (1–2 Hours Before)

                    • Protein + Carbs
                    • Example: Eggs + roti OR chicken + rice

                    Fuel your battle.

                    Post-Workout (Within 1 Hour)

                    • Protein + fast-digesting carbs

                    Example:

                    • Chicken + rice
                    • Eggs + toast

                    Recover and rebuild.

                    Night Eating

                    • Light protein-based meal
                    • Avoid heavy carbs late at night

                    5. Fat-Loss Mistakes (Avoid These)

                    ❌ Starving yourself
                    ❌ Skipping protein
                    ❌ Drinking calories (soft drinks, juices)
                    ❌ Eating junk “in moderation” (it adds up)
                    ❌ No consistency


                    6. Sample Fat-Loss Diet Plan

                    Meal 1 (Breakfast)

                    • 3 Eggs
                    • 1 Roti
                    • Tea (no sugar)

                    Meal 2 (Lunch)

                    • Chicken + Rice
                    • Salad

                    Meal 3 (Pre/Post Workout)

                    • Banana
                    • Yogurt OR Eggs

                    Meal 4 (Dinner)

                    • Chicken or Daal
                    • Vegetables

                    7. Supplements (Optional, Not Required)

                    • Whey Protein (only if needed)
                    • Black Coffee (pre-workout boost)

                    Supplements don’t replace discipline.


                    8. The Warrior Formula

                    Fat loss comes down to:

                    • Calorie deficit
                    • High protein
                    • Consistent training
                    • Discipline

                    No shortcuts. No magic pills.


                    Final Word

                    Anyone can train hard.
                    Few can eat with discipline.

                    That’s why most people stay the same.

                    Control your diet… and you control your body. Learn more about Nutritionhere.