How to Do Calf Raises Correctly: Step-by-Step Guide for Beginners

Learn how to do calf raises with perfect form, avoid common mistakes, and discover the best variations to build powerful lower legs.

Calf raises are one of the most effective exercises for developing stronger calves, improving ankle stability, and enhancing athletic performance. Whether you are training for military fitness tests, sports performance, or general fitness, mastering calf raises is essential.


What Are Calf Raises?

A calf raise is a lower-leg exercise where you lift your heels off the ground by pushing through the balls of your feet, then slowly lower yourself back down.

The calf raise is considered one of the best exercises for strengthening the calves and improving lower-leg endurance.

Calf raises are commonly used in:

  • Military fitness training
  • Strength and conditioning programs
  • Running and athletic performance training
  • Rehabilitation and injury prevention routines

Unlike many machine exercises, calf raises develop functional strength that improves jumping, sprinting, and everyday movement.

Benefits of Calf Raises

Calf raises are one of the most effective exercises for developing strong and resilient lower legs.

Benefits include:

• Builds stronger calves
• Improves ankle stability and mobility
• Enhances running and jumping performance
• Increases lower-leg endurance
• Reduces the risk of ankle injuries
• Supports balance and coordination

Few exercises target the calves as effectively as calf raises.

Muscles Worked in Calf Raises

Calf raises activate several lower-leg muscles simultaneously.

Primary Muscles

• Gastrocnemius
• Soleus

Secondary Muscles

• Tibialis Posterior
• Peroneal Muscles
• Foot Stabilizers
• Achilles Tendon Complex

Because of this muscle activation, calf raises are one of the best exercises for developing lower-leg strength and endurance.


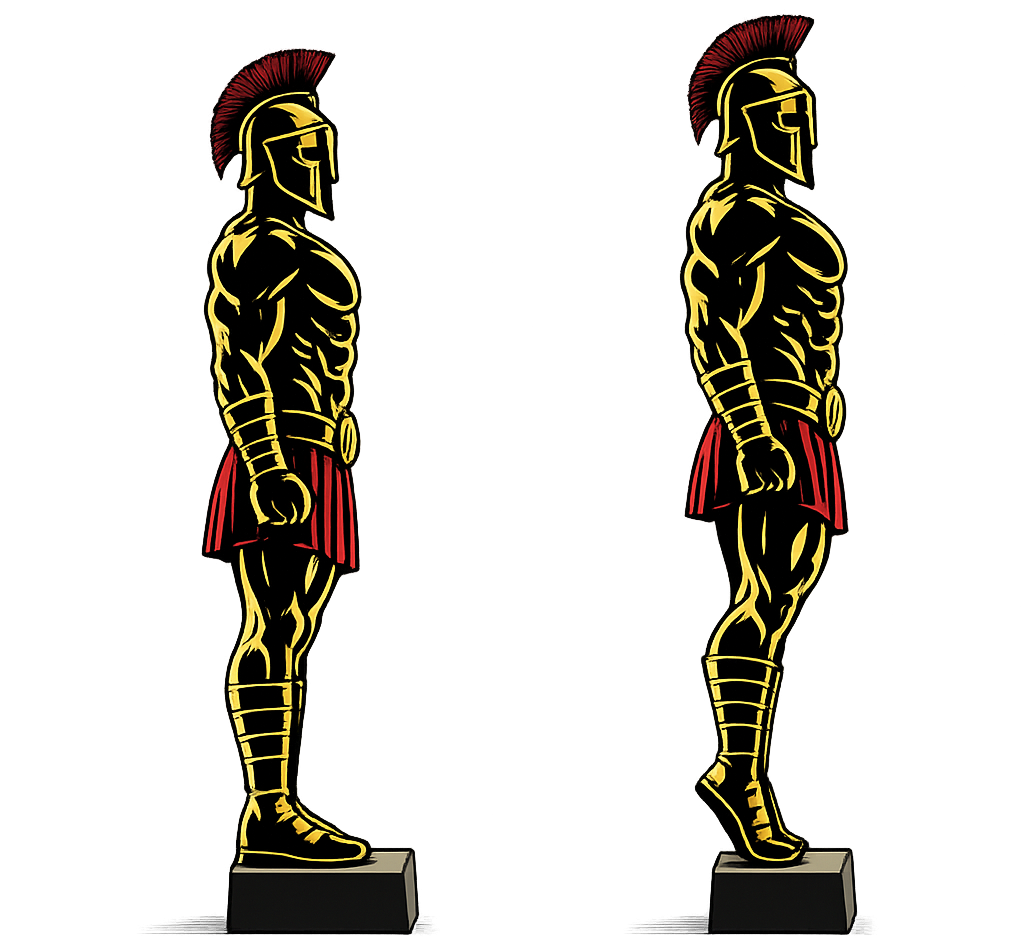
How to Do Calf Raises (Step-by-Step)

Step 1: Stand Tall

Begin with:

• Feet shoulder-width apart
• Toes pointing forward
• Chest upright
• Core engaged

Tip: Stand near a wall or sturdy object if you need assistance with balance.

Step 2: Set Your Position

Before lifting:

• Keep your knees slightly bent or straight
• Distribute your weight evenly
• Maintain good posture

This creates a stable foundation.

Step 3: Rise Onto Your Toes

Push through the balls of your feet and raise your heels as high as possible.

Focus on:

• Contracting your calf muscles
• Keeping movements smooth
• Maintaining balance

Step 4: Pause at the Top

At the highest position:

• Heels are elevated
• Calves are fully contracted
• Body remains upright

Pause briefly to maximize muscle activation.

Warrior showcasing How to do Calf Raises with proper form

Step 5: Lower Slowly

Lower your heels back to the ground under control.

Avoid bouncing or dropping quickly.

Repeat for the desired number of repetitions.


Calf Raise Form Checklist

Use this quick checklist to ensure perfect calf raise form.

  • Keep your body upright
  • Push through the balls of your feet
  • Raise your heels as high as possible
  • Pause briefly at the top
  • Lower with control

Perfect form builds strength faster and prevents injury.


Common Calf Raise Mistakes

Using Momentum

Problem: Reduces calf activation.

Fix: Perform every repetition slowly and under control.

Bouncing at the Bottom

Problem: Places unnecessary stress on the Achilles tendon.

Fix: Lower smoothly and avoid rebounding.

Incomplete Range of Motion

Problem: Limits muscle development.

Fix: Fully raise and lower your heels during each rep.

Leaning Forward Excessively

Problem: Affects balance and posture.

Fix: Keep your chest upright throughout the movement.

Rushing the Exercise

Problem: Reduces effectiveness.

Fix: Focus on controlled repetitions and proper contractions.

Quality reps always beat rushed reps.


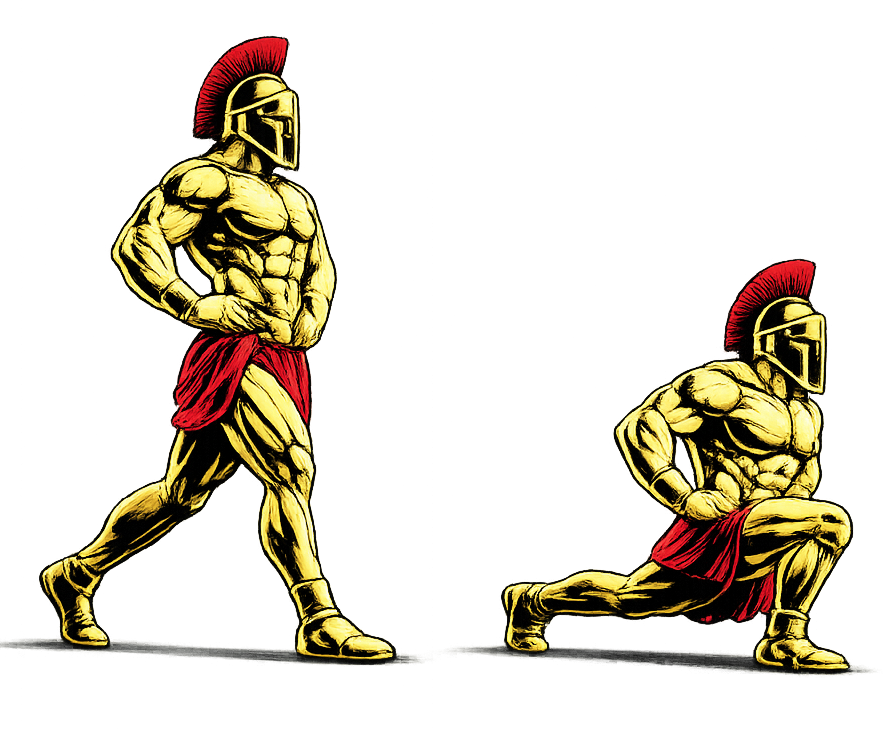
Calf Raise Variations

Once you master the basic calf raise, different variations can help build strength and increase difficulty.

Single-Leg Calf Raises

Improves balance and unilateral strength.

How to Do Single-Leg Calf Raises

• Lift one foot off the ground
• Raise yourself using the opposite leg
• Lower under control and switch sides

This variation helps correct strength imbalances.

Elevated Calf Raises

Increases range of motion.

How to Do Elevated Calf Raises

• Stand on the edge of a step or platform
• Allow your heels to drop below the step
• Raise your heels as high as possible

This variation provides a deeper stretch and greater muscle activation.

Seated Calf Raises

Places greater emphasis on the soleus muscle.

How to Do Seated Calf Raises

• Sit on a bench or chair
• Place feet flat on the ground
• Raise and lower your heels under control

This variation improves lower-leg endurance.

Weighted Calf Raises

Adds resistance for increased strength gains.

How to Do Weighted Calf Raises

• Hold dumbbells or wear a weighted vest
• Perform the movement normally
• Maintain perfect form throughout

This variation is excellent for building stronger calves.


Final Thoughts

The calf raise is one of the most effective exercises you can master for developing powerful lower legs.

It builds:

• Calf strength
• Lower-leg endurance
• Ankle stability
• Athletic performance
• Balance and coordination

Progress may feel slow because the calves are highly endurance-oriented muscles. However, with consistent training and proper form, your lower-leg strength and resilience will steadily improve. Learn more about Leg Workouts here.

One controlled rep is always better than several sloppy reps.

Focus on quality repetitions, full range of motion, and controlled movement.

A warrior stands strongest from the ground up.


Calf Raise FAQ

Q1: How many calf raises should a beginner do?
Most beginners can start with 15–20 repetitions per set while focusing on proper form and controlled movement.

Q2: Are calf raises good for runners?
Yes. Calf raises help improve ankle strength, lower-leg endurance, and running performance while reducing injury risk.

Q3: How often should I do calf raises?
You can train calf raises 2–6 times per week depending on your recovery and overall training volume.

    How to Do Lying Leg Raises Correctly: Step-by-Step Guide for Beginners

    Learn how to do lying leg raises with perfect form, avoid common mistakes, and discover the best variations to build real core strength.

    Lying leg raises are one of the most effective bodyweight exercises for developing strong lower abs, improving hip control, and enhancing core stability. Whether you are training for military fitness tests, athletic performance, or general fitness, mastering the lying leg raise is essential.


    What Are Lying Leg Raises?

    A lying leg raise is a bodyweight exercise where you lie flat on your back and raise your legs upward while keeping them straight.

    The exercise is considered one of the best movements for targeting the lower abdominal muscles and strengthening the hip flexors.

    Lying leg raises are commonly used in:

    • Military fitness training
    • Strength and conditioning programs
    • Athletic performance routines
    • Core strengthening workouts

    Unlike traditional crunches, lying leg raises emphasize the lower portion of the abdominal muscles while improving overall core control.

    Benefits of Lying Leg Raises

    Lying leg raises are one of the most effective exercises for developing core strength.

    Benefits include:

    • Strengthens the lower abdominal muscles
    • Improves hip flexor strength
    • Enhances core stability
    • Develops muscular endurance
    • Supports athletic performance
    • Requires no equipment

    Few exercises target the lower abs as effectively as lying leg raises.

    Muscles Worked in Lying Leg Raises

    Lying leg raises activate several core muscles simultaneously.

    Primary Muscles
    • Lower Rectus Abdominis
    • Hip Flexors
    Secondary Muscles
    • Obliques
    • Transverse Abdominis
    • Quadriceps
    • Lower Back Stabilizers

    Because of this muscle activation, lying leg raises are one of the best exercises for developing lower-core strength.


    How to Do Lying Leg Raises (Step-by-Step)

    Step 1: Lie Flat on Your Back

    Begin with:

    • Legs fully extended
    • Arms at your sides or under your hips
    • Head resting comfortably

    Tip: Press your lower back into the floor throughout the exercise.

    Step 2: Engage Your Core

    Before lifting:

    • Tighten your abdominal muscles
    • Keep your legs together
    • Maintain a neutral neck position

    This creates a stable starting position.

    Step 3: Raise Your Legs

    Lift both legs upward while keeping them straight.

    Focus on:

    • Moving slowly and under control
    • Keeping your lower back pressed into the floor
    • Avoiding momentum

    Raise your legs until they are nearly perpendicular to the ground.

    Step 4: Pause at the Top

    At the highest position:

    • Legs remain straight
    • Core stays engaged
    • Lower back remains stable

    Pause briefly to maximize muscle activation.

    Step 5: Lower Slowly

    Lower your legs back toward the floor under control.

    Avoid letting your feet touch the ground between repetitions.

    Repeat for the desired number of repetitions.

    Warrior showcasing How to do lying leg raises with proper form

    Lying Leg Raise Form Checklist

    Use this quick checklist to ensure perfect form.

    • Keep your legs straight
    • Maintain a tight core
    • Press your lower back into the floor
    • Lower your legs slowly
    • Avoid using momentum

    Perfect form builds strength faster and prevents injury.


    Common Lying Leg Raise Mistakes

    Arching the Lower Back

    Problem: Places excessive stress on the spine.

    Fix: Keep your lower back pressed firmly into the floor.

    Using Momentum

    Problem: Reduces abdominal activation.

    Fix: Perform each repetition slowly and under control.

    Bending the Knees Excessively

    Problem: Reduces exercise difficulty and effectiveness.

    Fix: Keep your legs as straight as possible.

    Lowering Too Quickly

    Problem: Decreases muscle engagement.

    Fix: Control the negative phase of the movement.

    Holding Your Breath

    Problem: Reduces endurance and stability.

    Fix: Breathe steadily throughout the exercise.

    Clean reps always beat fast reps.


    Lying Leg Raise Variations

    Once you master the basic lying leg raise, different variations can help build strength and increase difficulty.

    Bent-Knee Leg Raises

    A beginner-friendly variation.

    How to Do Bent-Knee Leg Raises

    • Bend your knees slightly
    • Raise your legs upward
    • Lower under control

    This variation reduces stress on the lower back.

    Flutter Kicks

    Improves endurance and lower-ab engagement.

    How to Do Flutter Kicks

    • Raise your legs slightly off the floor
    • Alternate small kicking movements
    • Maintain constant core tension

    This variation develops muscular endurance.

    Reverse Crunches

    Adds greater abdominal involvement.

    How to Do Reverse Crunches

    • Raise your knees toward your chest
    • Lift your hips slightly off the floor
    • Lower slowly with control

    This variation emphasizes the lower abs.

    Hanging Leg Raises

    An advanced progression.

    How to Do Hanging Leg Raises

    • Hang from a pull-up bar
    • Raise your legs until they are parallel to the ground
    • Lower under control

    This variation develops elite core and grip strength.


    Final Thoughts

    The lying leg raise is one of the most effective exercises you can master for building a strong core.

    It builds:

    • Lower abdominal strength
    • Hip flexor strength
    • Core stability
    • Muscular endurance
    • Functional athletic performance

    Progress may feel slow at first, especially if your core strength is limited. However, with consistent training and proper form, your abdominal strength and control will steadily improve. Learn more about Core Workouts here.

    One controlled repetition is always better than ten sloppy reps.

    Focus on quality repetitions, controlled movement, and maintaining tension throughout.

    A warrior’s strength is forged from the center outward.


    Lying Leg Raise FAQ

    Q1: Are lying leg raises good for beginners?
    Yes. Beginners can start with bent-knee variations and progress to straight-leg raises as their strength improves.

    Q2: Do lying leg raises target the lower abs?
    Yes. They are one of the most effective bodyweight exercises for emphasizing the lower portion of the rectus abdominis.

    Q3: How often should I do lying leg raises?
    You can train lying leg raises 2–5 times per week depending on your recovery and overall training volume.

      How to Do Hanging Knee Raises Correctly: Step-by-Step Guide for Beginners

      Learn how to do hanging knee raises with perfect form, avoid common mistakes, and discover the best variations to build real core strength.

      Hanging knee raises are one of the most effective bodyweight exercises for developing strong abs, improving hip flexor strength, and building total-body control. Whether you are training for military fitness tests, calisthenics, or athletic performance, mastering the hanging knee raise is essential.


      What Are Hanging Knee Raises?

      A hanging knee raise is a bodyweight exercise where you hang from a pull-up bar and raise your knees toward your chest before lowering them back down under control.

      The hanging knee raise is considered one of the best core exercises because it trains the abdominal muscles while also developing grip strength and shoulder stability.

      Hanging knee raises are commonly used in:

      • Military fitness training
      • Calisthenics programs
      • Strength and conditioning routines
      • Athletic performance training

      Unlike traditional floor exercises, hanging knee raises build functional core strength while improving body control.

      Benefits of Hanging Knee Raises

      Hanging knee raises are one of the most powerful exercises for developing core strength.

      Benefits include:

      • Strengthens the lower abdominal muscles
      • Improves hip flexor strength
      • Builds grip endurance
      • Enhances shoulder stability
      • Develops body control and coordination
      • Essential for advanced calisthenics movements

      Few exercises challenge the core as effectively as the hanging knee raise.

      Muscles Worked in Hanging Knee Raises

      Hanging knee raises activate several major muscle groups simultaneously.

      Primary Muscles

      • Rectus Abdominis
      • Hip Flexors

      Secondary Muscles

      • Obliques
      • Transverse Abdominis
      • Forearms and Grip Muscles
      • Shoulders (Deltoids)
      • Latissimus Dorsi

      Because of this muscle activation, hanging knee raises are one of the best exercises for developing a strong and functional core.


      How to Do Hanging Knee Raises (Step-by-Step)

      Step 1: Grip the Pull-Up Bar

      Grab the bar with your palms facing away from you and your hands about shoulder-width apart.

      Tip: Use a full grip and squeeze the bar tightly for better stability.

      Step 2: Start From a Dead Hang

      Begin from a controlled dead hang with:

      • Arms fully extended
      • Shoulders slightly engaged
      • Core tight
      • Legs hanging naturally

      Avoid excessive swinging.

      This position creates a stable foundation.

      Step 3: Raise Your Knees Toward Your Chest

      Lift your knees upward while keeping the movement smooth and controlled.

      Focus on:

      • Engaging your abs
      • Minimizing body swing
      • Bringing your knees toward your chest

      Avoid using momentum.

      Step 4: Reach the Top Position

      At the top of the movement:

      • Knees are near chest level
      • Core remains tight
      • Upper body stays stable

      Pause briefly to maximize abdominal activation.

      Step 5: Lower With Control

      Slowly lower your legs back to the starting position.

      Avoid dropping quickly or allowing excessive swinging.

      The lowering phase builds significant core strength.

      Warrior showcasing How to do hanging knee raises with proper form

      Hanging Knee Raise Form Checklist

      Use this quick checklist to ensure perfect hanging knee raise form.

      • Start from a controlled dead hang
      • Keep your core tight
      • Minimize swinging
      • Raise your knees under control
      • Lower slowly between reps

      Perfect form builds strength faster and prevents injury.


      Common Hanging Knee Raise Mistakes

      Swinging Excessively

      Problem: Reduces abdominal activation.

      Fix: Tighten your core and control the movement throughout.

      Using Momentum

      Problem: Makes the exercise easier and less effective.

      Fix: Lift your knees slowly instead of kicking them upward.

      Shrugging the Shoulders

      Problem: Causes unnecessary tension.

      Fix: Keep your shoulders active and slightly pulled down.

      Partial Repetitions

      Problem: Limits strength development.

      Fix: Use a full range of motion whenever possible.

      Lowering Too Quickly

      Problem: Reduces muscle activation.

      Fix: Control the negative phase of every repetition.

      Clean reps always beat high numbers.


      Hanging Knee Raise Variations

      Once you master the basic hanging knee raise, different variations can help build strength and increase difficulty.

      Bent-Leg Hanging Raises

      A beginner-friendly variation.

      How to Do Bent-Leg Hanging Raises

      • Raise your knees only halfway
      • Maintain control throughout the movement
      • Lower slowly to the starting position

      This variation is ideal for beginners.

      Alternating Knee Raises

      Improves coordination and oblique activation.

      How to Do Alternating Knee Raises

      • Raise one knee at a time
      • Alternate sides with each repetition
      • Keep the body stable

      This variation improves balance and rotational strength.

      Hanging Leg Raises

      A more advanced progression.

      How to Do Hanging Leg Raises

      • Keep your legs straight throughout the movement
      • Raise them until they are parallel to the ground or higher
      • Lower under control

      This variation develops greater abdominal strength.

      Toes-to-Bar

      An advanced calisthenics movement.

      How to Do Toes-to-Bar

      • Raise your feet until they touch the pull-up bar
      • Maintain control throughout the movement
      • Lower slowly back to the dead hang

      This variation builds elite core strength and body control.


      Final Thoughts

      The hanging knee raise is one of the most effective core exercises you can master.

      It builds:

      • Abdominal strength
      • Hip flexor strength
      • Grip endurance
      • Shoulder stability
      • Functional athletic performance

      Progress may feel challenging at first, especially if your grip or core strength is limited. However, with consistent training and proper form, your hanging strength and abdominal control will steadily improve. Learn more about Core Workouts here.

      One clean rep is always better than ten sloppy ones.

      Focus on quality repetitions, full range of motion, and controlled movement.

      A warrior controls his body before he commands his strength.


      Hanging Knee Raise FAQ

      Q1: Are hanging knee raises good for beginners?
      Yes. Hanging knee raises are beginner-friendly and are easier than hanging leg raises. They are an excellent way to build the strength needed for more advanced core exercises.

      Q2: What’s the difference between hanging knee raises and hanging leg raises?
      Hanging knee raises involve bent knees and are easier to perform, while hanging leg raises require straight legs and greater abdominal strength.

      Q3: How often should I do hanging knee raises?
      You can train hanging knee raises 2–4 times per week depending on your recovery and overall training volume.

        How to Do Glute Bridges Correctly: Step-by-Step Guide for Beginners

        Learn how to do glute bridges with perfect form, avoid common mistakes, and discover the best variations to build real lower-body strength.

        Glute bridges are one of the most effective bodyweight exercises for developing strong glutes, improving hip stability, and enhancing athletic performance. Whether you are training for military fitness tests, sports performance, or general fitness, mastering the glute bridge is essential.


        What Is a Glute Bridge?

        A glute bridge is a bodyweight exercise where you lie on your back and raise your hips toward the ceiling by driving through your heels.

        The glute bridge is considered one of the best exercises for activating and strengthening the glutes while improving hip mobility and core stability.

        Glute bridges are commonly used in:

        • Strength and conditioning programs
        • Athletic performance training
        • Rehabilitation programs
        • General fitness routines

        Unlike many machine exercises, glute bridges build functional strength that transfers directly to sports and everyday activities.

        Benefits of Glute Bridges

        Glute bridges are one of the most powerful exercises for developing lower-body strength.

        Benefits include:

        • Builds strong glutes and hamstrings
        • Improves hip stability and mobility
        • Strengthens the core and lower back
        • Enhances athletic performance
        • Helps improve posture
        • Reduces the effects of prolonged sitting

        Few exercises activate the glutes as effectively as the glute bridge.

        Muscles Worked in Glute Bridges

        Glute bridges activate several major muscle groups simultaneously.

        Primary Muscles

        • Glutes (Gluteus Maximus)
        • Hamstrings

        Secondary Muscles

        • Core Muscles (Abdominals and Obliques)
        • Lower Back (Erector Spinae)
        • Hip Stabilizers
        • Calves

        Because of this muscle activation, glute bridges are one of the best exercises for developing posterior chain strength.


        How to Do Glute Bridges (Step-by-Step)

        Step 1: Lie Flat on Your Back

        Begin by lying on the floor with:

        • Knees bent
        • Feet flat on the ground
        • Arms resting by your sides

        Tip: Position your feet about hip-width apart.

        Step 2: Set Your Starting Position

        Before lifting:

        • Engage your core
        • Keep your head and shoulders relaxed
        • Place your heels close enough that you can almost touch them with your fingertips

        This creates a stable foundation.

        Step 3: Drive Through Your Heels

        Push through your heels and raise your hips toward the ceiling.

        Focus on:

        • Squeezing your glutes
        • Keeping your core tight
        • Avoiding excessive arching of the lower back

        Warrior showcasing How to do Glute Bridges with proper form

        Step 4: Reach the Top Position

        At the top:

        • Your body forms a straight line from shoulders to knees
        • Glutes are fully contracted
        • Core remains engaged

        Pause briefly while maintaining control.

        Step 5: Lower Yourself Slowly

        Lower your hips back to the starting position under control.

        Avoid dropping quickly.

        Repeat for the desired number of repetitions.


        Glute Bridge Form Checklist

        Use this quick checklist to ensure perfect glute bridge form.

        • Keep your feet flat on the floor
        • Drive through your heels
        • Squeeze your glutes at the top
        • Maintain a tight core
        • Lower with control

        Perfect form builds strength faster and prevents injury.


        Common Glute Bridge Mistakes

        Overarching the Lower Back

        Problem: Places unnecessary stress on the spine.

        Fix: Focus on squeezing the glutes instead of arching your back.

        Pushing Through the Toes

        Problem: Reduces glute activation.

        Fix: Drive through your heels throughout the movement.

        Feet Too Far From the Body

        Problem: Increases hamstring involvement and reduces efficiency.

        Fix: Position your heels closer to your hips.

        Rushing the Movement

        Problem: Reduces muscle activation.

        Fix: Use a controlled tempo and pause briefly at the top.

        Failing to Engage the Core

        Problem: Causes instability and poor posture.

        Fix: Tighten your abs before each repetition.

        Clean reps always beat fast reps.


        Glute Bridge Variations

        Once you master the basic glute bridge, different variations can help build strength and increase difficulty.

        Single-Leg Glute Bridges

        Improves unilateral strength and balance.

        How to Do Single-Leg Glute Bridges

        • Extend one leg straight
        • Drive through the opposite heel
        • Raise your hips and lower with control

        This variation challenges each side individually.

        Elevated Glute Bridges

        Increases range of motion.

        How to Do Elevated Glute Bridges

        • Place your feet on a bench or elevated surface
        • Raise your hips toward the ceiling
        • Lower slowly under control

        This variation places greater emphasis on the glutes.

        Weighted Glute Bridges

        Adds resistance for increased strength gains.

        How to Do Weighted Glute Bridges

        • Place a weight across your hips
        • Perform the movement normally
        • Maintain perfect form throughout

        This variation is excellent for building stronger glutes.

        Hip Thrusts

        A more advanced progression.

        How to Do Hip Thrusts

        • Place your upper back on a bench
        • Drive through your heels
        • Raise your hips until your body forms a straight line

        Hip thrusts are one of the best exercises for maximizing glute development.


        Final Thoughts

        The glute bridge is one of the most powerful exercises you can master for developing posterior chain strength.

        It builds:

        • Strong glutes
        • Powerful hamstrings
        • Core stability
        • Hip mobility
        • Functional athletic performance

        Progress may feel slow at first, especially if your glutes are weak from prolonged sitting. However, with consistent training and proper form, your strength and stability will steadily improve. Learn more about Leg Workouts here.

        One controlled rep is always better than several sloppy ones.

        Focus on quality repetitions, full range of motion, and controlled movement.

        A warrior’s power begins at the hips.


        Glute Bridge FAQ

        Q1: Are glute bridges good for beginners?
        Yes. Glute bridges are beginner-friendly and highly effective for strengthening the glutes and improving hip stability.

        Q2: How many glute bridges should a beginner do?
        Most beginners can start with 10–20 repetitions per set while focusing on proper form and glute activation.

        Q3: How often should I do glute bridges?
        You can train glute bridges 2–5 times per week depending on your recovery and overall training volume.

          How to Do a Plank Correctly: Step-by-Step Guide for Beginners

          Learn how to do a plank with perfect form, avoid common mistakes, and discover the best plank variations to build real core strength and endurance.

          Planks are one of the most effective bodyweight exercises for developing a strong core, improving posture, and enhancing total-body stability. Whether you are training for military fitness tests, athletic performance, or general fitness, mastering the plank is essential.


          What Is a Plank?

          A plank is an isometric bodyweight exercise where you hold your body in a straight line while supporting yourself on your forearms and toes.

          The plank is considered one of the best core exercises because it trains multiple muscle groups simultaneously while improving stability and endurance.

          Planks are commonly used in:

          • Military fitness training
          • Strength and conditioning programs
          • Athletic performance training
          • General fitness routines

          Unlike many abdominal exercises, planks strengthen the entire core without requiring repetitive movement.

          Benefits of Planks

          Planks are one of the most powerful exercises for developing core strength.

          Benefits include:

          • Strengthens the entire core
          • Improves posture and spinal stability
          • Enhances balance and coordination
          • Builds shoulder endurance
          • Reduces the risk of lower back pain
          • Essential for athletic and military performance

          Few exercises challenge the core as effectively as the plank.

          Muscles Worked in Planks

          Planks activate several major muscle groups simultaneously.

          Primary Muscles

          • Rectus Abdominis
          • Transverse Abdominis
          • Obliques

          Secondary Muscles

          • Shoulders (Deltoids)
          • Glutes
          • Lower Back Muscles
          • Chest (Pectorals)
          • Quadriceps

          Because of this muscle activation, planks are one of the best exercises for developing total-body stability.


          How to Do a Plank (Step-by-Step)

          Step 1: Get Into Position

          Begin by lying face down on the floor.

          Place:

          • Forearms on the ground
          • Elbows directly under your shoulders
          • Toes on the floor

          Tip: Keep your forearms parallel and hands relaxed.

          Step 2: Lift Your Body

          Raise yourself off the ground.

          Focus on:

          • Supporting your weight on your forearms and toes
          • Keeping your body straight
          • Engaging your core

          Avoid letting your hips sag or rise too high.

          Step 3: Tighten Your Entire Body

          Before holding the position:

          • Tighten your abs
          • Squeeze your glutes
          • Engage your legs

          This creates full-body tension and improves stability.

          Warrior showcasing How to do a Plank with proper form

          Step 4: Maintain Proper Alignment

          At the holding position:

          • Head remains neutral
          • Spine stays straight
          • Hips remain level

          Your body should form a straight line from head to heels.

          Step 5: Hold With Control

          Maintain the plank for the desired duration.

          Focus on:

          • Steady breathing
          • Maintaining tension
          • Avoiding unnecessary movement

          Quality is more important than time.


          Plank Form Checklist

          Use this quick checklist to ensure perfect plank form.

          • Keep your body in a straight line
          • Engage your core and glutes
          • Keep elbows directly under the shoulders
          • Maintain steady breathing
          • Avoid excessive movement

          Perfect form builds strength faster and prevents injury.


          Common Plank Mistakes

          Sagging Hips

          Problem: Places excessive stress on the lower back.

          Fix: Tighten your core and glutes to maintain alignment.

          Raising the Hips Too High

          Problem: Reduces core activation.

          Fix: Keep your body in a straight line.

          Holding Your Breath

          Problem: Reduces endurance and stability.

          Fix: Breathe steadily throughout the exercise.

          Looking Up

          Problem: Creates neck strain.

          Fix: Keep your head neutral and look toward the floor.

          Focusing Only on Time

          Problem: Leads to poor form.

          Fix: Prioritize quality over duration.

          Perfect planks always beat long, sloppy holds.


          Plank Variations

          Once you master the basic plank, different variations can help build strength and increase difficulty.

          Knee Planks

          A beginner-friendly variation.

          How to Do Knee Planks

          • Keep your knees on the ground
          • Maintain a straight line from shoulders to knees
          • Hold with control

          This variation is ideal for beginners.

          High Planks

          Places more emphasis on the shoulders and chest.

          How to Do High Planks

          • Support yourself on your hands instead of your forearms
          • Keep your body straight
          • Maintain core tension

          High planks improve upper-body stability.

          Side Planks

          Targets the obliques and lateral core muscles.

          How to Do Side Planks

          • Support your body on one forearm
          • Stack your feet or place one foot in front of the other
          • Hold the position with control

          Side planks improve rotational stability.

          Plank Shoulder Taps

          An advanced variation that challenges stability.

          How to Do Plank Shoulder Taps

          • Begin in a high plank position
          • Touch one shoulder with the opposite hand
          • Alternate sides while minimizing hip movement

          This variation develops balance and coordination.


          Final Thoughts

          The plank is one of the most powerful bodyweight exercises you can master.

          It builds:

          • Core strength
          • Shoulder endurance
          • Postural stability
          • Balance and coordination
          • Functional athletic performance

          Progress may feel slow at first because planks demand full-body tension and endurance. However, with consistent training and proper form, your stability and core strength will steadily improve. Learn more about Core Workouts here.

          One perfect hold is always better than several sloppy seconds.

          Focus on quality, tension, and proper alignment.

          A warrior stands strongest when his foundation is unbreakable.


          Plank FAQ

          Q1: How long should a beginner hold a plank?
          Most beginners can start with 20–30 seconds and gradually increase the duration as their strength improves.

          Q2: Are planks better than sit-ups?
          Planks and sit-ups serve different purposes. Planks emphasize stability and total-core activation, while sit-ups focus more on abdominal endurance.

          Q3: How often should I do planks?
          You can train planks 3–6 times per week depending on your recovery and overall training program.

            How to Do Lunges Correctly: Step-by-Step Guide for Beginners

            Learn how to do lunges with perfect form, avoid common mistakes, and discover the best lunge variations to build real lower-body strength.

            Lunges are one of the most effective bodyweight exercises for developing powerful legs, improving balance, and increasing athletic performance. Whether you are training for military fitness tests, sports performance, or general fitness, mastering the lunge is essential.


            What Is a Lunge?

            A lunge is a unilateral lower-body exercise where you step forward, backward, or sideways and lower your body until both knees are bent before returning to the starting position.

            The lunge is considered one of the best lower-body exercises because it trains each leg individually while improving balance and coordination.

            Lunges are commonly used in:

            • Military fitness training
            • Strength and conditioning programs
            • Athletic performance training
            • Functional fitness routines

            Unlike machine exercises, lunges build real-world strength and movement ability.

            Benefits of Lunges

            Lunges are one of the most powerful exercises for developing lower-body strength.

            Benefits include:

            • Builds strong quads and glutes
            • Improves balance and coordination
            • Corrects muscular imbalances
            • Enhances core stability
            • Increases athletic performance
            • Develops functional movement

            Few exercises challenge the lower body as effectively as the lunge.

            Muscles Worked in Lunges

            Lunges activate several major muscle groups simultaneously.

            Primary Muscles

            • Quadriceps
            • Glutes
            • Hamstrings

            Secondary Muscles

            • Core Muscles (Abdominals and Obliques)
            • Calves
            • Hip Stabilizers
            • Lower Back Muscles

            Because of this muscle activation, lunges are one of the best exercises for developing total lower-body strength.


            How to Do Lunges (Step-by-Step)

            Step 1: Stand Tall

            Begin with:

            • Feet hip-width apart
            • Chest upright
            • Core engaged
            • Arms relaxed at your sides

            Tip: Maintain good posture throughout the movement.

            Step 2: Step Forward

            Take a controlled step forward with one leg.

            Focus on:

            • Keeping your torso upright
            • Maintaining balance
            • Landing with your entire foot

            This creates a stable foundation.

            Step 3: Lower Your Body

            Bend both knees and lower yourself under control.

            Focus on:

            • Front thigh approaching parallel to the floor
            • Rear knee moving toward the ground
            • Front knee staying aligned with your toes

            Avoid letting the front knee collapse inward.

            Warrior showcasing How to do Lunges with proper form

            Step 4: Reach the Bottom Position

            At the bottom:

            • Both knees are roughly bent at 90 degrees
            • Chest remains upright
            • Core stays tight

            Pause briefly while maintaining control.

            Step 5: Push Back to the Starting Position

            Drive through the heel of your front foot and return to the standing position.

            Repeat with the opposite leg.

            Continue alternating sides for the desired number of repetitions.


            Lunge Form Checklist

            Use this quick checklist to ensure perfect lunge form.

            • Keep your chest upright
            • Maintain balance throughout
            • Keep the front knee aligned with the toes
            • Engage your core
            • Control every repetition

            Perfect form builds strength faster and prevents injury.


            Common Lunge Mistakes

            Taking Steps That Are Too Short

            Problem: Places excessive stress on the knees.

            Fix: Take a longer step to allow both knees to bend naturally.

            Leaning Forward Excessively

            Problem: Reduces balance and proper muscle activation.

            Fix: Keep your chest up and shoulders back.

            Allowing the Front Knee to Collapse Inward

            Problem: Increases injury risk.

            Fix: Keep the knee tracking in line with the toes.

            Rushing the Movement

            Problem: Reduces stability and muscle activation.

            Fix: Perform each repetition slowly and under control.

            Losing Balance

            Problem: Reduces exercise effectiveness.

            Fix: Focus on maintaining a stable stance and engaging your core.

            Quality reps always beat rushed reps.


            Lunge Variations

            Once you master the basic lunge, different variations can help build strength and improve athletic performance.

            Reverse Lunges

            A beginner-friendly variation that places less stress on the knees.

            How to Do Reverse Lunges

            • Step backward instead of forward
            • Lower under control
            • Push through the front heel to return

            Reverse lunges are ideal for beginners.

            Walking Lunges

            Develops coordination and lower-body endurance.

            How to Do Walking Lunges

            • Perform a forward lunge
            • Bring the rear leg forward into the next repetition
            • Continue moving forward

            This variation improves athletic conditioning.

            Side Lunges

            Targets the inner thighs and improves lateral movement.

            How to Do Side Lunges

            • Step sideways
            • Push hips backward
            • Lower under control and return

            Side lunges help improve mobility and agility.

            Jump Lunges

            An advanced plyometric variation.

            How to Do Jump Lunges

            • Perform a lunge
            • Jump explosively and switch legs in the air
            • Land softly and repeat

            Jump lunges develop power and explosiveness.


            Final Thoughts

            The lunge is one of the most powerful lower-body exercises you can master.

            It builds:

            • Leg strength
            • Glute strength
            • Balance and coordination
            • Core stability
            • Functional athletic performance

            Progress may feel challenging at first because lunges require strength and balance simultaneously. However, with consistent training and proper form, your lower-body strength will steadily improve. Learn more about Leg Workouts here.

            One perfect rep is always better than several sloppy reps.

            Focus on quality repetitions, full range of motion, and controlled movement.

            A warrior moves forward with strength and stability.


            Lunge FAQ

            Q1: Are lunges better than squats?
            Both exercises are excellent. Lunges are particularly effective for improving balance, coordination, and correcting muscular imbalances.

            Q2: How many lunges should a beginner do?
            Most beginners can start with 8–12 repetitions per leg for 2–3 sets while focusing on proper form.

            Q3: How often should I do lunges?
            You can train lunges 2–4 times per week depending on your recovery and overall training volume.

              How to Do a Pike Push-Up Correctly: Step-by-Step Guide for Beginners

              Learn how to do pike push-ups with perfect form, avoid common mistakes, and discover the best variations to build shoulder strength and overhead pressing power.

              Pike push-ups are one of the most effective bodyweight exercises for developing strong shoulders, triceps, and upper-body pressing strength. Whether you are training for calisthenics, military fitness tests, or handstand push-up progressions, mastering pike push-ups is essential.


              What Are Pike Push-Ups?

              A pike push-up is a bodyweight exercise in which you perform a push-up with your hips elevated, shifting more of the workload onto your shoulders.

              The movement mimics the overhead pressing pattern used in handstand push-ups, making it one of the best exercises for building vertical pushing strength.

              Pike push-ups are commonly used in:

              • Calisthenics training
              • Handstand push-up progressions
              • Bodyweight strength programs
              • Athletic conditioning routines

              Unlike standard push-ups, pike push-ups place greater emphasis on the shoulders and upper chest.

              Benefits of Pike Push-Ups

              Pike push-ups are one of the best exercises for developing upper-body pressing strength.

              Benefits include:

              • Builds strong shoulders and triceps
              • Develops overhead pressing strength
              • Improves shoulder stability
              • Strengthens the upper chest
              • Enhances body control and coordination
              • Prepares you for handstand push-ups

              Few bodyweight exercises build shoulder strength as effectively as pike push-ups.

              Muscles Worked in Pike Push-Ups

              Pike push-ups activate multiple upper-body muscles simultaneously.

              Primary Muscles
              • Shoulders (Anterior Deltoids)
              • Triceps
              Secondary Muscles
              • Upper Chest (Clavicular Pectorals)
              • Core Muscles
              • Serratus Anterior
              • Upper Trapezius

              Because of this muscle activation, pike push-ups are one of the best bodyweight alternatives to overhead presses.


              How to Do Pike Push-Ups (Step-by-Step)

              Step 1: Get Into the Pike Position

              Start in a push-up position and raise your hips toward the ceiling.

              • Hands shoulder-width apart
              • Arms straight
              • Legs straight if flexibility allows

              Your body should form an inverted “V” shape.

              Tip: The higher your hips, the more emphasis you place on your shoulders.

              Step 2: Engage Your Core

              Before lowering:

              • Tighten your abs
              • Squeeze your glutes
              • Keep your spine neutral

              This helps maintain stability throughout the movement.

              Warrior showcasing How to do Pike Push-Ups with proper form

              Step 3: Lower Your Head Toward the Ground

              Bend your elbows and slowly lower yourself.

              Focus on bringing the top of your head toward the floor between your hands.

              Avoid lowering your chest like a standard push-up.

              Warrior showcasing How to do Pike-Push-Ups progressively

              Step 4: Reach the Bottom Position

              At the bottom:

              • Head is close to the ground
              • Elbows remain controlled
              • Core stays tight

              Pause briefly while maintaining tension.

              Step 5: Press Back Up

              Push through your palms and extend your elbows until you return to the starting position.

              Keep the movement smooth and controlled.


              Pike Push-Up Form Checklist

              Use this quick checklist to ensure perfect form.

              • Keep hips elevated throughout the movement
              • Lower your head between your hands
              • Maintain a tight core
              • Control the lowering phase
              • Lock out fully at the top

              Perfect form builds strength faster and reduces the risk of injury.


              Common Pike Push-Up Mistakes

              Dropping the Hips

              Problem: Turns the movement into a regular push-up.

              Fix: Keep your hips elevated throughout the exercise.

              Flaring the Elbows Excessively

              Problem: Places unnecessary stress on the shoulders.

              Fix: Keep elbows at a controlled angle during each rep.

              Looking Forward

              Problem: Creates neck strain and poor alignment.

              Fix: Keep your head neutral and focus on the floor.

              Partial Range of Motion

              Problem: Limits strength development.

              Fix: Lower until your head nearly touches the ground.

              Rushing the Movement

              Problem: Reduces muscle activation.

              Fix: Use a controlled tempo:

              • 1–2 seconds down
              • Brief pause
              • Explode upward

              Quality repetitions always beat sloppy reps.


              Pike Push-Up Variations

              Once you master the basic pike push-up, these variations can help build more strength and progress toward advanced skills.

              Incline Pike Push-Ups

              A beginner-friendly variation that reduces difficulty.

              How to Do Incline Pike Push-Ups

              • Place your hands on an elevated surface
              • Raise your hips into a pike position
              • Perform the movement with control

              This variation is ideal for beginners.

              Elevated Feet Pike Push-Ups

              Increases shoulder loading significantly.

              How to Do Elevated Feet Pike Push-Ups

              • Place your feet on a box or bench
              • Raise hips high
              • Lower your head toward the floor

              This variation closely resembles a handstand push-up.

              Deficit Pike Push-Ups

              Improves range of motion and strength.

              How to Do Deficit Pike Push-Ups

              • Place hands on parallettes or blocks
              • Lower deeper than normal
              • Press back up under control

              This variation builds strength through a greater range of motion.

              Wall-Assisted Handstand Push-Ups

              The next progression after mastering pike push-ups.

              How to Do Wall-Assisted Handstand Push-Ups

              • Kick into a wall-supported handstand
              • Lower your head toward the ground
              • Press back upward

              This progression develops true vertical pressing strength.


              Final Thoughts

              The pike push-up is one of the most effective bodyweight shoulder exercises you can master.

              It builds:

              • Shoulder strength
              • Triceps strength
              • Upper chest development
              • Core stability
              • Handstand push-up readiness

              Progress may feel challenging at first, especially if shoulder strength is limited. However, with consistent training and proper form, your pressing power will steadily improve. Learn more about Push Workouts here.

              Focus on quality repetitions, controlled movement, and full range of motion.

              A warrior presses upward with strength — never with shortcuts.


              Pike Push-Up FAQ

              Q1: Are pike push-ups better than regular push-ups for shoulders?
              Yes. Pike push-ups place significantly more emphasis on the shoulders, making them one of the best bodyweight shoulder exercises.

              Q2: How many pike push-ups should a beginner do?
              Most beginners can start with 5–10 controlled repetitions per set and gradually increase volume over time.

              Q3: Do pike push-ups help with handstand push-ups?
              Absolutely. Pike push-ups are one of the best progressions for developing the strength and movement pattern needed for handstand push-ups.

                Progress Tracking Tools: How to Track Your Fitness Like a Warrior

                What Are Progress Tracking Tools?

                Progress tracking tools are simple methods used to record your workouts, performance, body changes, and consistency over time. Instead of guessing whether you’re improving, these tools give you clear data about your strength, endurance, and discipline.

                For a warrior, tracking progress is not optional — it is the key to continuous improvement and long-term success.


                Why Progress Tracking Matters

                Tracking your training helps you:

                • Stay consistent and accountable
                • Measure strength and endurance improvements
                • Identify weaknesses early
                • Avoid plateaus
                • Stay motivated by seeing results
                • Set realistic goals

                When you see your numbers improve — more pushups, faster runs, longer hangs — your motivation increases automatically.


                Types of Progress Tracking Tools

                1. Workout Log

                Record:

                • Exercises performed
                • Sets and reps
                • Weight used (if any)
                • Total workout time

                This helps you apply progressive overload, the main principle behind muscle growth and strength.

                Weekly Workout Tracker

                WeekMonTueWedThuFriSatNotes
                1
                2
                3
                4

                2. Strength Benchmarks

                Track your personal bests, such as:

                • Maximum pushups
                • Maximum pullups
                • Plank time
                • Dead hang time
                • Squat reps

                Test these every 2–4 weeks.

                Strength Progress Tracker

                ExerciseWeek 1Week 2Week 3Week 4
                Pushups (max)
                Pullups (max)
                Squats (max)
                Plank time
                Dead hang

                3. Running & Endurance Tracker

                Record:

                • Distance covered
                • Time taken
                • Pace per mile
                • Number of laps

                This is essential for military and endurance training.

                Running Progress Tracker

                DateDistanceTimePaceNotes

                4. Body Progress Tracking

                Measure every 2–3 weeks:

                • Body weight
                • Chest circumference
                • Waist size
                • Arm size
                • Thigh size

                Photos (front, side, back) are even more powerful than numbers.

                Body Measurement Tracker

                MeasurementWeek 1Week 4Week 8
                Weight
                Chest
                Waist
                Arms
                Thighs

                5. Consistency Tracker

                Sometimes the most important metric is simply:

                Did you train today?

                Mark each completed workout to build discipline.


                How to Use Progress Tracking Tools Effectively

                • Write your results immediately after each workout
                • Review your numbers every week
                • Aim to improve at least one metric each session
                • Test maximum performance once every 2–4 weeks
                • Focus on long-term improvement, not daily fluctuations

                Remember: progress is slow but powerful when tracked.


                5. Monthly Performance Test

                Test once per month:

                • Max pushups
                • Max pullups
                • 1-mile run time
                • Plank max time
                • Dead hang max time

                Record results and compare with previous months.


                Final Thoughts

                What gets measured gets improved. Progress tracking turns training into a mission, not a guess. When you record your performance and stay consistent, small improvements compound into powerful results.

                Train hard. Track everything. Become unstoppable. Remember (1)365 is still 1; But (1.01)365 is 37.78. Improve 0.01 everyday and you will reinvent yourself in a year.

                  At-Home Beginner Training Plan (6-Day PPL Routine)

                  Introduction

                  Training at home is one of the most effective ways for beginners to build strength, consistency, and discipline. This 6-day PPL(Push-Pull-Legs) plan requires minimal equipment and focuses on proper form, gradual progress, and full-body development — the foundation of a true warrior.

                  Click on any exercise to know How to do it.


                  Weekly Schedule

                  • Day 1 – Push
                  • Day 2 – Pull
                  • Day 3 – Legs
                  • Day 4 – Push
                  • Day 5 – Pull
                  • Day 6 – Legs
                  • Day 7 – Rest / Light Mobility

                  What You Need for This 6-Day PPL Plan


                  Pre-Workout Warm-Up (Do Before Every Session)

                  Perform each movement for 20–30 seconds:

                  This prepares your joints, increases blood flow, and reduces the risk of injury.


                  Day 1 & 4 – Push (Chest, Shoulders, Triceps)

                  Main Workout

                  Optional Core

                  • Plank– 3 × 20–30 sec

                  Day 2 & 5 – Pull (Back, Biceps)

                  (Use a pull-up bar, tree bar, or resistance band if available.)

                  Main Workout

                  Optional Core


                  Day 3 & 6 – Legs (Quads, Hamstrings, Glutes, Calves)

                  Main Workout

                  Optional Core


                  Post-Workout Stretch (Recommended)

                  Hold each stretch for 20–30 seconds:


                  Progression Tips for Beginners

                  • Add 1–2 reps each week.
                  • Once you reach the top rep range, add another set.
                  • Use a backpack with books/bricks for extra resistance.
                  • Focus on slow, controlled movement.
                  • Rest 45–90 seconds between sets.

                  Final Thoughts

                  Consistency beats intensity for beginners. Train six days a week, focus on good form, eat well, and sleep properly. Follow this plan for 6–8 weeks, and you’ll build the strength, endurance, and discipline needed to advance to more challenging warrior-level training.

                    Gym Training Plans: What They Are and What You Need

                    Gym Training Plans

                    Gym training plans are structured workout programs designed to help you build muscle, increase strength, improve endurance, and enhance overall fitness using gym equipment. Unlike random workouts, a proper gym plan follows a systematic approach—targeting specific muscle groups, managing workload, and ensuring steady progress over time.

                    With access to a wide range of machines, free weights, and training tools, gym plans allow for greater exercise variety and precise muscle development.


                    What a Gym Training Plan Includes

                    1. Defined Goals
                    Every effective plan starts with a clear objective, such as muscle gain, fat loss, strength building, endurance, or overall fitness. Your goal determines exercise selection, training intensity, and weekly frequency.

                    2. Structured Split Routine
                    Gym plans are often organized into training splits, such as:

                    • Push (chest, shoulders, triceps)
                    • Pull (back, biceps)
                    • Legs (lower body)
                    • Full-body or upper/lower splits

                    This structure allows proper recovery while maximizing performance.

                    3. Progressive Overload
                    Progress is achieved by gradually increasing weight, repetitions, sets, or training intensity to continuously challenge the muscles.


                    What You Need for Training At the Gym

                    • Access to free weights: Dumbbells, barbells, and weight plates
                    • Resistance machines: For controlled and targeted muscle training
                    • Cardio equipment: Treadmill, rowing machine, or cycling
                    • Training plan or log: To track weights, reps, and progress
                    • Proper gym form and technique: To maximize results and prevent injury

                    Supporting Factors for Success

                    • Balanced nutrition to support performance and recovery
                    • Adequate rest and sleep
                    • Proper warm-up and mobility work
                    • Consistency and discipline over time

                    Final Thoughts

                    A gym training plan provides structure, variety, and the tools needed to safely and effectively push your limits. With clear goals, progressive training, and consistency, the gym becomes a powerful environment for building strength, muscle, and long-term fitness.